The layout, clearance, appliance, storage and permit decisions in a kitchen remodel, with the planning numbers designers use and the Florida code lines that are not optional, in the order to settle them.
By Elbaz ConstructionUpdated September 27, 20269 min readSources: NKBA Kitchen Planning Guidelines · Florida Building Code · Florida Statutes
Kitchen planning
The short answer
?
Plan a kitchen remodel from the floor plan up: first decide where the sink, cooktop and refrigerator go and whether any of them move, then check the aisles, seating and counter space around them, then pick the appliances (their size, fuel and venting decide the cabinets), and only then cabinets, stone and finishes. The design industry’s own planning guidelines give workable numbers for each step, and the Florida code adds a few that are not optional. Settled in that order, the drawings, the permit and the cabinet order all agree.
01
Layout
Sink, cooktop and fridge placed first; moving them decides the trades.
02
Space
Aisles, stool clearance and landing counter beside each appliance.
03
Appliances
Size, fuel, hood and duct chosen before cabinets are ordered.
04
Paperwork
Permits for plumbing, gas and electrical; inspections before walls close.
Step 1
Start with three work centres: sink, cooktop, refrigerator
The National Kitchen & Bath Association publishes Kitchen Planning Guidelines that designers use as a checklist. They are recommendations, not law (the document itself says state and local codes govern), but they are the most useful numbers a homeowner can bring to a first design meeting. The first is the work triangle: the path between the cooktop, the cleanup sink and the refrigerator should total no more than 26 feet, with no single leg shorter than 4 feet or longer than 9 feet, measured from the centre-front of each. No leg should cut through an island by more than 12 inches, no tall pantry or oven tower should sit between two of the three, and the main traffic route through the house should not cross the triangle.
Simplified plan, not to scale. All six distances are NKBA Kitchen Planning Guidelines (guidelines 3, 6, 8, 11, 16 and 17), which are design recommendations, not Florida code. Your designer and building official apply the code to your room.
Moving a work centre is the biggest decision in the project. A sink that moves needs new drain and vent piping; a cooktop that moves needs new gas or a new circuit, and its hood duct moves with it. Our kitchen cost guide explains how that choice changes the code level and the budget. Three common layouts built around an island:
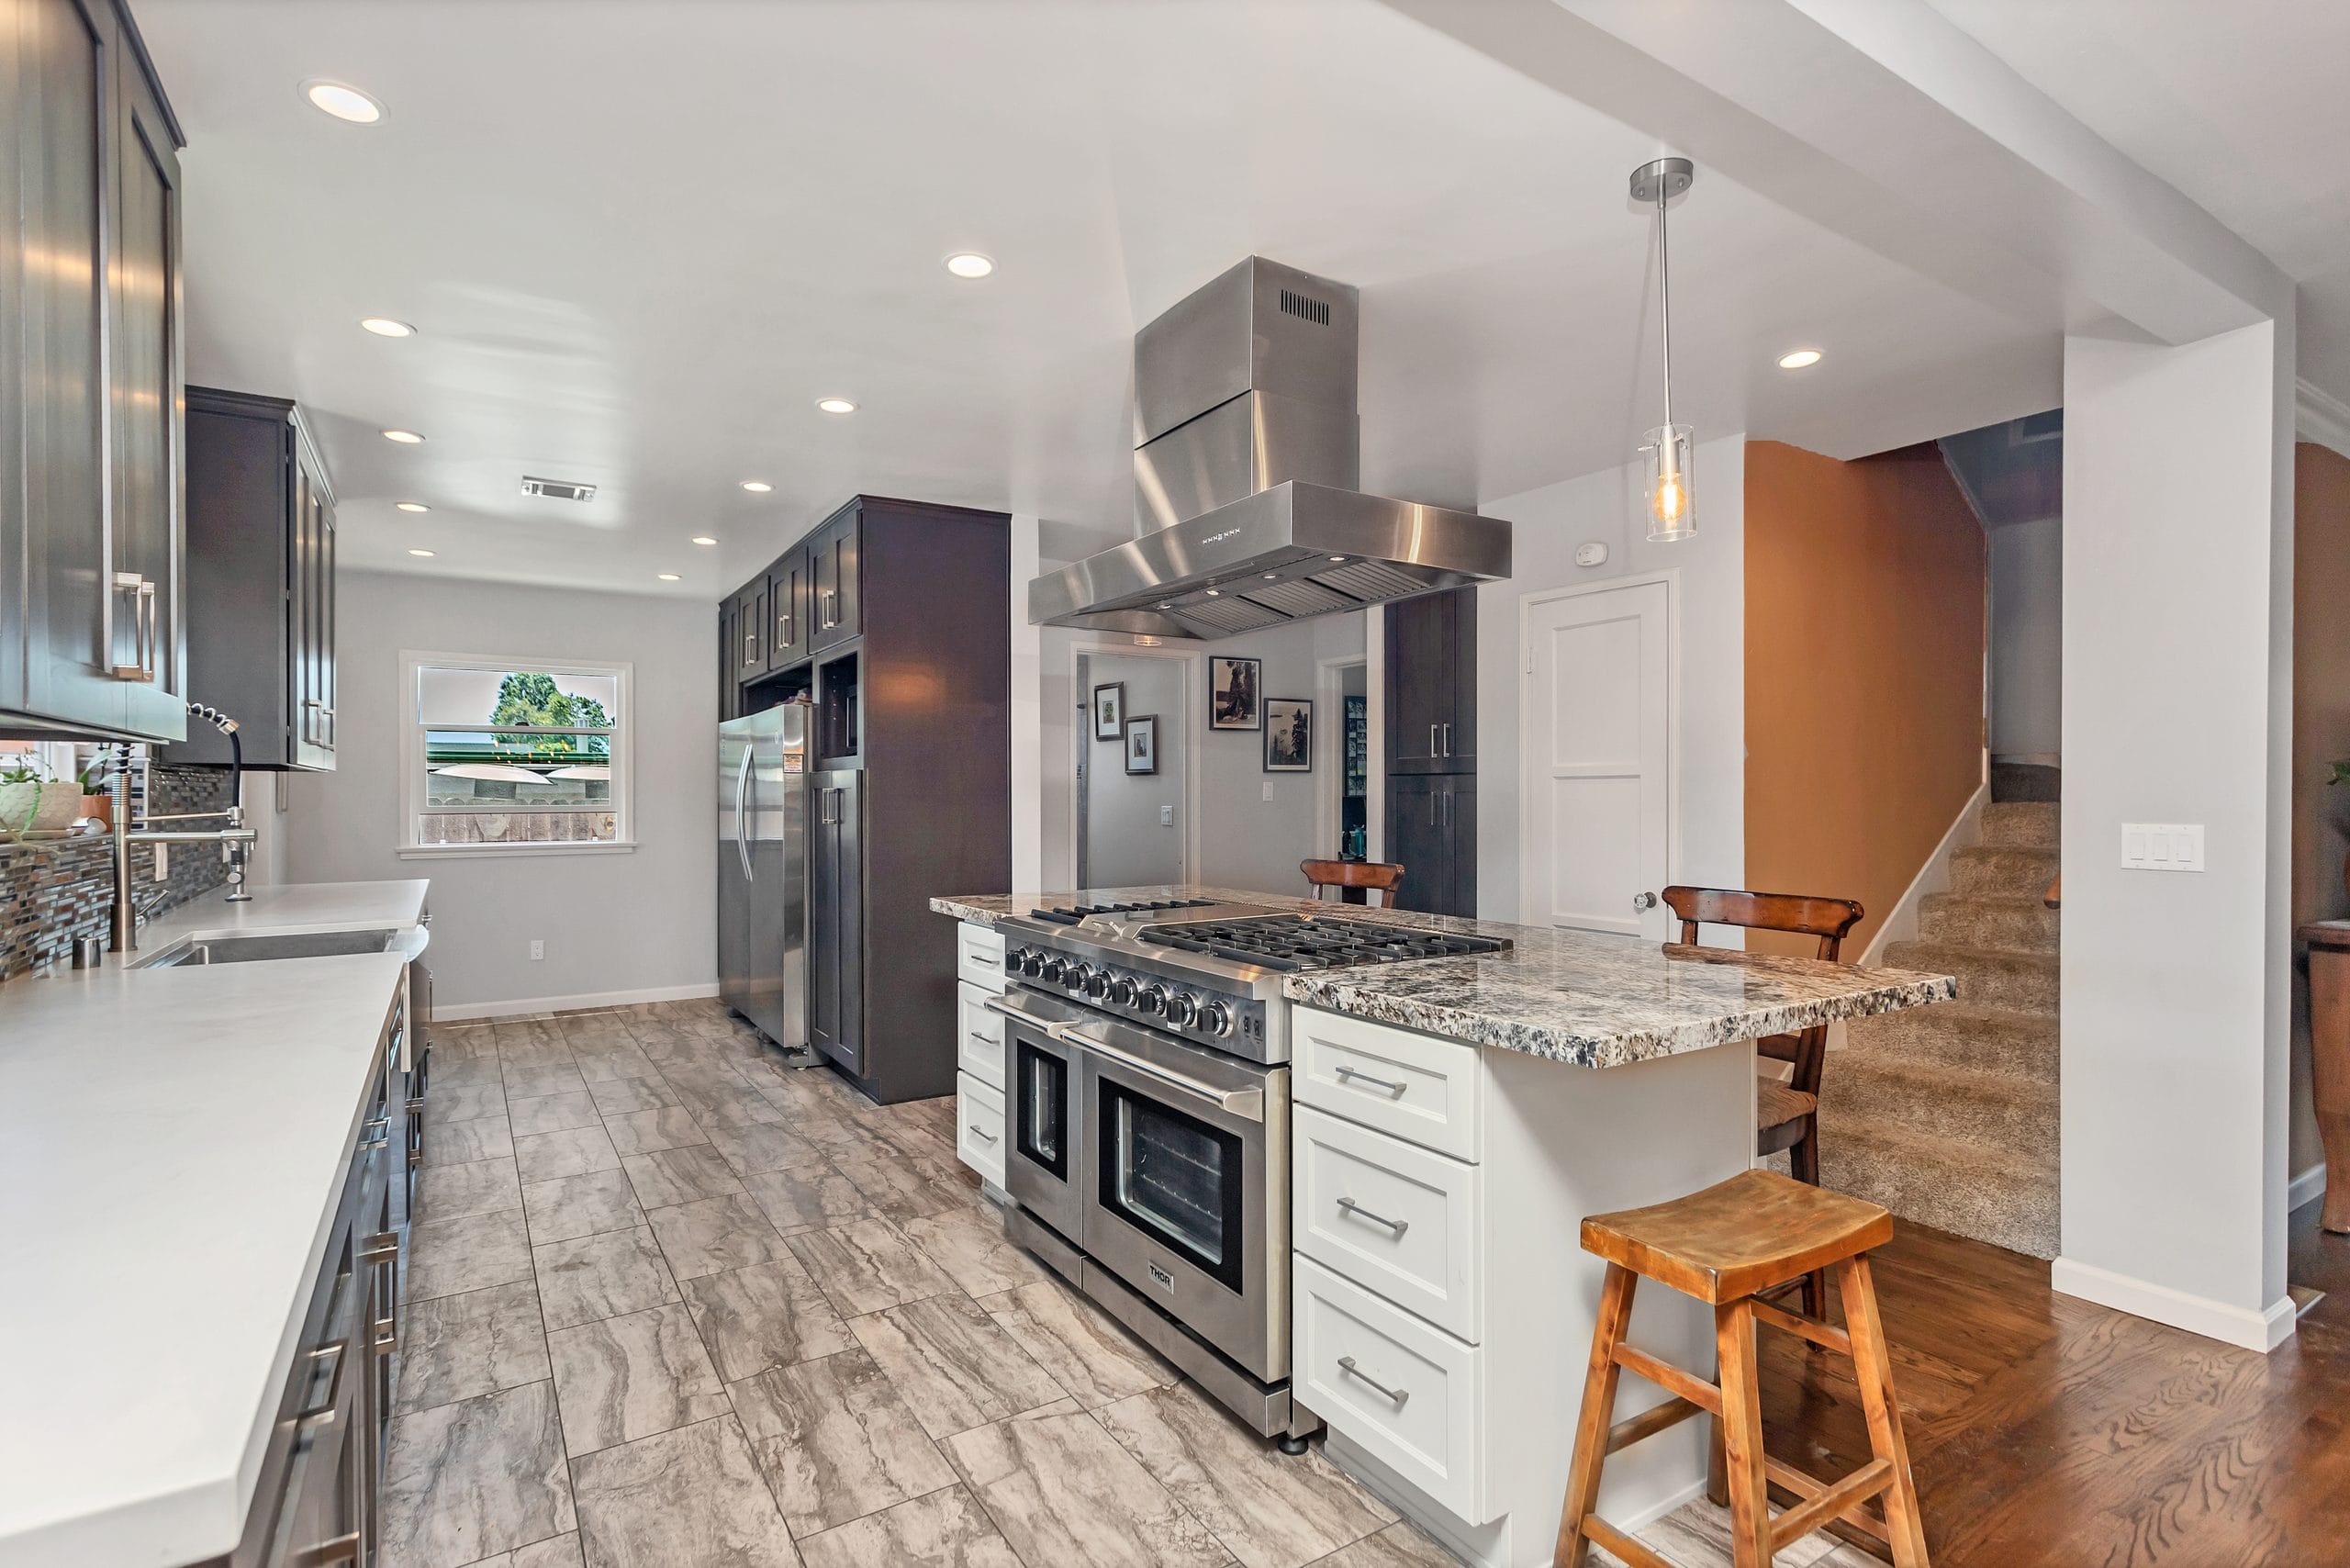
Cook at the island
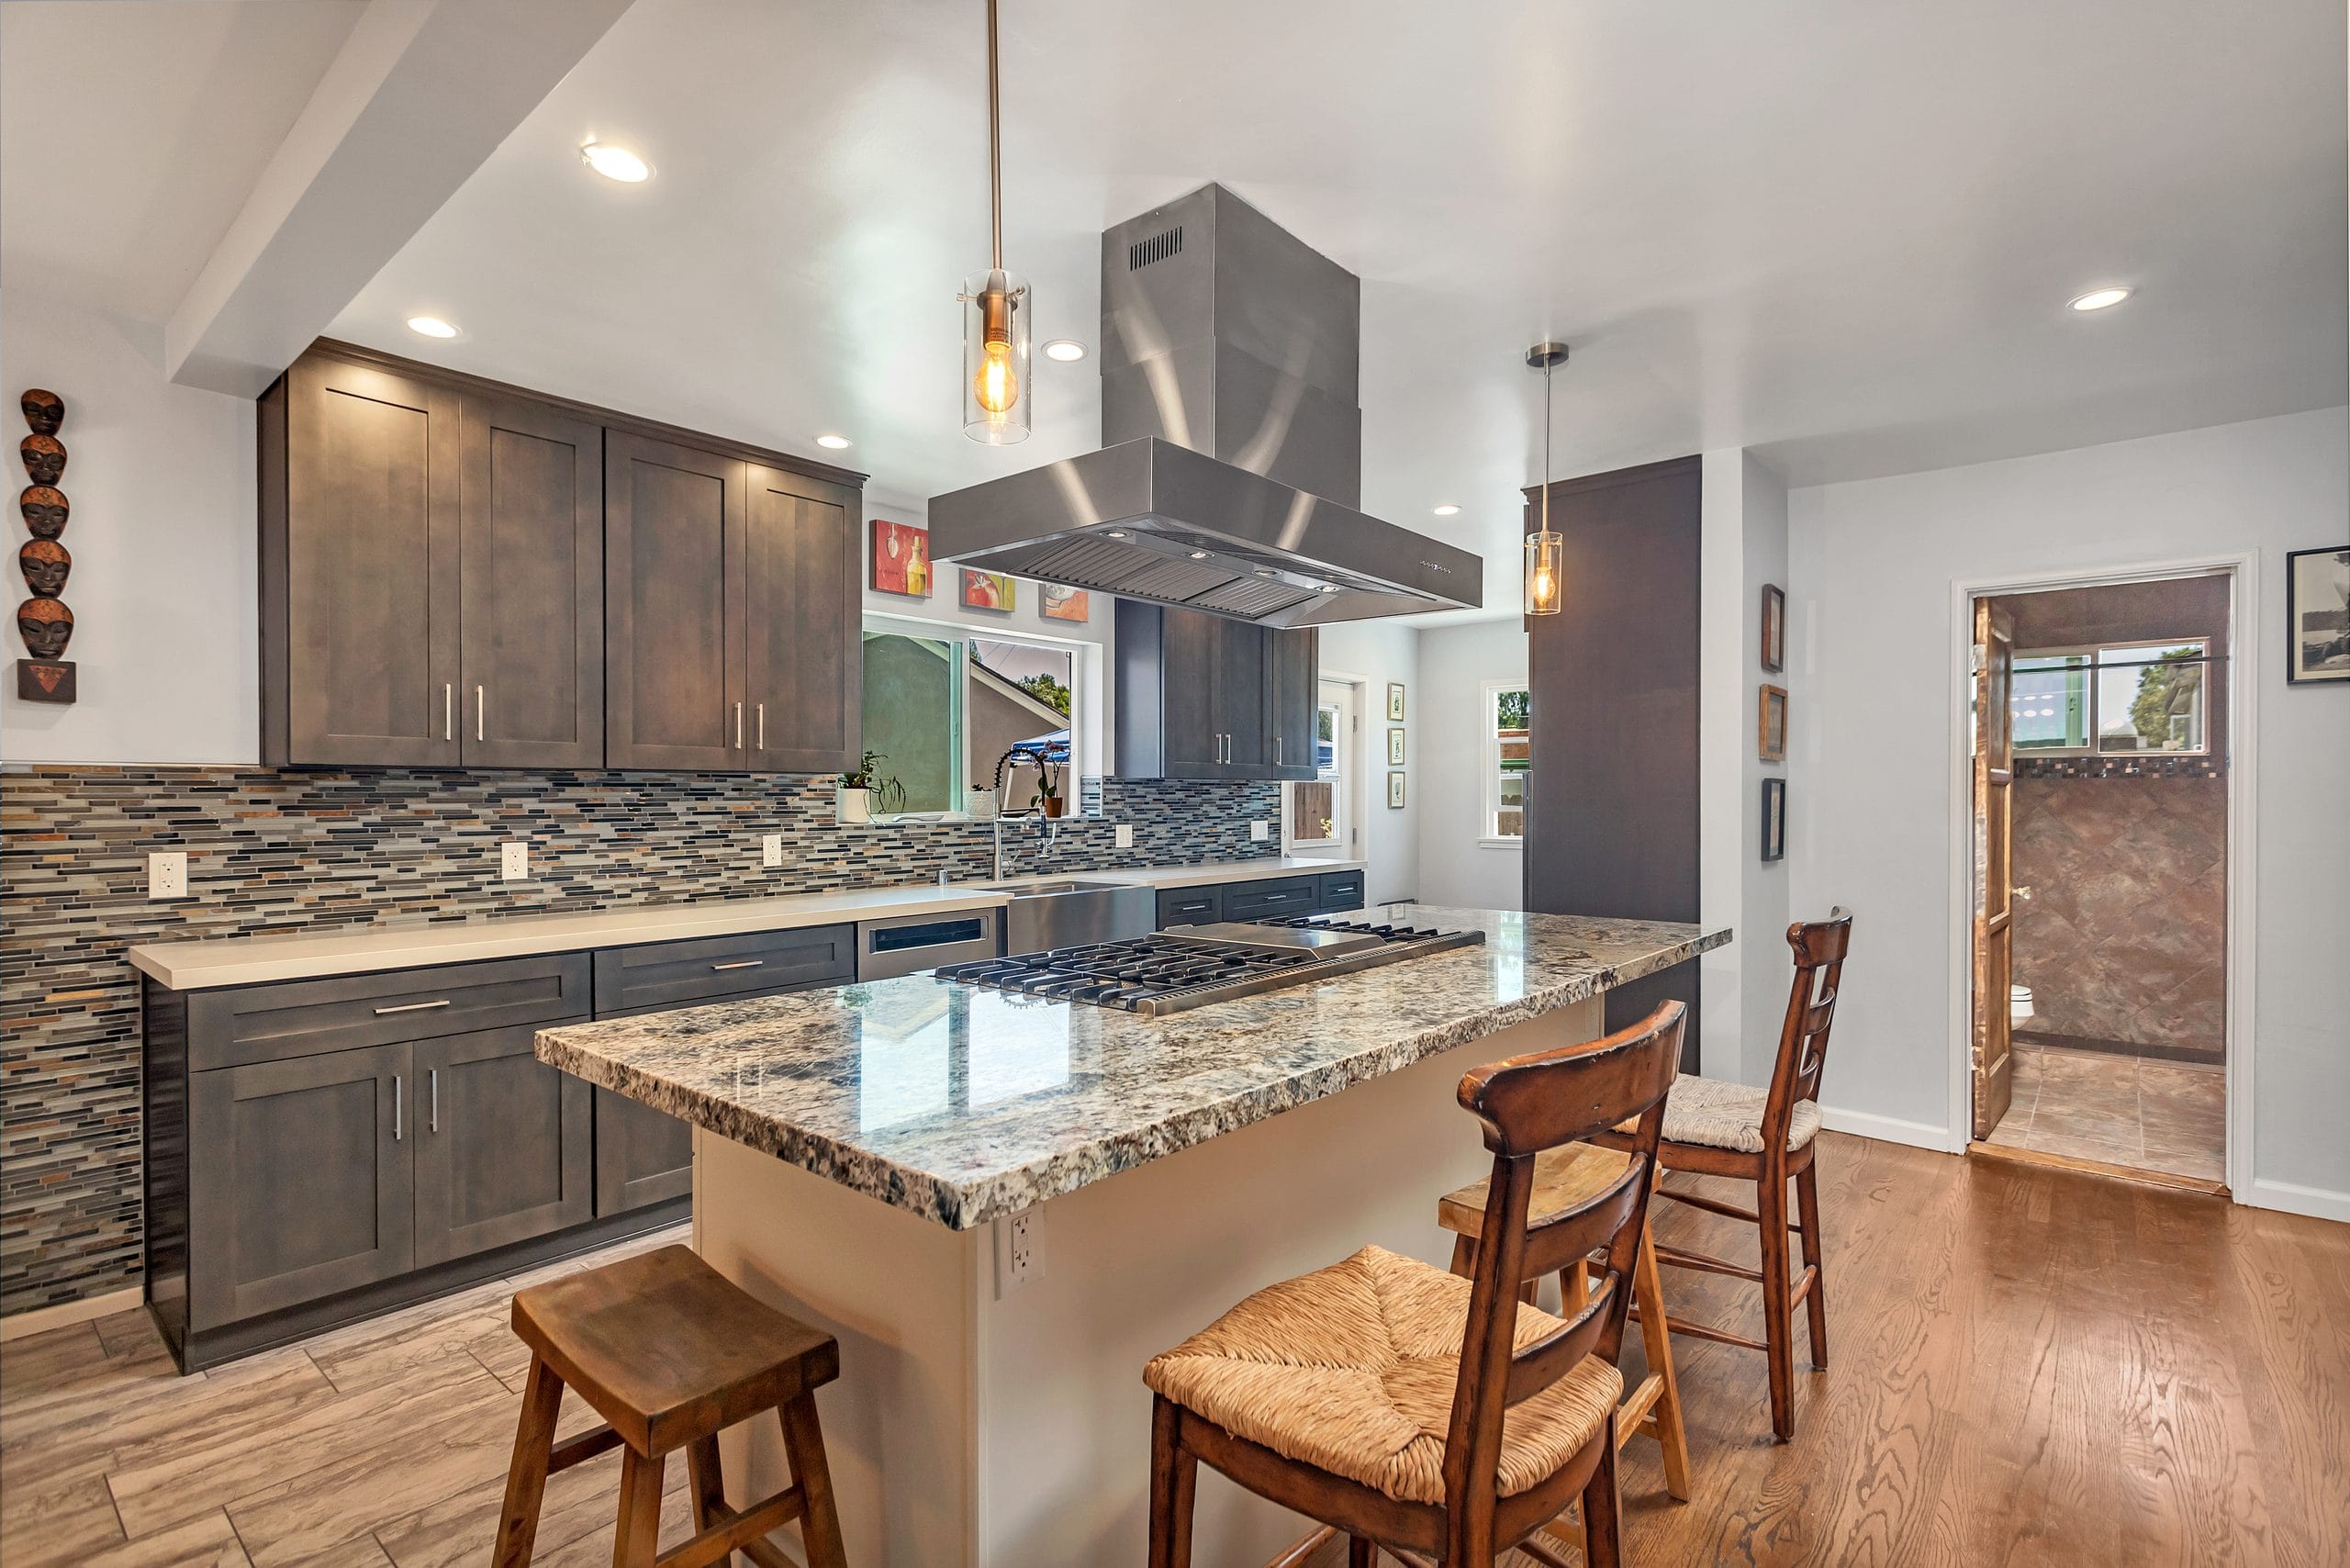
Cooktop in the island
The cook faces the room. It needs a hood above the island with a duct route through the ceiling, and counter on both sides and behind the burners.
Photo: a six-burner range set into an island under a stainless island hood.
Clean at the island
Sink in the island
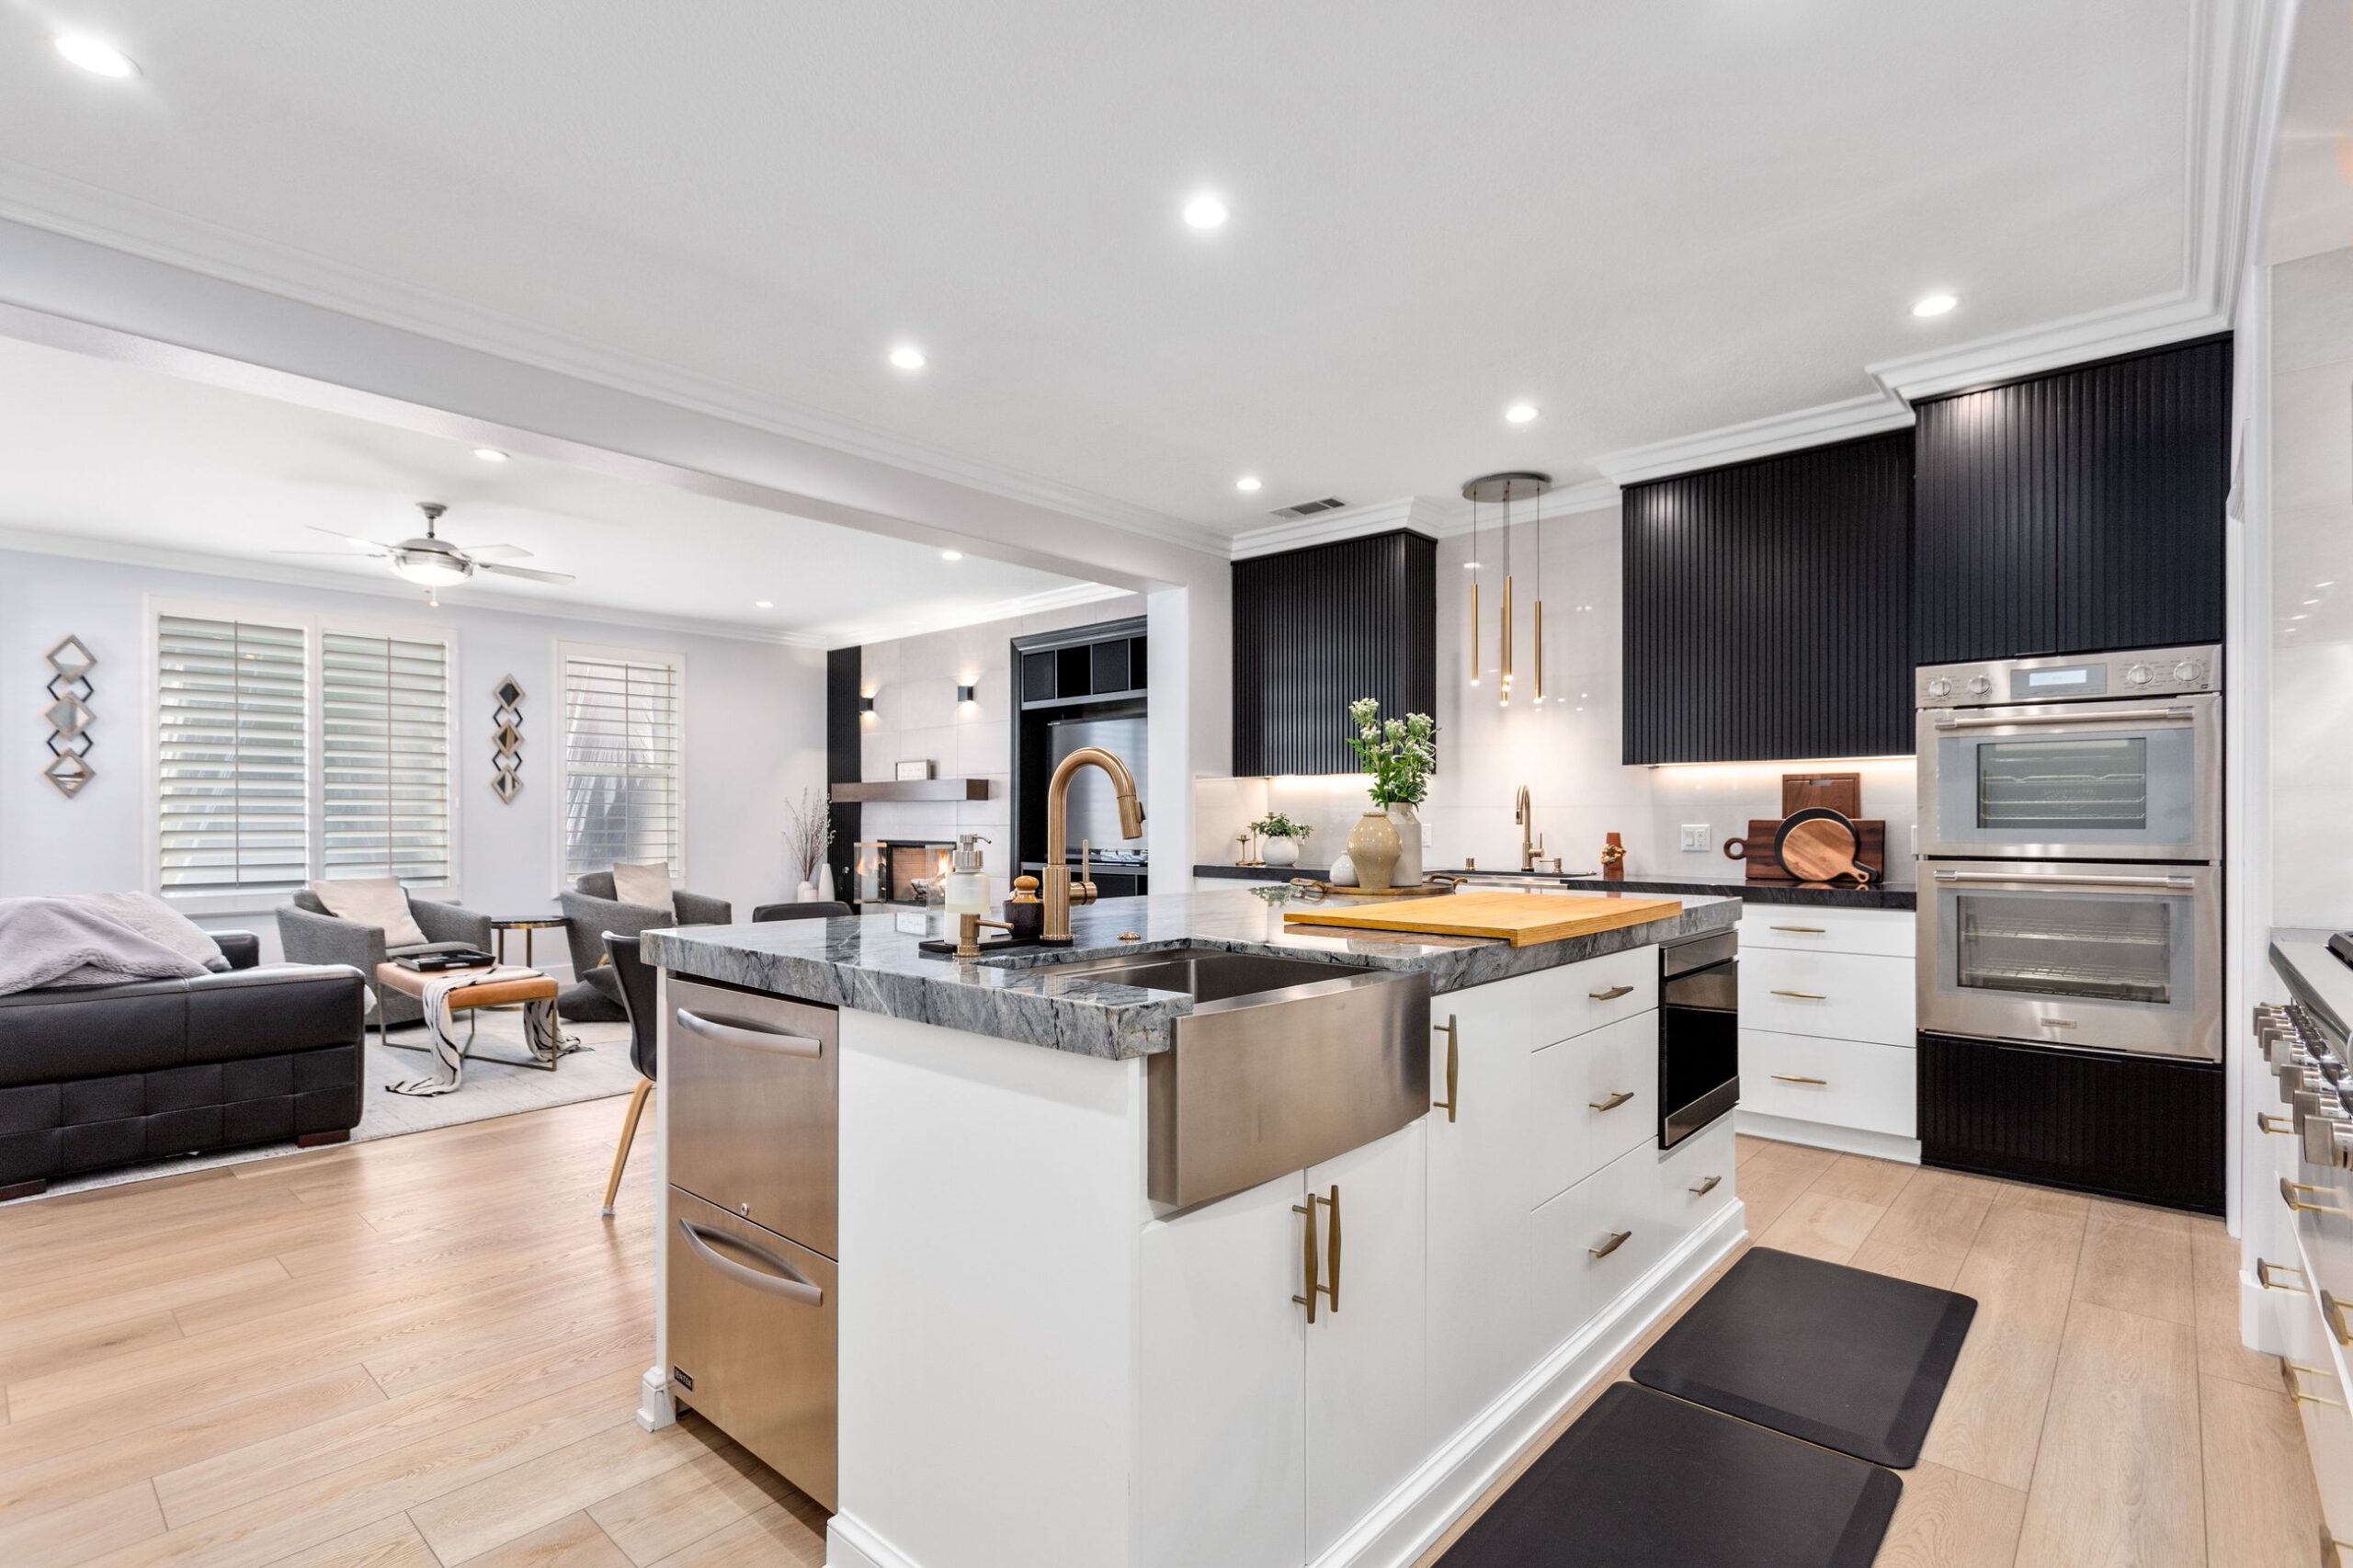
The cleanup centre faces the room and the cooking stays on the wall, under a wall hood. The island needs a drain and vent path through the floor.
Photo: an island with a farmhouse sink and dishwasher drawers, facing a wall with double ovens.
Two heights
Split the island
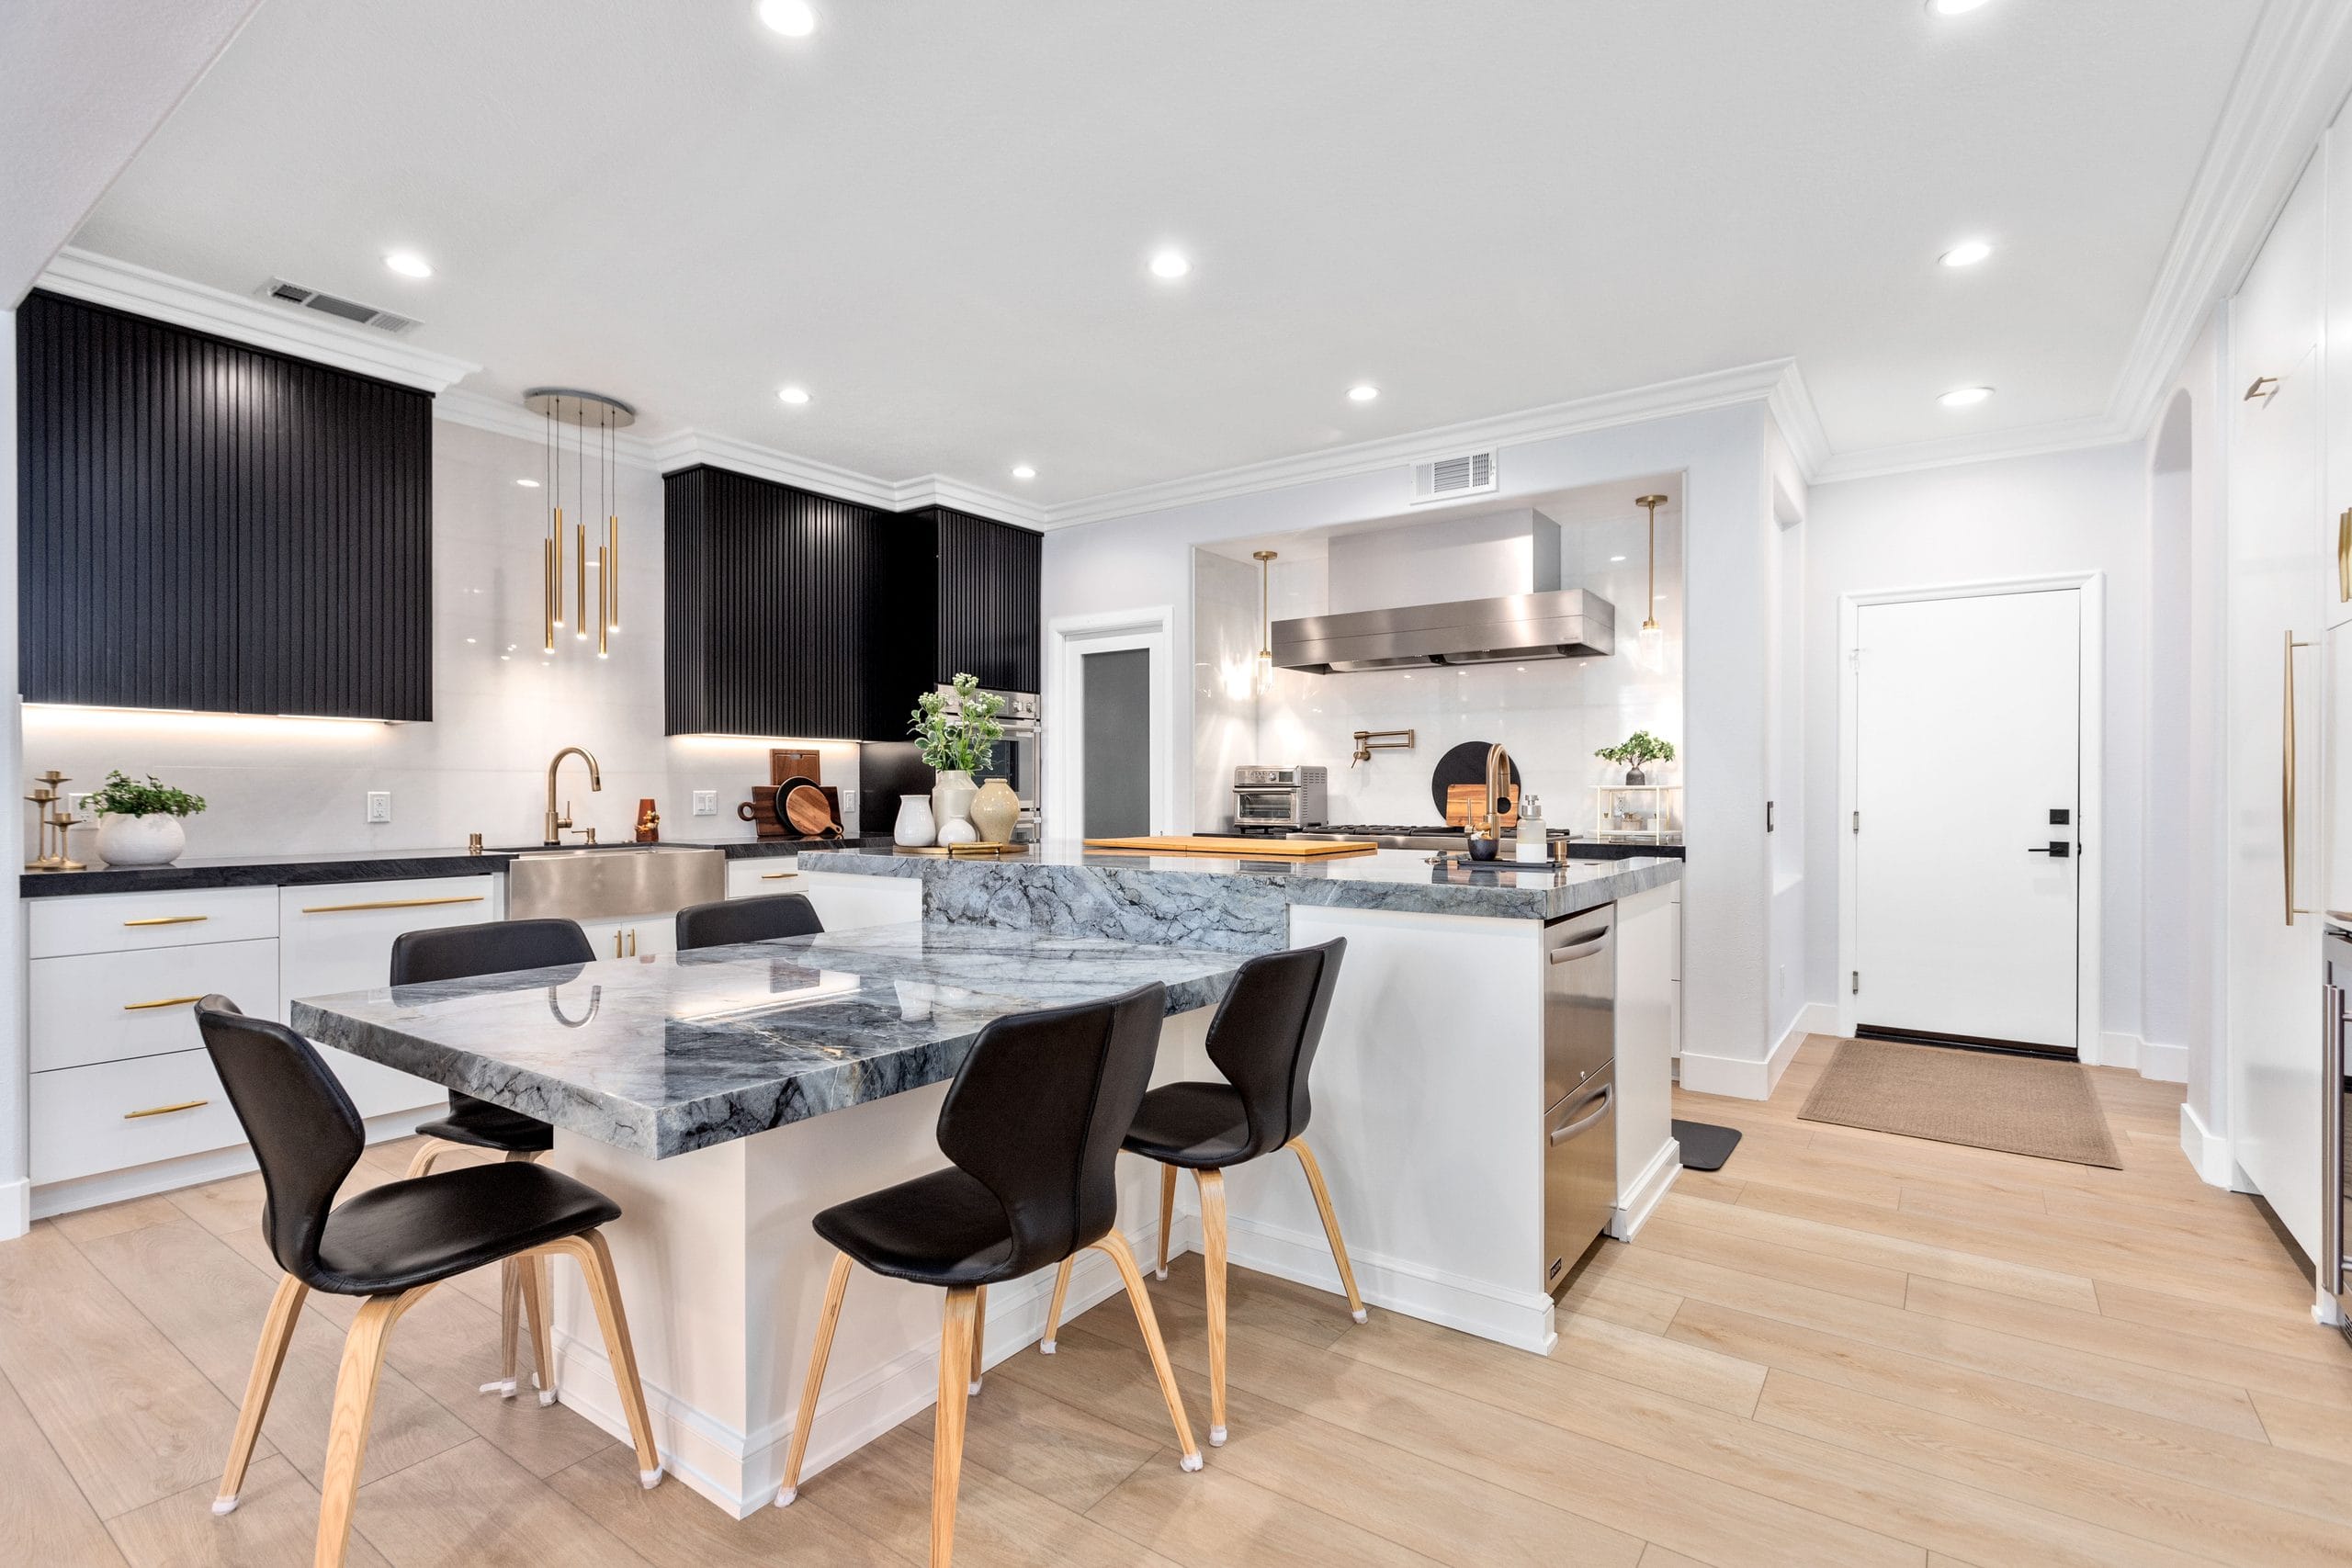
A working counter and a table-height seating end in one piece of furniture. Each height needs its own knee space and clearance.
Photo: a two-level island in blue-grey quartzite: a lower seating table joined to a working island.
Step 2
Aisles, seating and the counter beside each appliance
With the work centres placed, check the space around them. The NKBA numbers most often missed in remodels:
Clear floor around an island
NKBA Kitchen Planning Guidelines 6, 7 and 8, in inches
Aisles. Measure between counter fronts, tall cabinets and appliances, not between walls. An island that leaves 36 inches looks generous on paper and is tight with the dishwasher open.
Stools. Allow a knee space 24 inches wide for each person, 15 inches deep at a 36-inch counter, 12 inches at a 42-inch bar and 18 inches at a 30-inch table (guideline 9). Four stools need about 8 feet of overhang.
The dishwasher sits within 36 inches of the sink edge, with 21 inches of standing room beside it (guideline 13).
Landing counter beside each appliance
NKBA Kitchen Planning Guidelines 11, 16, 17, 22 and 23, in inches
Add a clear prep counter at least 36 inches wide and 24 inches deep next to the sink (guideline 12), and on an island or peninsula keep at least 9 inches of counter behind the cooktop at the same height (guideline 17). NKBA puts the whole kitchen’s working counter at about 158 inches of frontage, 24 inches deep (guideline 25), a useful check when a large range, a tall oven tower and a column refrigerator all compete for the same wall.
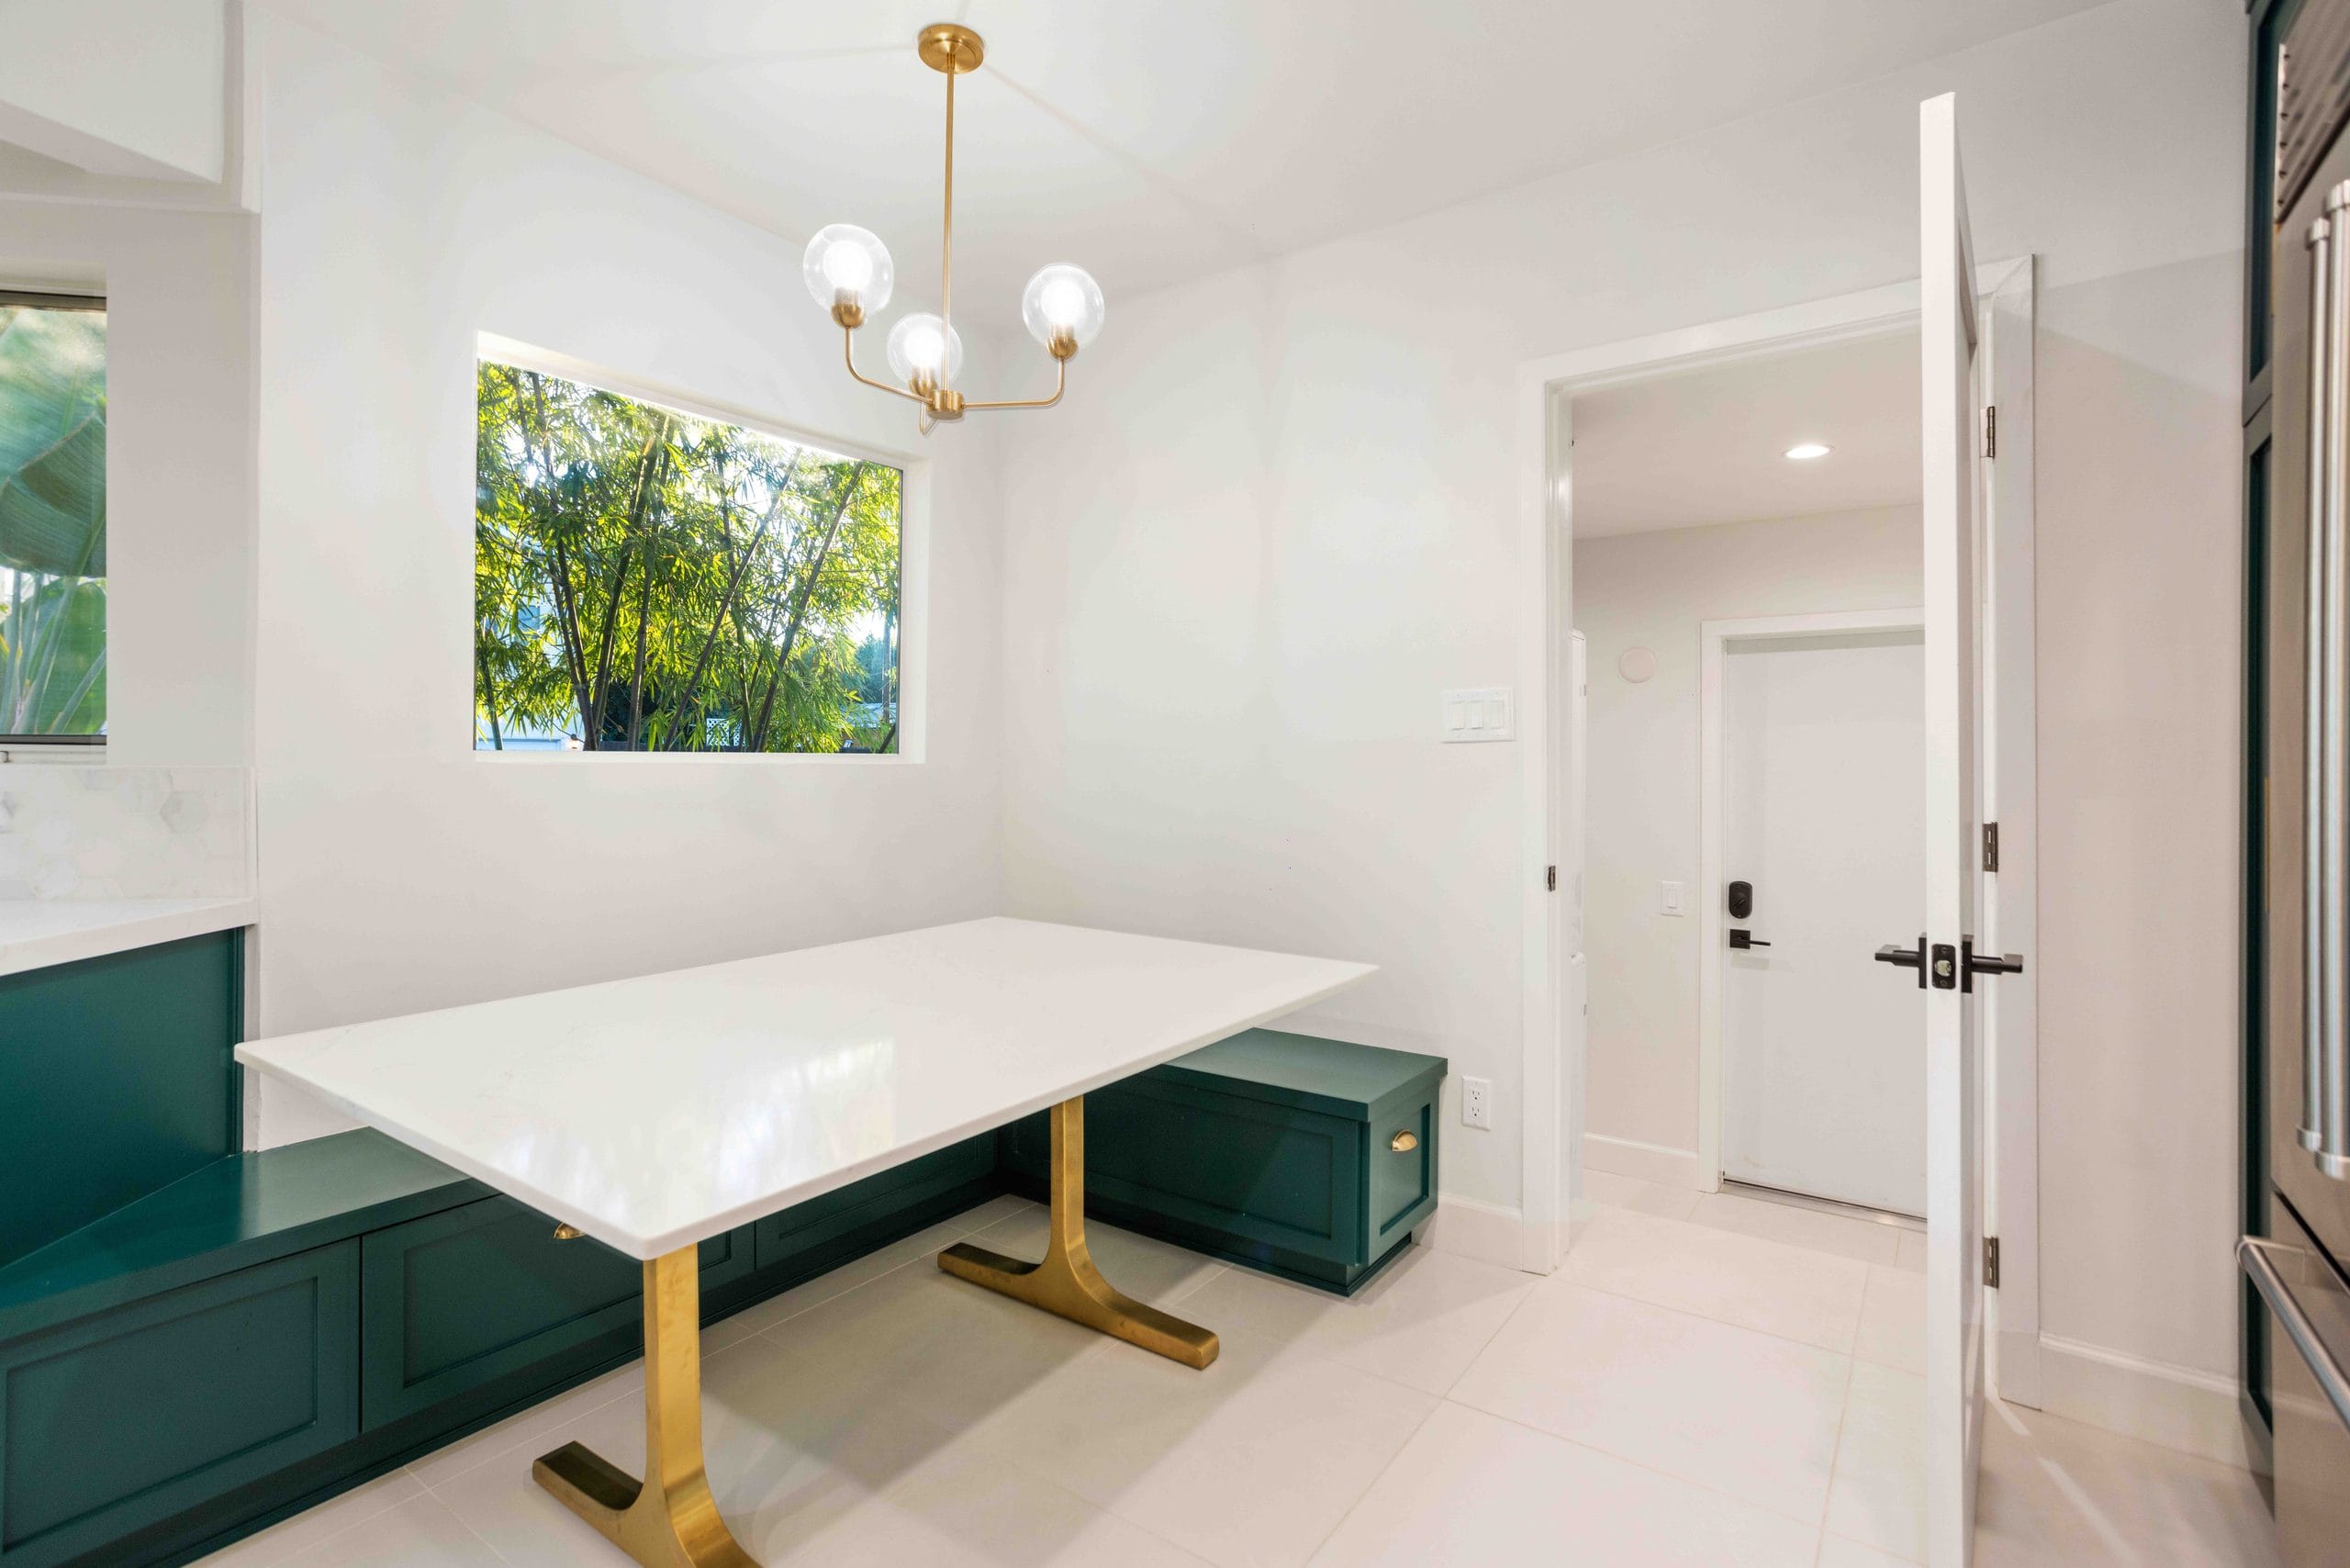
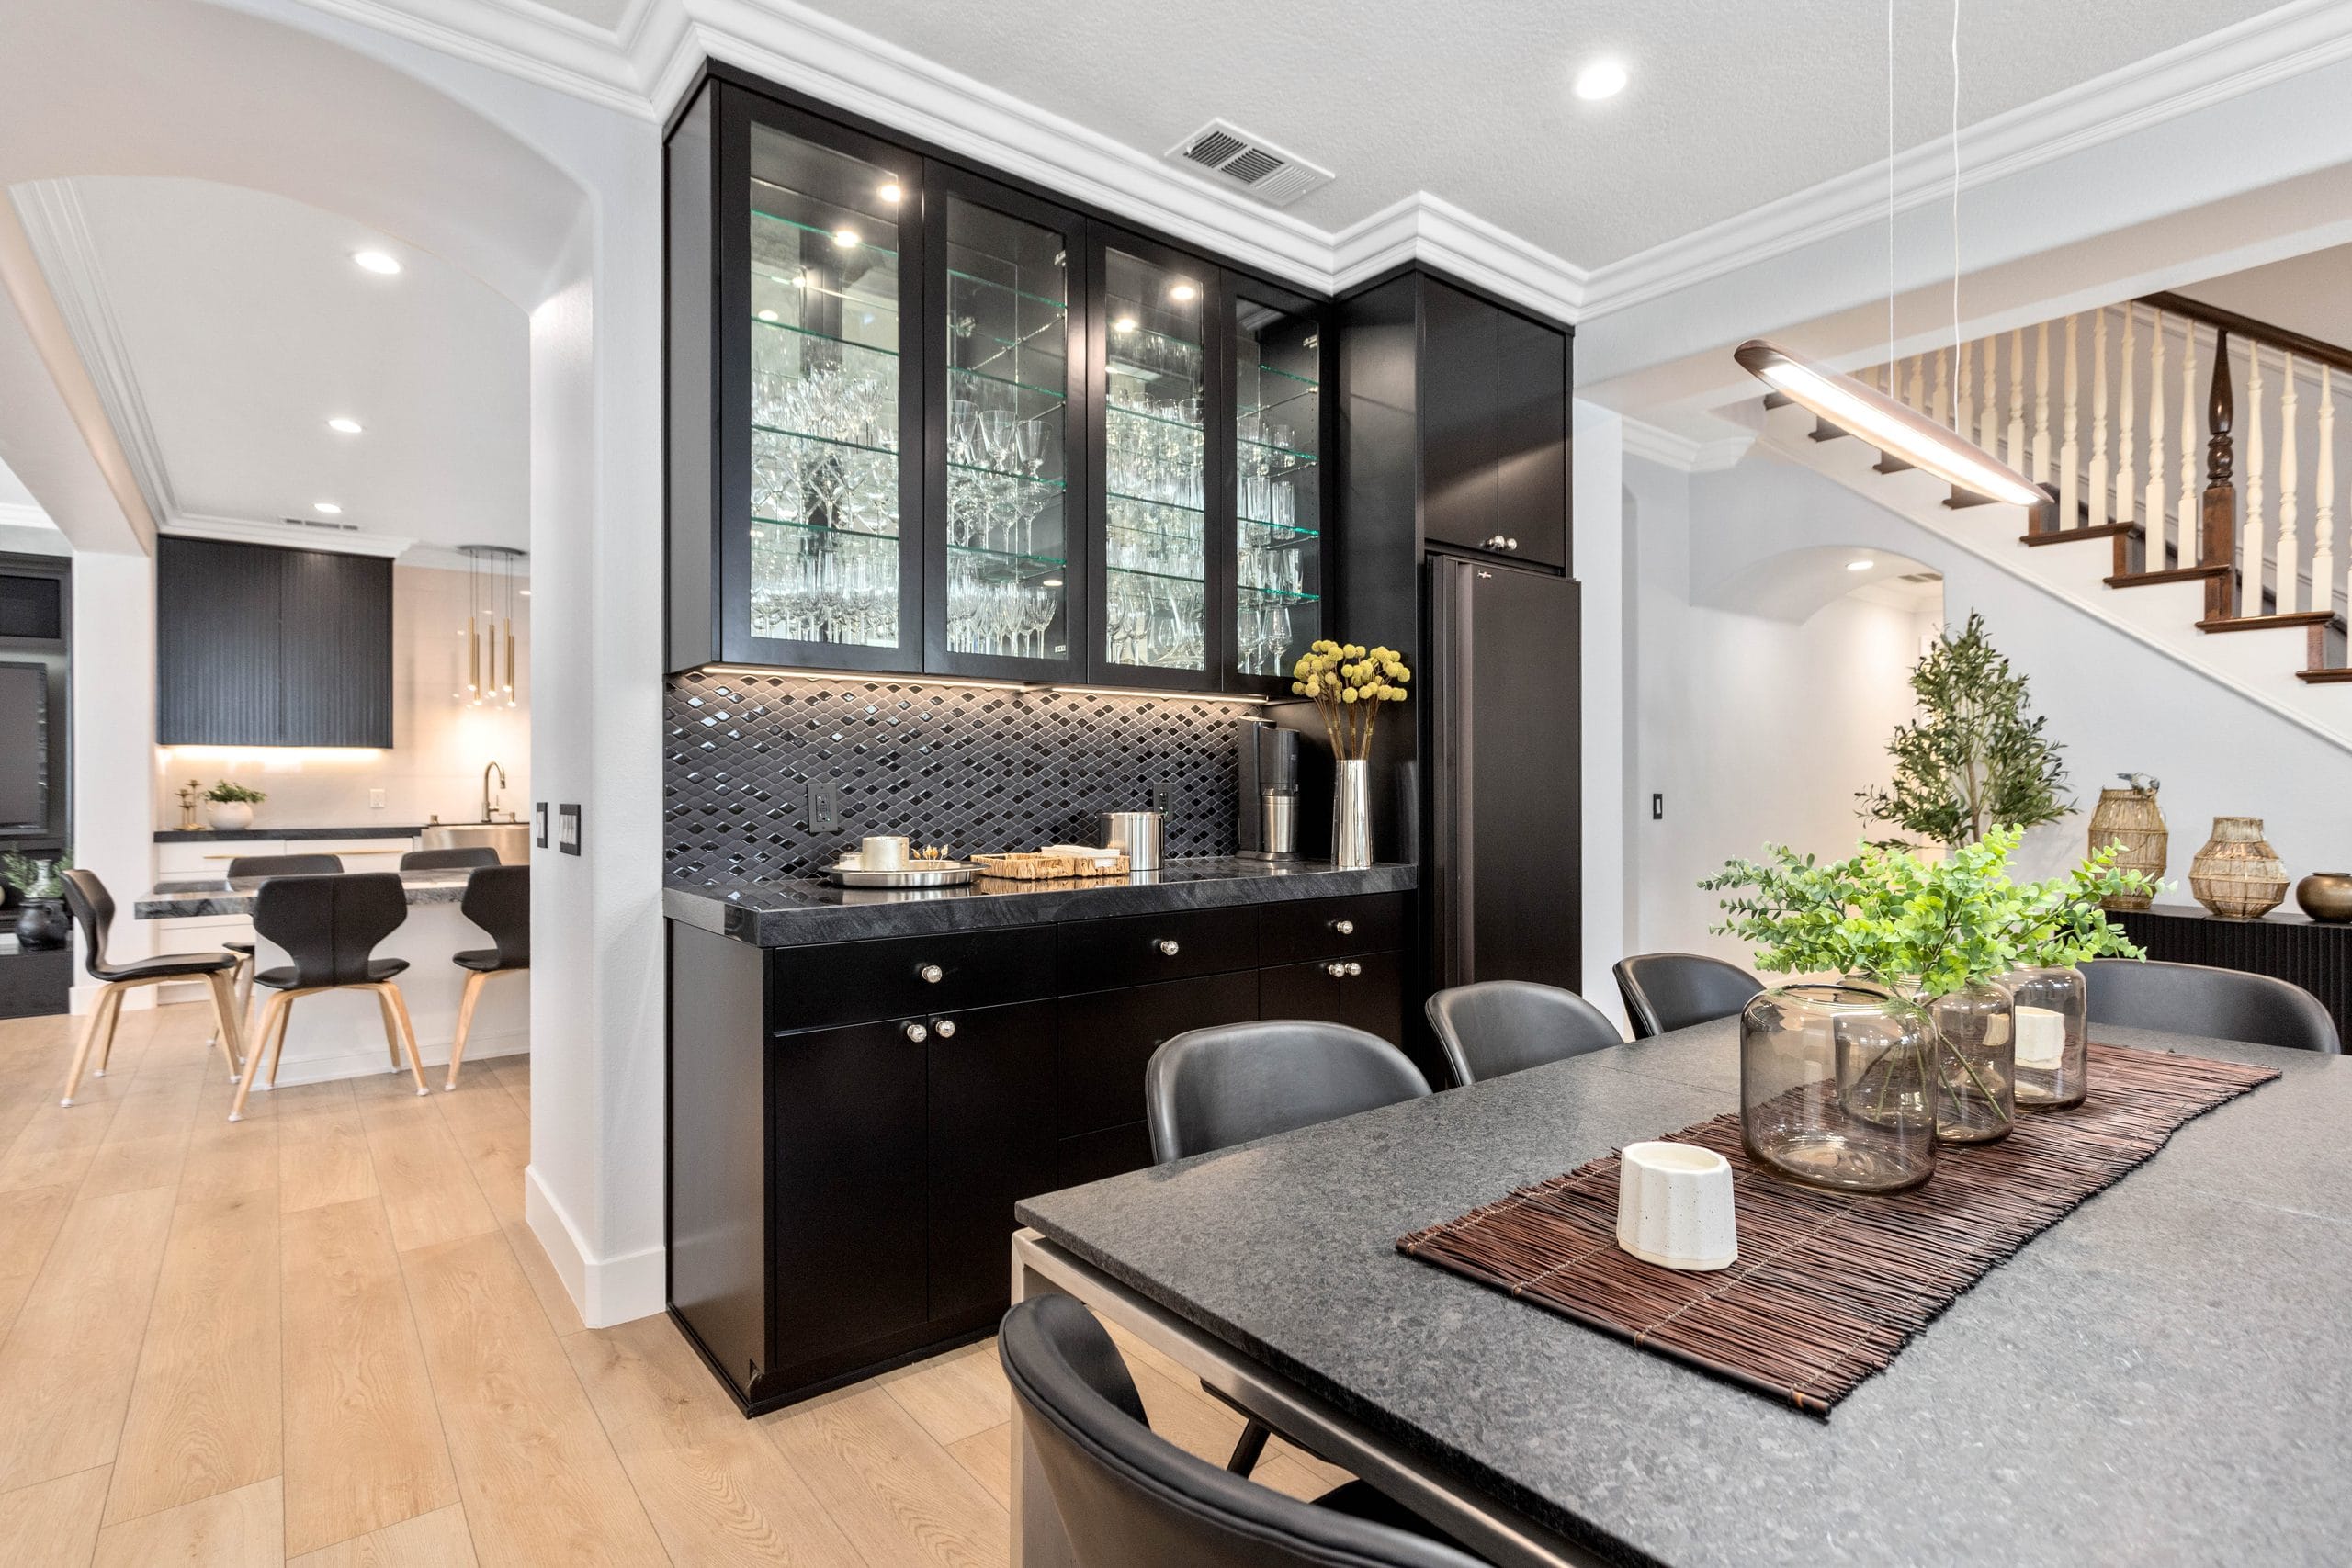
A built-in banquette with storage under the seat and a table by the window, from an Elbaz Construction kitchen remodel.A bar run with glass-front wall cabinets and counter space beside the refrigerator, from an Elbaz Construction remodel.
Step 3
Choose the appliances before the cabinets
Cabinets are built around appliances, so the appliance list has to be final, with model numbers, before cabinets are ordered. Four rules decide what can go where:
Household-rated only. Cooking appliances must be listed and labeled for household use and installed to the manufacturer’s instructions (FBC-Residential M1901.2), and the fuel-gas chapter does not allow commercial cooking appliances in a dwelling unless they are listed for residential use (G2447.2). A restaurant range is not a residential range, however it looks.
Clearance above the burners. A range needs at least 30 inches of vertical clearance above the cooking top to unprotected combustible material (M1901.1). The code allows less only with specified protection or a listed hood or appliance above, following its installation instructions (G2447.5 for gas). That line fixes the height of the wall cabinet or shelf over the range.
The hood and its duct. A range hood discharges outdoors through a duct (M1503.1), and a large hood can require makeup air (M1503.4). Choose the range and hood together and draw the duct route before the ceiling and cabinets are fixed; the cost guide covers the makeup-air thresholds.
Not under an opening window. NKBA advises against a cooktop under an operable window and recommends a fire extinguisher by the kitchen exit (guideline 20). In Miami-Dade and Broward, a window that is replaced must also meet the hurricane impact rules.
An island cooktop under a stainless island hood, with bar stools on the far side and the sink run behind, from an Elbaz Construction kitchen remodel.
The electrical plan follows the appliances: dedicated circuits, the 20-amp countertop circuits and GFCI protection the 2020 National Electrical Code requires in Florida, and outlets within reach along every counter. The cost guide lists them. Add task lighting over every work surface (NKBA guideline 31) on the same drawing, because under-cabinet lights need wiring before the cabinets go up.
Step 4
Storage: how much, and where
NKBA sizes storage as total shelf and drawer frontage (cabinet width × number of shelves or drawers × depth in feet). Its targets are about 1,400 inches for a kitchen under 150 square feet, 1,700 for 151 to 350 square feet and 2,000 above that (guideline 27), with a good share of it, 400 to 560 inches, within 72 inches of the sink (guideline 28), and at least one corner cabinet fitted with a pull-out or rotating device (guideline 29). Storage above 84 inches counts only as miscellaneous.
Recommended shelf and drawer frontage by kitchen size
The practical point for a remodel: when an island adds seating or a wall comes out for an open plan, count the storage that disappears with the old wall cabinets. Deep drawers in the island, a pantry wall or taller uppers usually put it back. Our custom cabinetry and open-concept kitchen pages show the options.
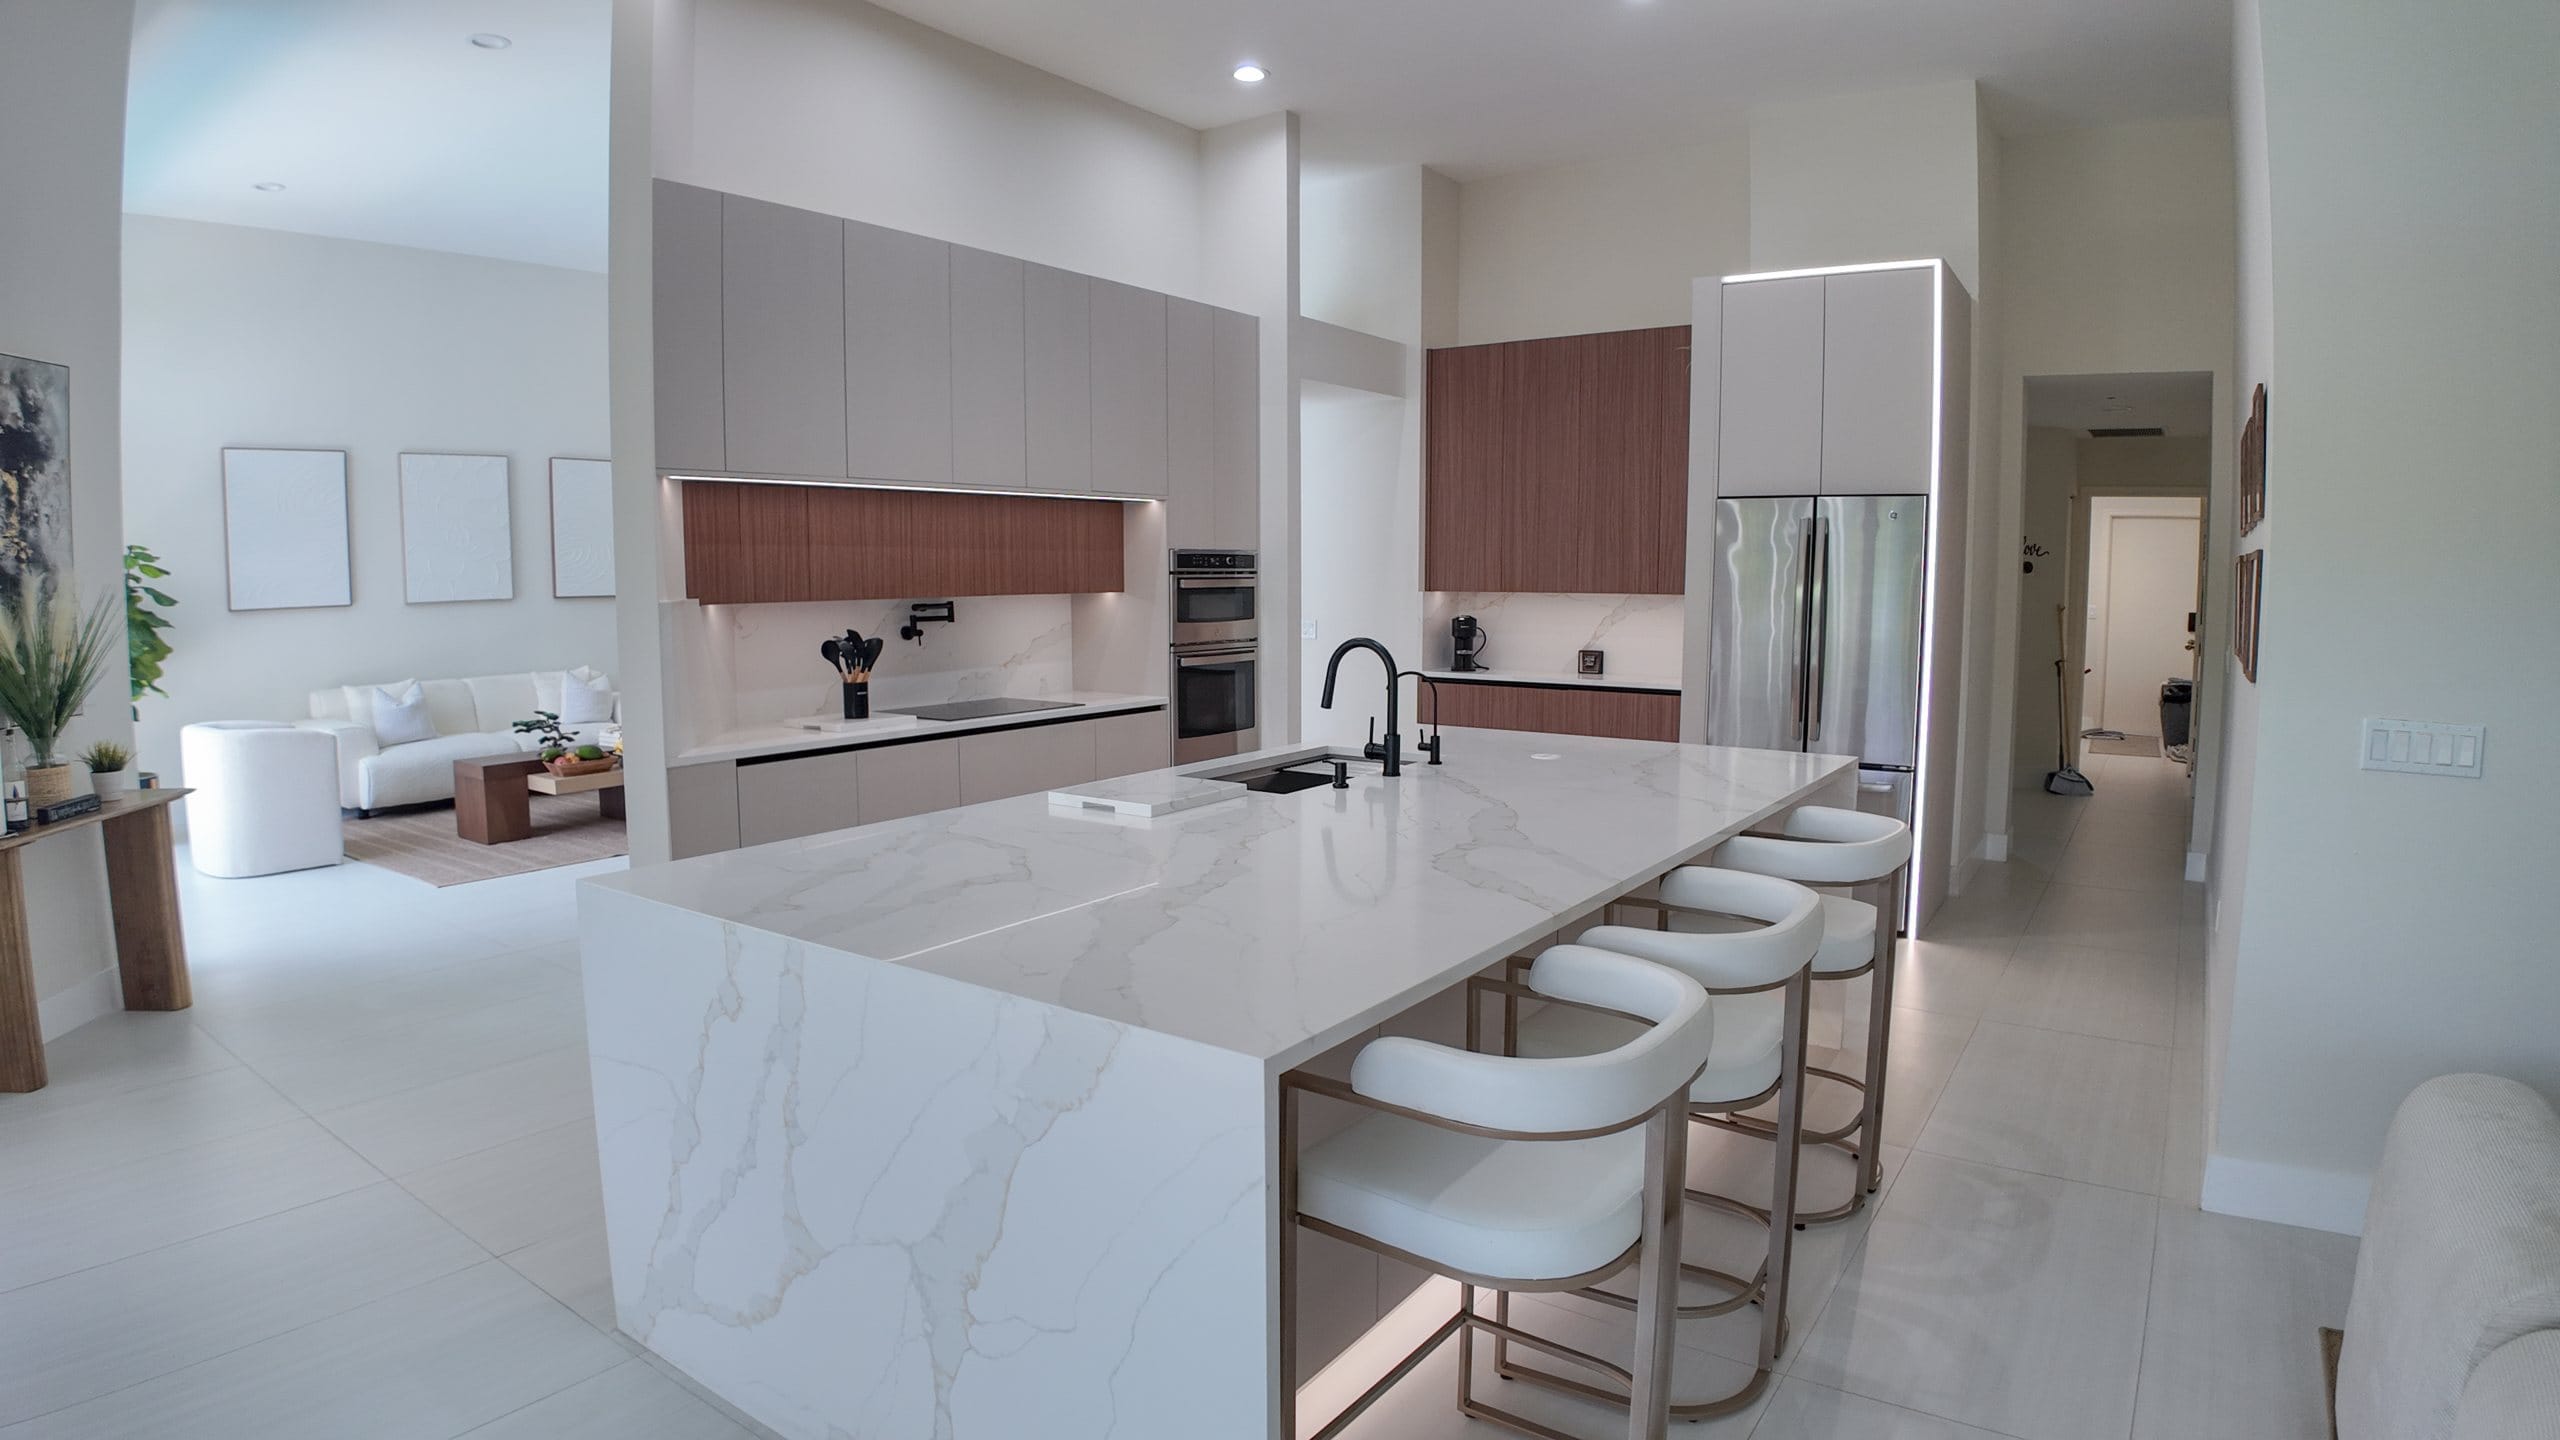
A waterfall island in marble-look porcelain with bar seating, a refrigeration column and a handleless cooking run beyond, from an Elbaz Construction kitchen remodel.
The order of decisions
What belongs on the drawings, and what can wait for the showroom
Decide on the drawings
Where the sink, cooktop and refrigerator go, and whether any wall comes out
Aisle widths, island size and seating overhang
Every appliance, by model: size, fuel, hood, duct route
Outlet, switch, circuit and task-light positions
Plumbing for the sink, dishwasher, ice maker and pot filler
Any window or door that changes
Can wait for the showroom
Cabinet door style and colour
Counter colour and edge profile (not the thickness if an appliance fits flush)
Backsplash tile
Hardware and faucet finish
Pendant style (not its position)
Paint
The left column is what the permit drawings, the rough-in inspections and the cabinet order depend on; changing it after the walls close or the cabinets ship means rework. The right column changes only what you see. The most common late change is an appliance: a wider range or a panel-ready refrigerator swapped in after the cabinets are ordered alters the cabinet boxes, the hood and sometimes the circuit.
The paperwork
Permits, inspections and the order of work
A kitchen remodel that moves or adds plumbing, gas or circuits, or changes a wall or window, needs permits for that work. Florida’s HB 803 (in force since July 1, 2026) lets a single-family owner request an exemption for small jobs, but it excludes electrical, plumbing, structural, mechanical and gas work and homes in a flood hazard area, so it rarely covers a real kitchen remodel. Inspections happen before anything is covered (Miami-Dade County), so the schedule has to leave room for them:
DesignLayout, appliances, drawingsWork centres, aisles, appliance list and electrical plan drawn together.
PermitPlumbing, gas, electrical, structureFiled with the drawings; in a condo, after the association approves.
Rough-inInspected before walls closeNew drain, vent, gas, wiring and hood duct are inspected open.
CabinetsBoxes set and levelledStone counters are usually measured from the installed base cabinets.
FinishCounters, backsplash, trim-out, finalAppliances connected, fixtures set, final inspection.
Condos add a layer: the association decides what may change, when work can happen and what it must approve first, often including plumbing and venting through common walls. Our condo renovation guide walks through it.
Interactive checklist
Before the first showroom visit: a kitchen planning checklist
0 of 9 done
Our process
How we plan a kitchen remodel
We plan a kitchen remodel from the floor plan up: we measure the room, find the drain, vent, gas and duct routes, set the work centres and aisles, and fix the appliance list and electrical plan on the drawings before cabinets and finishes. Our kitchen layout and design page shows how we work through the options, and small rooms have their own trade-offs on our galley kitchen page. On a design-build project the drawings the building department reviews are the drawings we build.
Asher was the best choice I have made. We love the outcome of the ADU . They showed up on time and did a great job, were friendly. No issues at all during the whole process. Very organized team . I would recommend them to everyone I know !
RRobert Bryan
”
Great experience! The team was professional, efficient, and delivered high-quality work on time. They communicated clearly throughout the project and exceeded our expectations. Highly recommend for any construction needs!
AAndrew
”
If you are planning to remodel your kitchen or bathroom or do any other construction project, call Sean from Elbaz Construction . He has a lot of experience and will recommend the best options/ suggestions to your project. He did high quality job !
KKameron Allison
”
Thank you Ashley ! We love the new bathrooms. Good with communication and very clear with explanations . I will definitely use them again in the future
AAndrew Tyupa
”
Asher has a lot of experience . We replaced our windows to energy efficient windows. He got down to business right away and did high quality work. His team is very professional! Thanks again
Jjessica berliner
”
I give them a five star rating not only for their excellent roofing skills and timelines, but also for their competitive pricing and the honesty and professionalism of the team !! We are very pleased with the outcome
ZZachary Gugliotta
Genuine Google reviews of Elbaz Construction, reproduced as written. They describe general work with us, not the specific topic of this article. Read all reviews on Google.
Questions
Quick answers on kitchen planning
Rules vary by address and scope. For your property, call 754-236-0675.
Start with the floor plan: place the sink, cooktop and refrigerator and decide whether any of them move. Then check aisles, seating and the counter beside each appliance, fix the appliance list by model, draw the electrical and lighting plan, and only then choose cabinets, stone and finishes.
It is the path between the cooktop, the cleanup sink and the refrigerator. The NKBA Kitchen Planning Guidelines recommend a total of no more than 26 feet, with each leg between 4 and 9 feet, and no major traffic route crossing it.
The NKBA guidelines recommend a work aisle of at least 42 inches for one cook and 48 inches for two or more, and behind seated diners 36 inches to edge past or 44 inches to walk past. These are design recommendations, not Florida code.
The Florida Building Code, Residential requires at least 30 inches of vertical clearance above the cooking top to unprotected combustible material (M1901.1). Less is allowed only with specified protection or a listed hood or appliance above, following its installation instructions.
Cooking appliances in a home must be listed and labeled for household use (FBC-Residential M1901.2), and the fuel-gas chapter does not allow commercial cooking appliances in a dwelling unless they are listed for residential use (G2447.2). Check the appliance’s listing before you design around it.
Thanks — that came through.
Your details are with the Elbaz Construction team and we will come back to you,
usually the same or next working day. If it is urgent, call (754) 236-0675.
General information as of September 2026. The NKBA figures are design recommendations, not code. Code references are to the Florida Building Code (8th edition, 2023) and Florida statutes; your designer, your building department and the permits issued decide how they apply to your kitchen.
Planning a kitchen remodel?
Settle the layout before the cabinets
We plan and build kitchen remodels across Miami-Dade, Broward and Palm Beach with the layout, the appliances and the permit package settled first.



 Cook at the island