


Flooring · South Florida
The finish is the last decision, not the first.
Substrate flatness, movement, waterproofing and where the water is meant to go all get decided before anyone opens a box of tile — and they determine whether the floor lasts.
In a kitchen the risks are point loads, appliance leaks and a long unbroken run that has to stay flat. In a bathroom they are standing water, falls to a drain, and a waterproofing layer that has to be continuous into every corner and up every upstand. Different rooms, same principle: what is underneath decides the outcome.
Florida-licensed general contractor, License No. CBC1265280. Bonded and insured.
Flatness, soundness, movement and moisture checked before any material is specified.
In wet areas, the membrane, the corners, the upstands and the drain detail are one continuous system rather than separate products.
Financing options are available through Mosaic.
- Licensed & insuredState-licensed GC, bonded and insured
- Design-buildDrawings and construction under one contract
- Permits & inspectionsSubmission, review comments and closeout
- LocalMiami-Dade · Broward · Palm Beach
- FinancingOptions available through Mosaic
What a properly built floor buys
Flat, dry, and still flat in five years.
Most flooring complaints — lipping, cracked grout, loose tiles, a smell that will not go — trace back to the preparation rather than the product.
Substrate.
Then finish.
Large-format tile in particular is unforgiving: the bigger the unit, the flatter the substrate has to be, because any deviation shows as lipping between tiles. Fixing that after laying means taking the floor up. It is the single most common avoidable failure in wet-area flooring.
- Substrate levelled to the tolerance the chosen format actually requires.
- Continuous waterproofing in wet areas, taken into corners and up upstands.
- Falls to the drain set in the substrate rather than hoped for in the tile.
- Movement and perimeter joints planned rather than grouted over.
Slip resistance is a specification
A tile that is beautiful dry can be treacherous wet. In bathrooms and around sinks it is worth choosing on tested slip performance as well as appearance, particularly in households with children or anyone unsteady.
Transitions are a detail, not an afterthought
Where a wet-area floor meets timber, carpet or a different level is where movement, water and wear all concentrate. Deciding that detail before laying is much cheaper than solving it after.
Grout is the maintenance decision.
Joint width, grout type and colour affect how the floor looks on day one and how it looks after three years of cleaning. Narrow joints look refined and are less forgiving of tile size variation; epoxy-based grouts resist staining better and cost more to install. It is worth deciding deliberately rather than defaulting.
Porcelain, ceramic, stone or LVP?
All four appear in South Florida kitchens and bathrooms, and they genuinely differ on water, wear, warmth and maintenance. Compared properly below.
Finished floors
Floors we have laid.
Genuine photographs of completed Elbaz Construction kitchen and bathroom projects, with the floors in place.
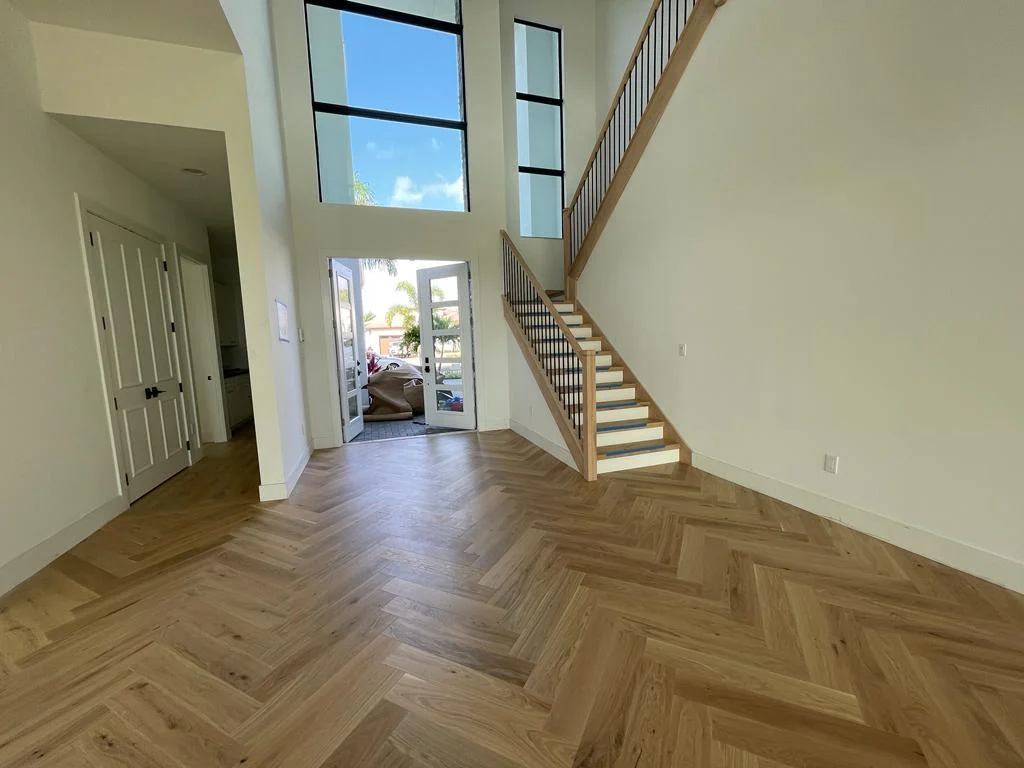
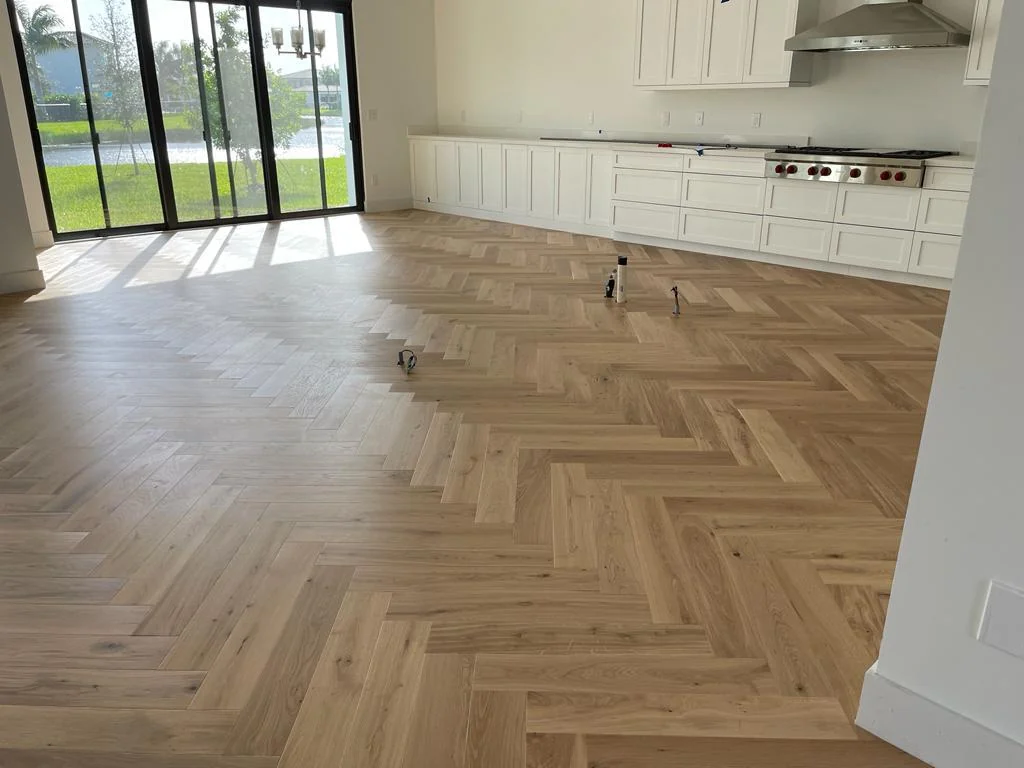
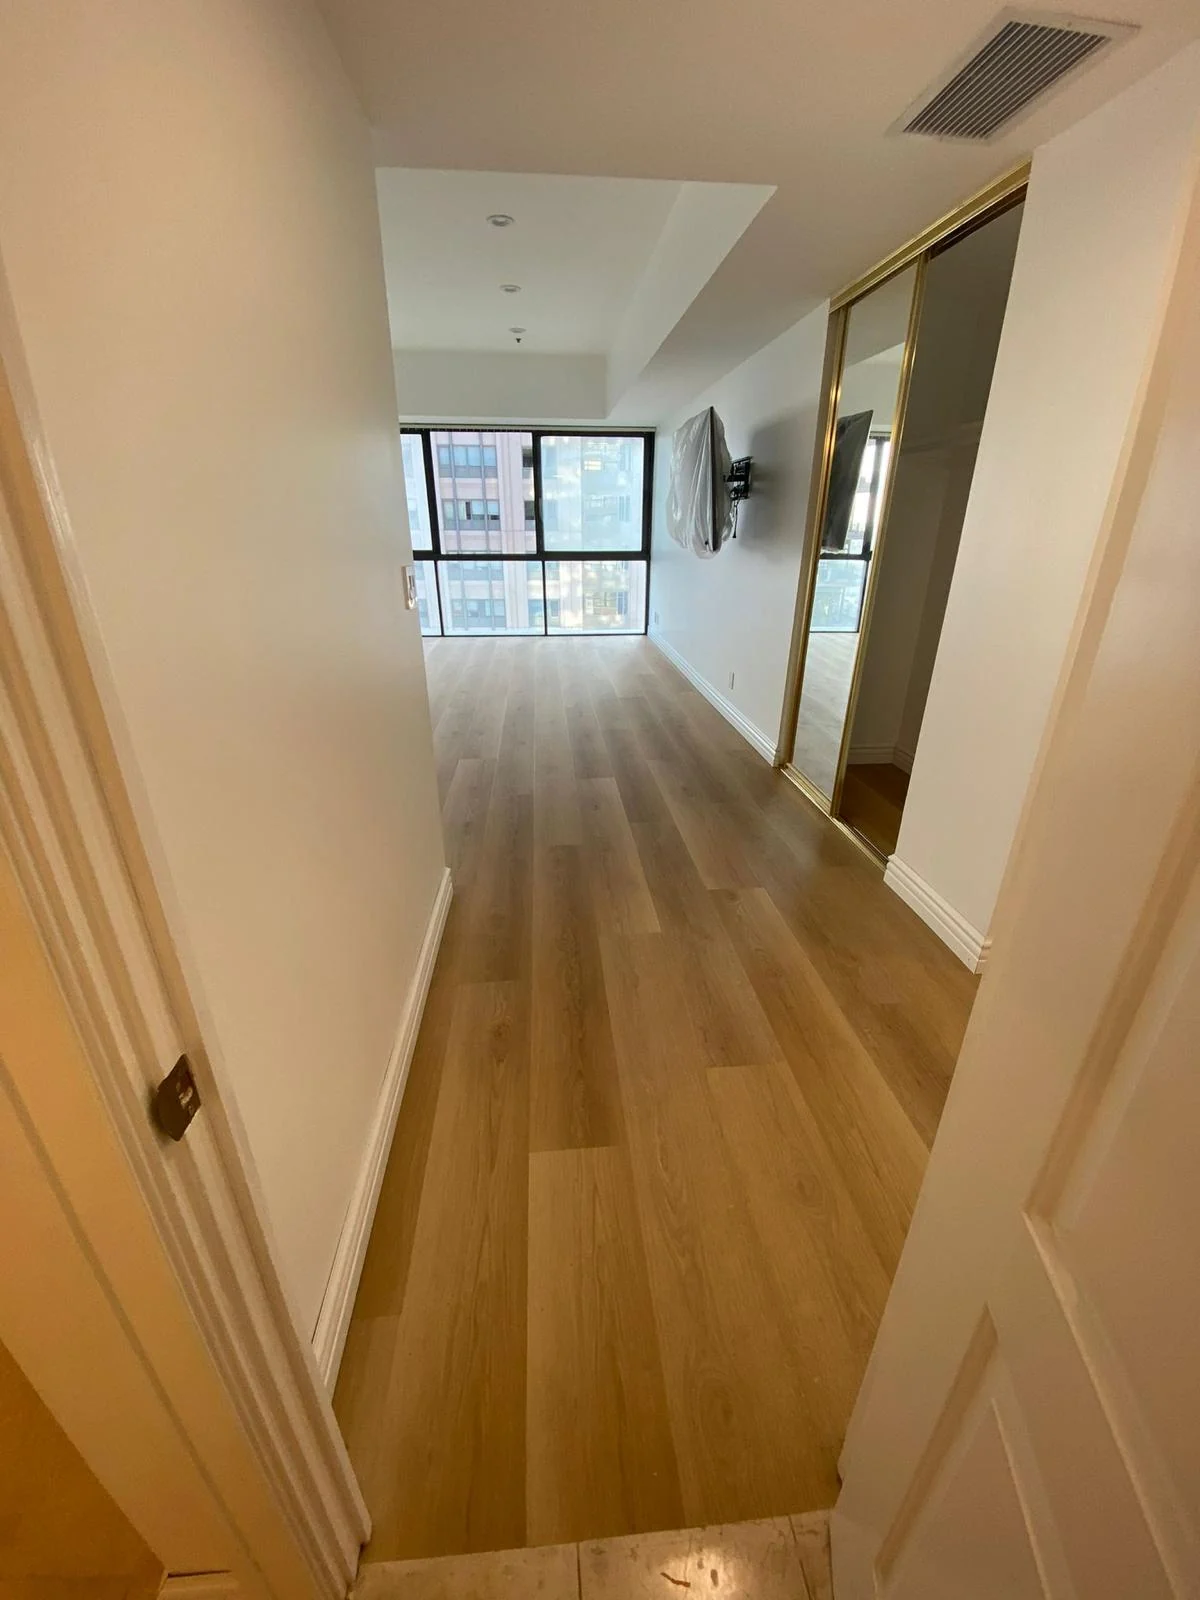
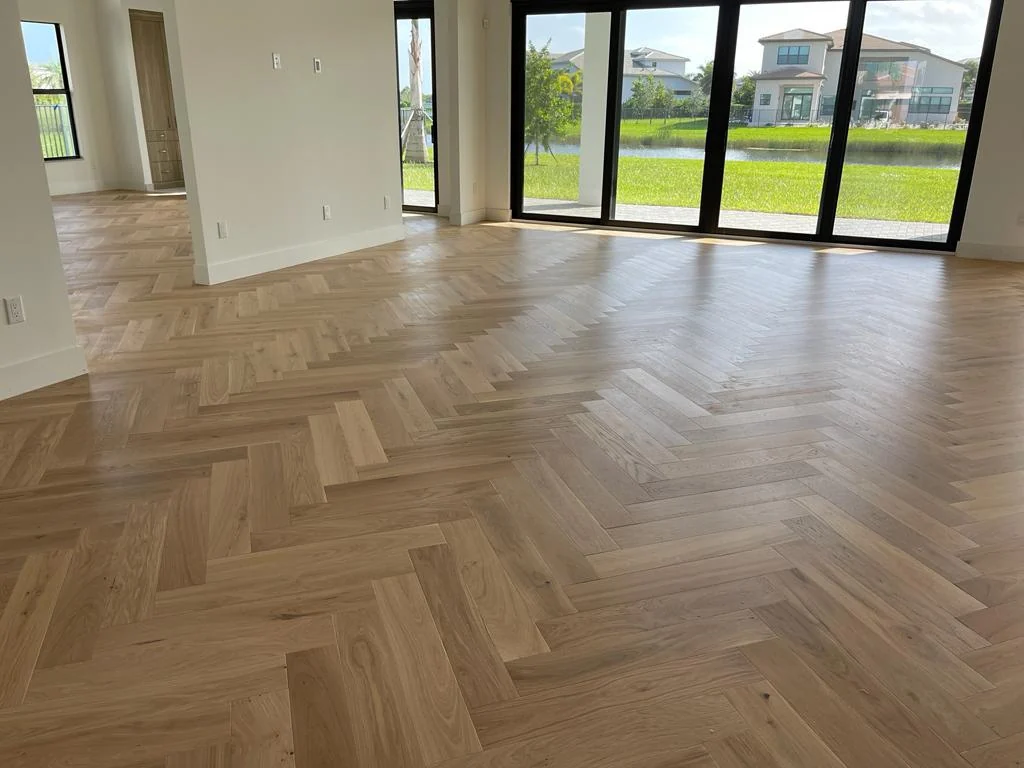
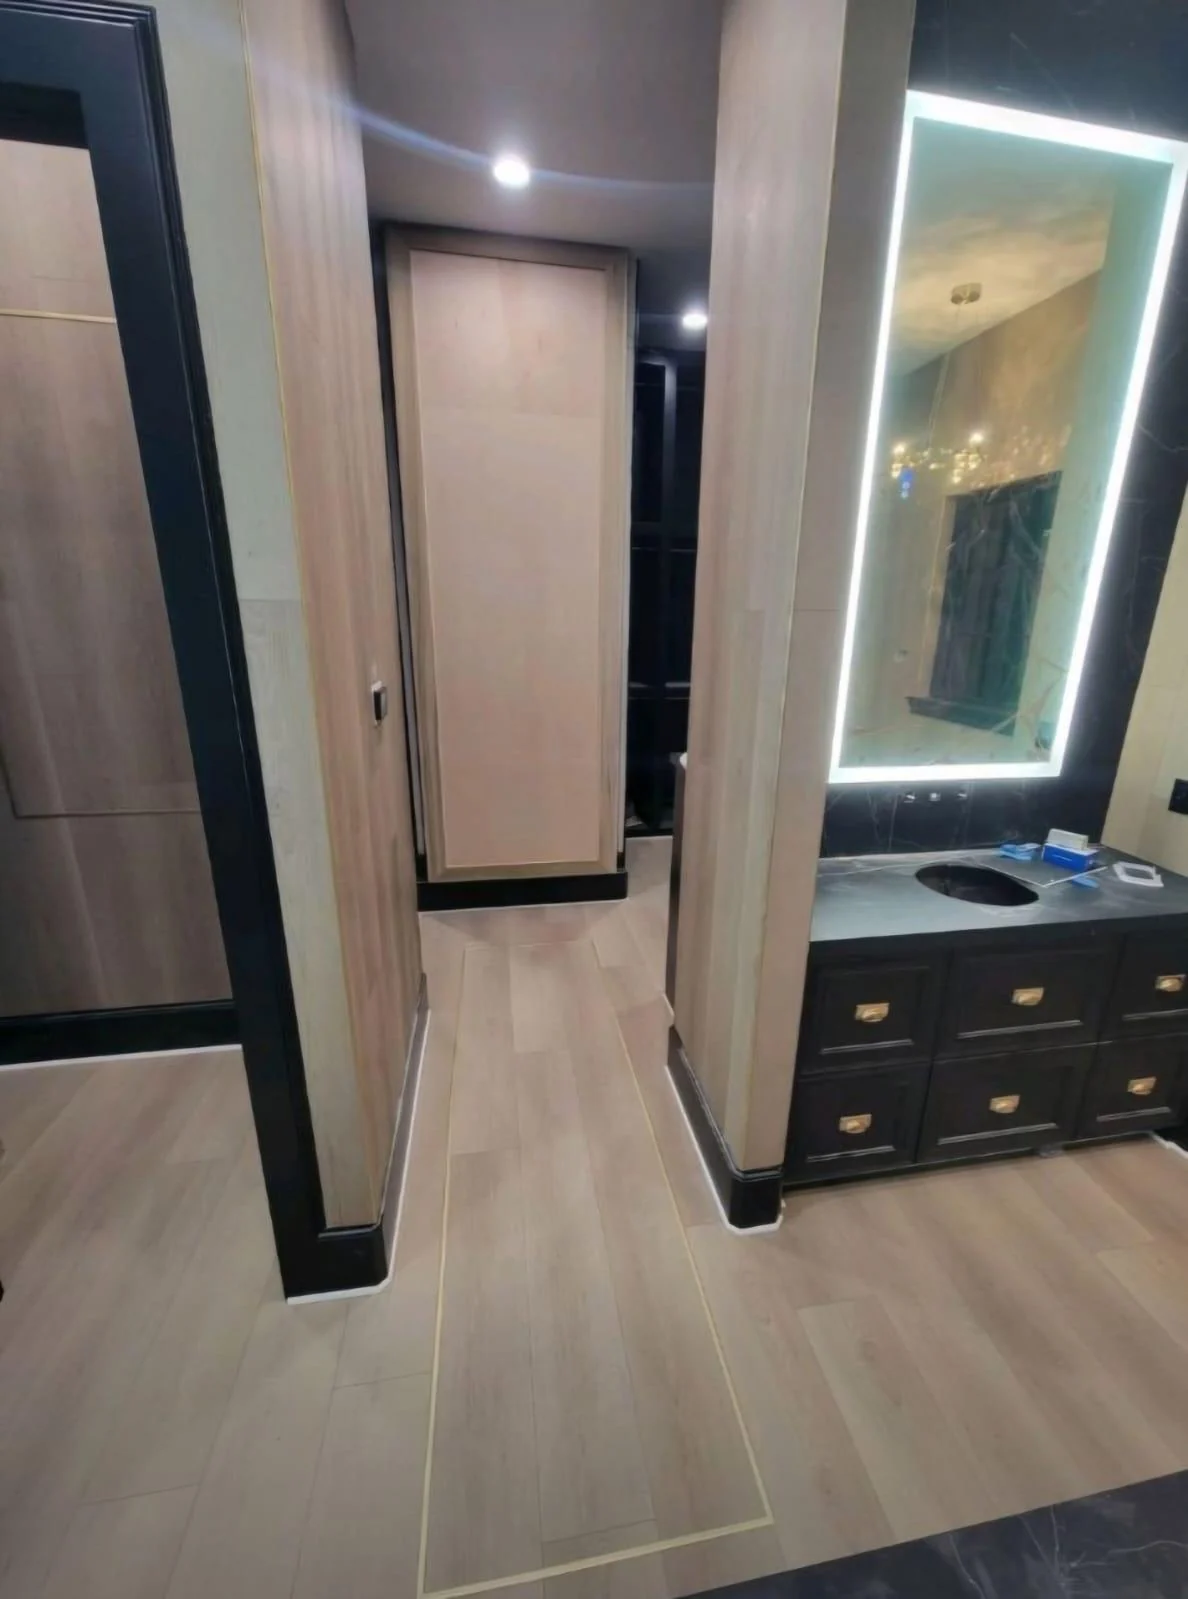
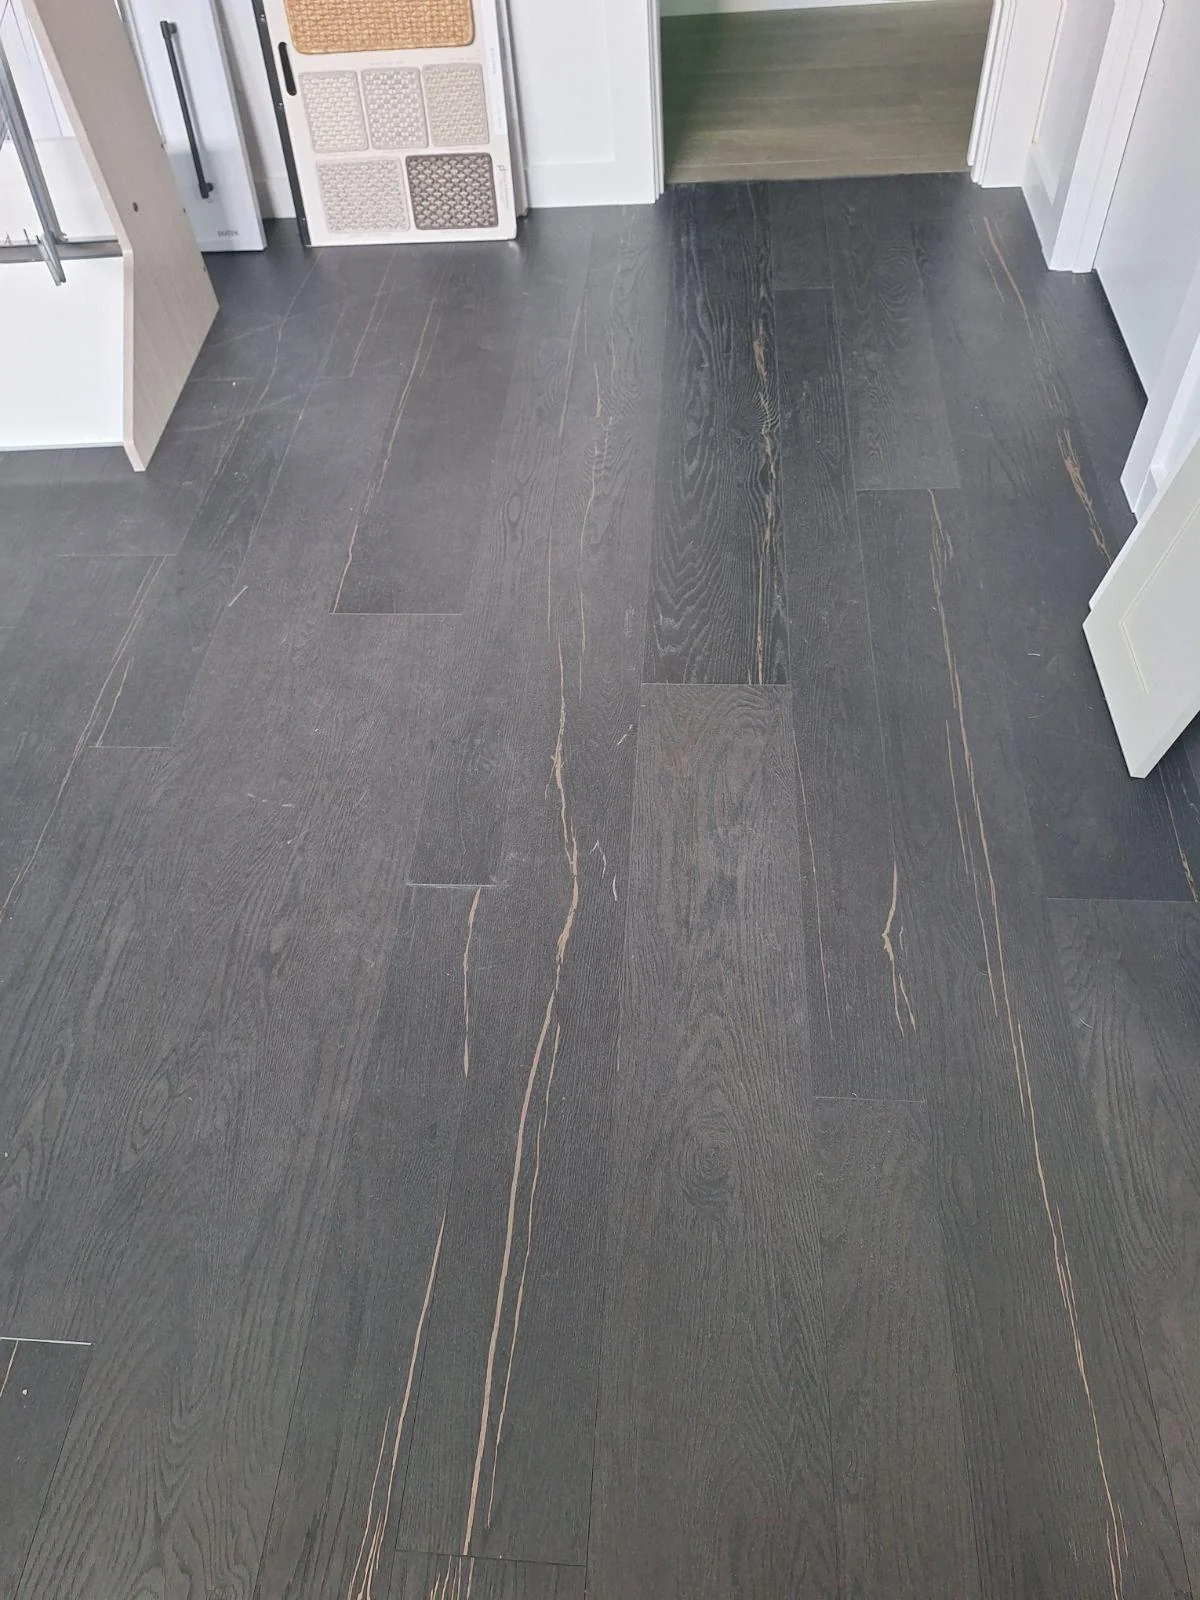
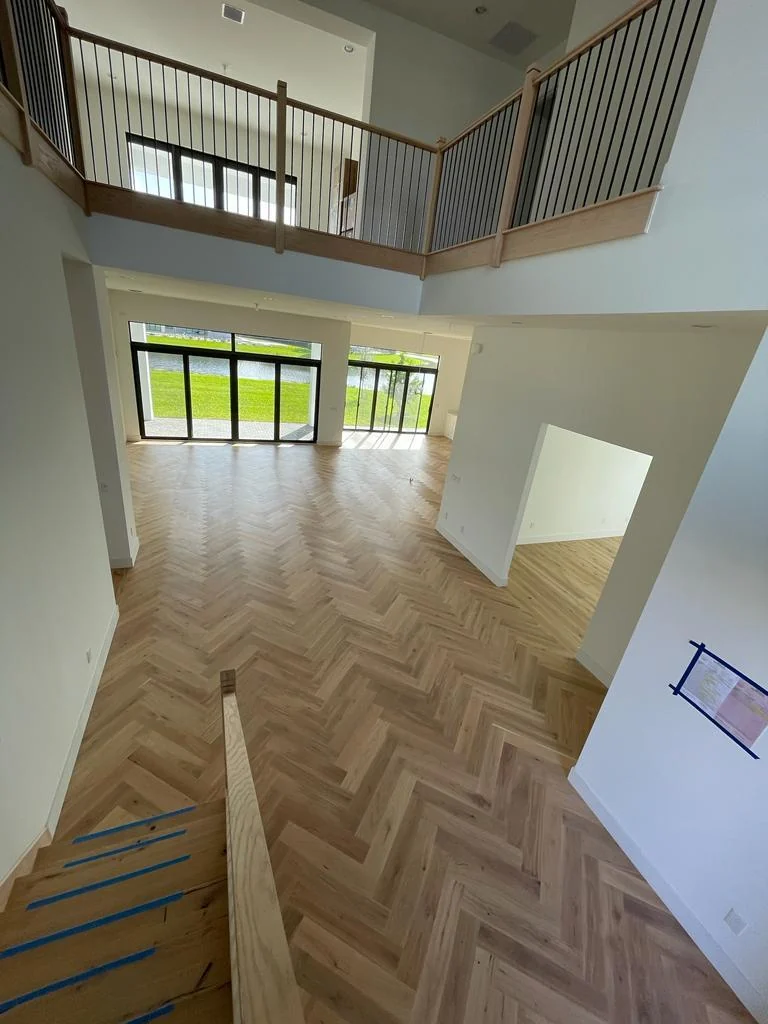
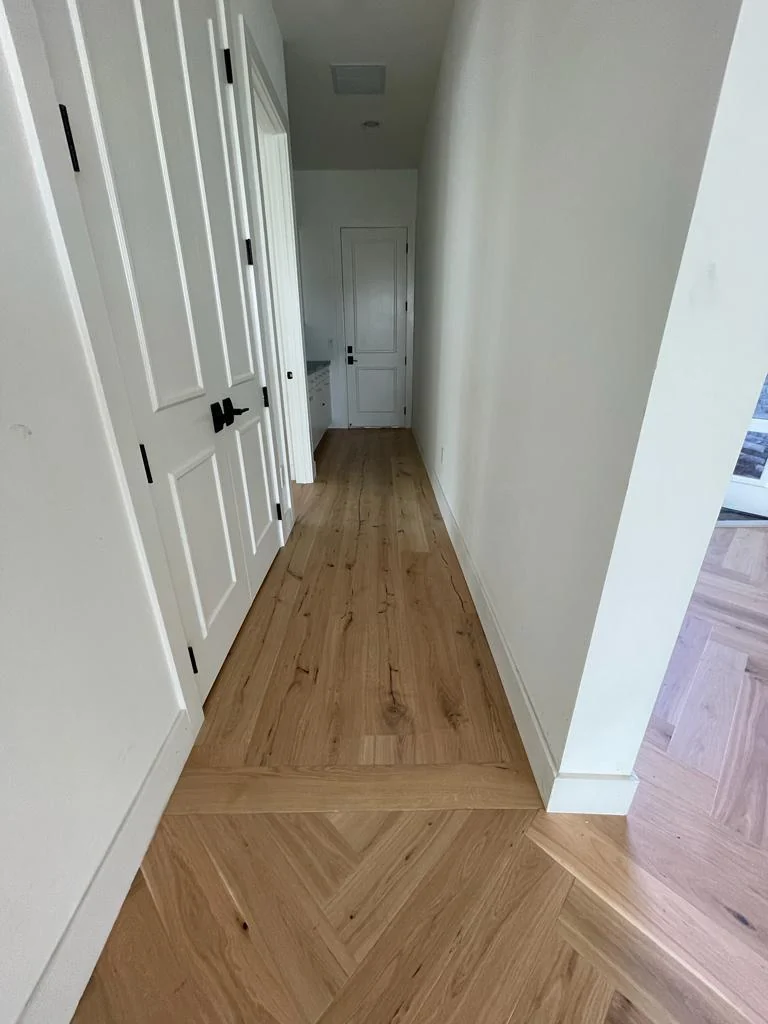
Herringbone flooring running to a stair landing
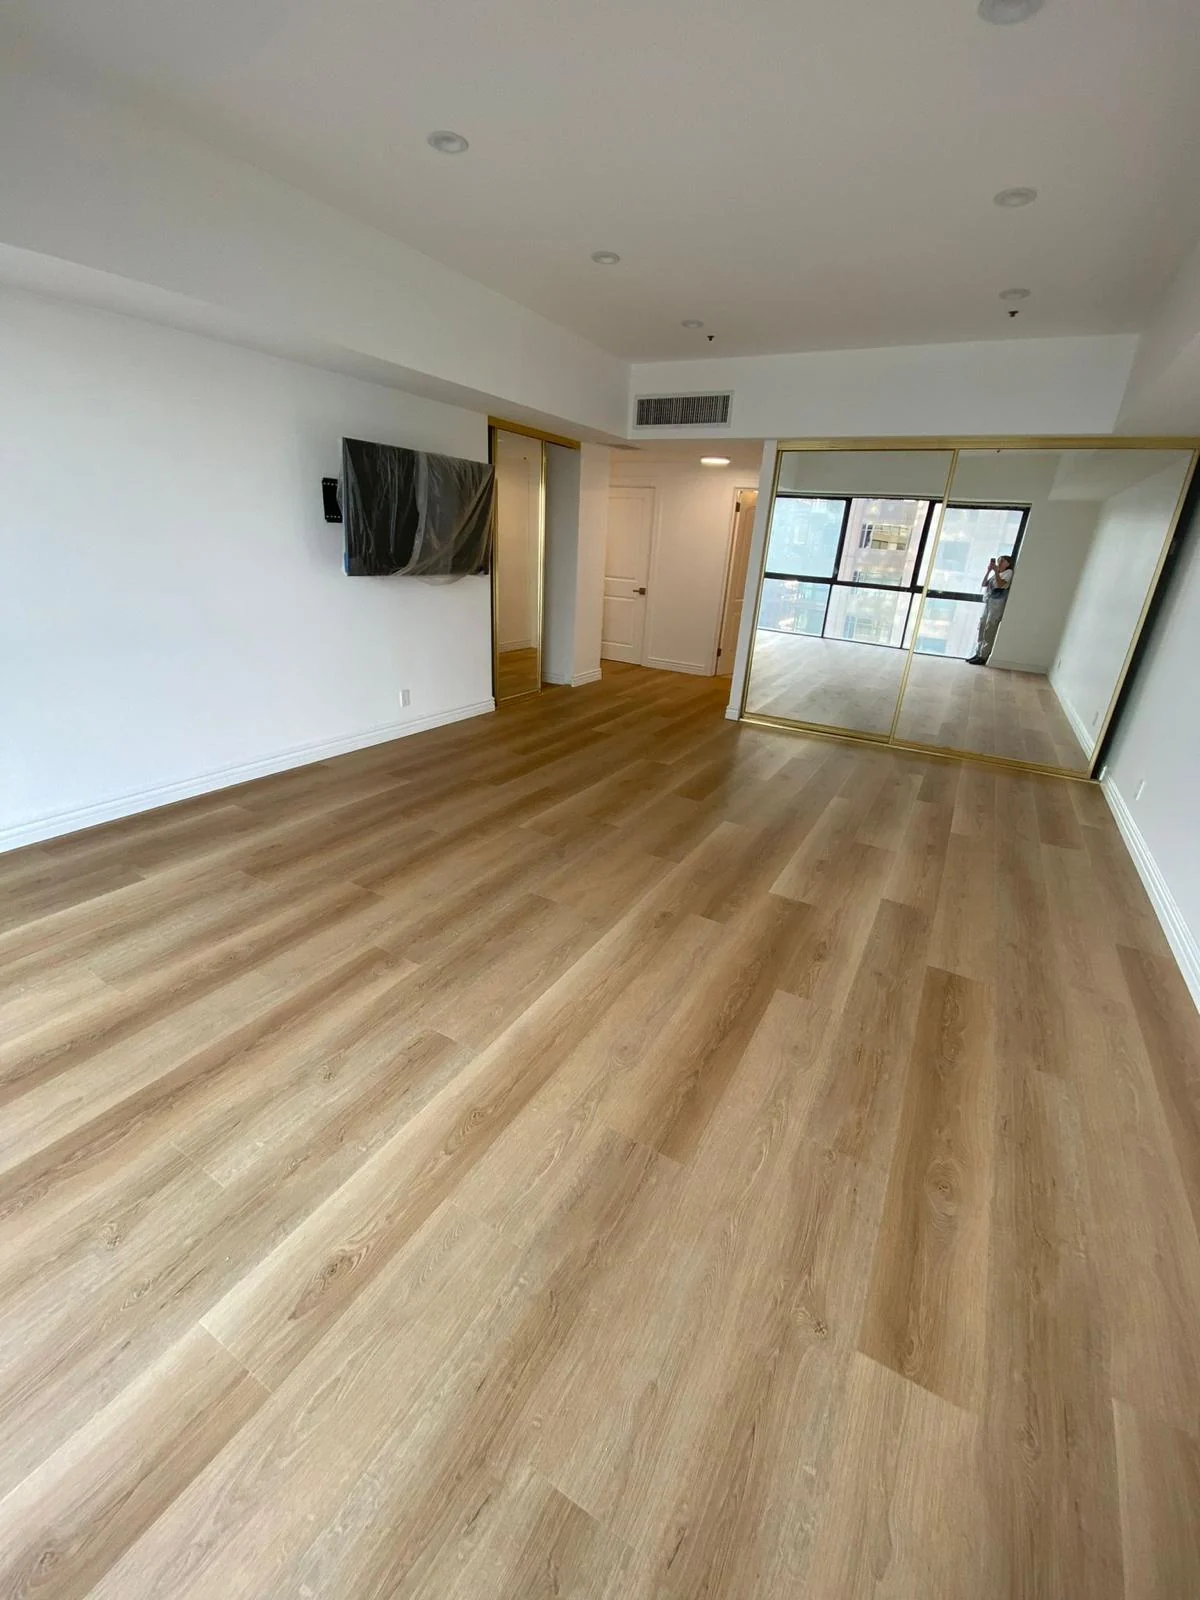
Real completed Elbaz Construction rooms, photographed after handover. They come from different projects, and are shown here for the floors in them — the substrate work beneath each one is not visible in a finished photograph, which is rather the point of this page.
How a wet-area floor is built
Four layers, and only one is visible.
Project record
- Scope
- Kitchen and bathroom flooring, supply and installation
- Build-up
- Substrate · preparation and levelling · waterproofing (wet areas) · finish
- Assessed first
- Flatness, soundness, moisture and movement
- Detailed
- Falls, drains, upstands, transitions and movement joints
- Not included by default
- Structural repairs to a failed subfloor — quoted separately once exposed
What is under there
Slab or timber, its flatness across the room, whether it moves, and whether there is moisture in it. On South Florida slabs, moisture is a genuine consideration for some finishes and irrelevant for others — which is one reason material selection follows the assessment.
Preparation to a tolerance
Levelling compound, priming, and where needed an uncoupling or backer layer. The tolerance is set by the finish: a large-format porcelain tile demands a far flatter substrate than a small mosaic or a plank.
Waterproofing, in wet areas
A continuous membrane system taken into every internal corner, up the upstands, and bonded correctly at the drain. It is a system rather than a product, and its weak point is always a junction rather than the middle of a field.
Laying, grouting, sealing
Setting out so cuts fall sensibly, laying to the correct coverage, then grouting and sealing movement and perimeter joints with the right material rather than grouting them solid.
Want to know what is under your floor before you choose a tile?
The substrate assessment decides which finishes are sensible. It comes first for a reason.
Scope options
Three ways a floor gets scoped.
Planning tiers, not packages. What your room needs is decided by what is under the existing floor.
Overlay
Where the existing floor is sound
The existing floor stays and a new finish goes over it, where build-up height and condition allow.
- Substrate assessment and moisture check
- Cleaning, priming and localised levelling
- Uncoupling or backer layer where required
- New finish laid to an agreed setting-out
- Grouting and sealing
- Transition and threshold details
- Perimeter and movement joints sealed
Strip and rebuild
The common wet-area scope
The existing floor comes up and the build-up is rebuilt properly from the substrate.
- Everything in Overlay, after full removal
- Existing floor and adhesive removed to substrate
- Substrate repaired and levelled to the required tolerance
- Continuous waterproofing system in wet areas
- Falls formed to the drain where applicable
- New finish, grouted and sealed
- Skirting, thresholds and making-good
Rebuilt with the room
Flooring as part of a wider remodel
Where the floor is being done alongside a kitchen or bathroom rebuild, and can be sequenced properly.
- Everything in Strip and rebuild
- Sequenced with plumbing and electrical first fix
- Underfloor heating installed within the build-up
- Drain relocation where the layout changes
- Level changes removed to create a flush floor
- Continuous flooring through adjoining spaces
- Coordinated with cabinetry and sanitaryware installation
Add-ons and upgrades, priced individually
- Underfloor heating within the floor build-up
- Uncoupling membrane over a slab prone to movement
- Epoxy or stain-resistant grout
- Sealing and periodic re-sealing for natural stone
- Anti-slip finishes for wet areas
- Bespoke thresholds and level-change details
- Moisture mitigation where slab readings require it
- Removal and disposal of previous adhesives
The right build-up is decided by the substrate and by the room's use, not by the finish you like the look of.
Room by room
Where these floors ended up.
Completed Elbaz Construction kitchens and bathrooms across South Florida, shown for their floors.
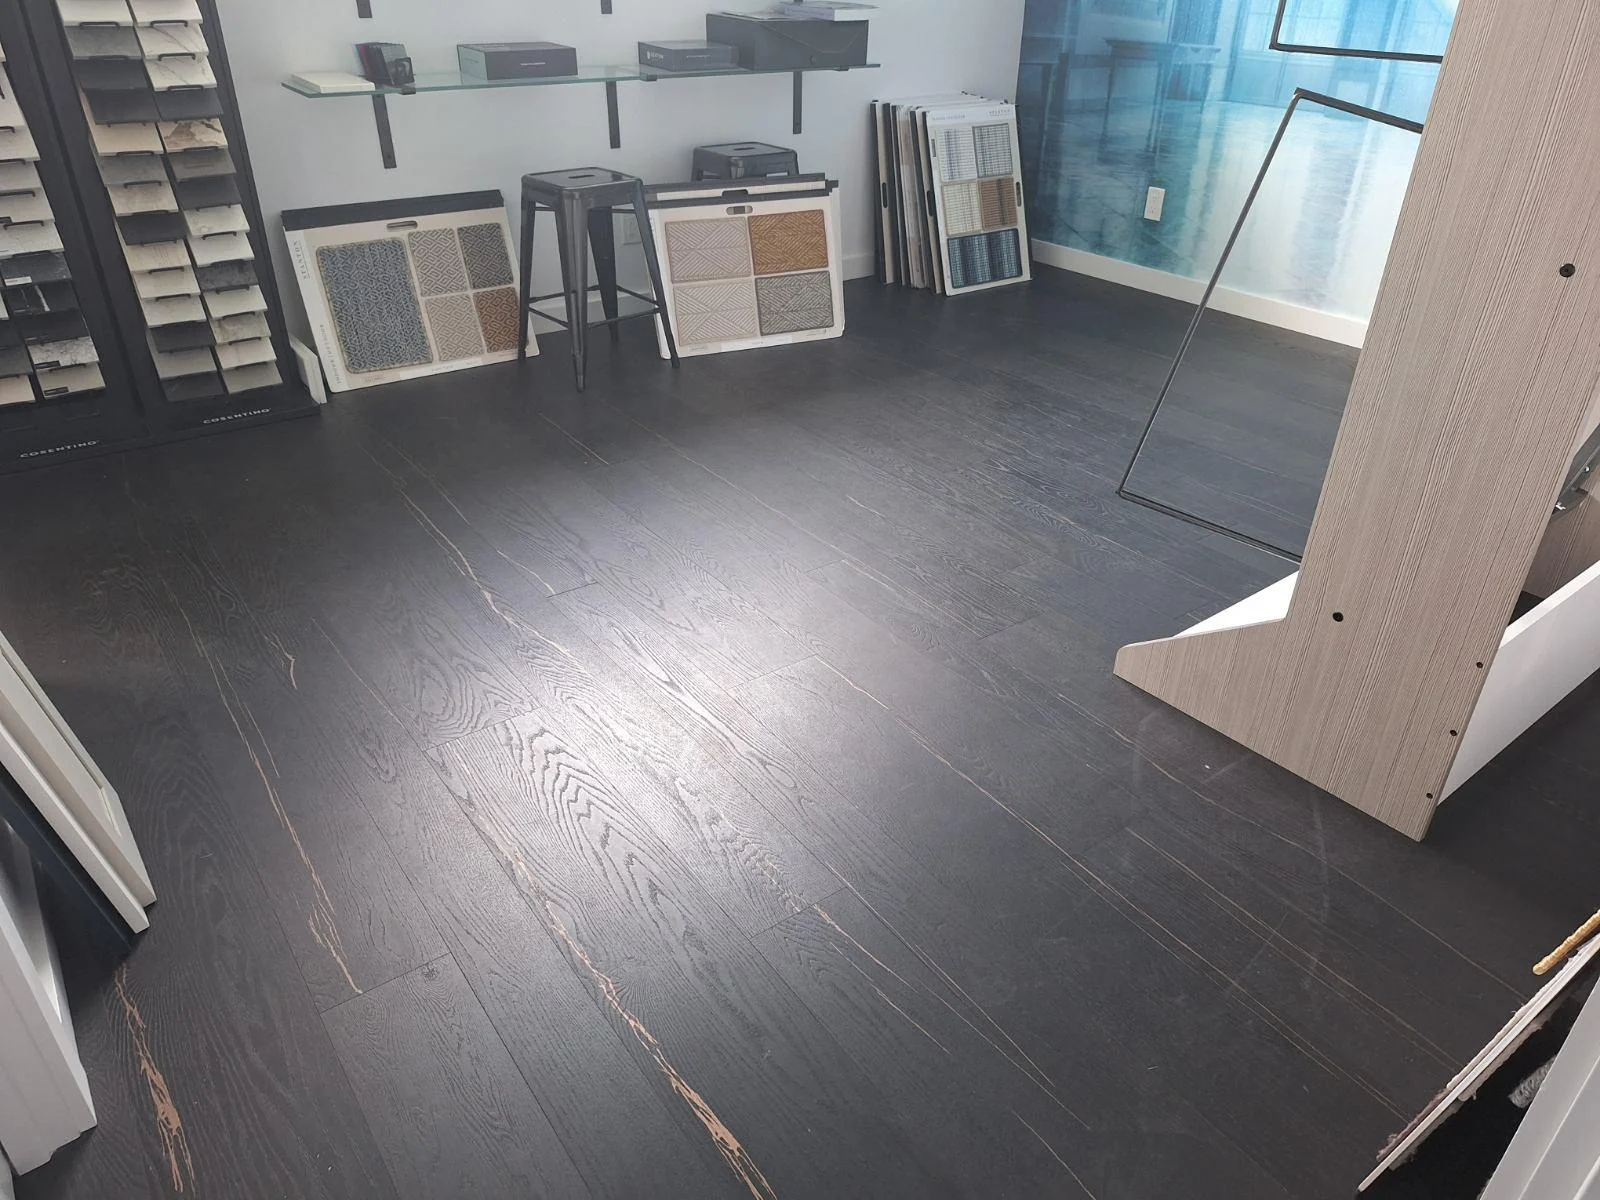
Subfloor preparation
The subfloor decides how the finished floor looks and how long it lasts. It is checked for level, moisture and soundness before a single board or tile is opened.
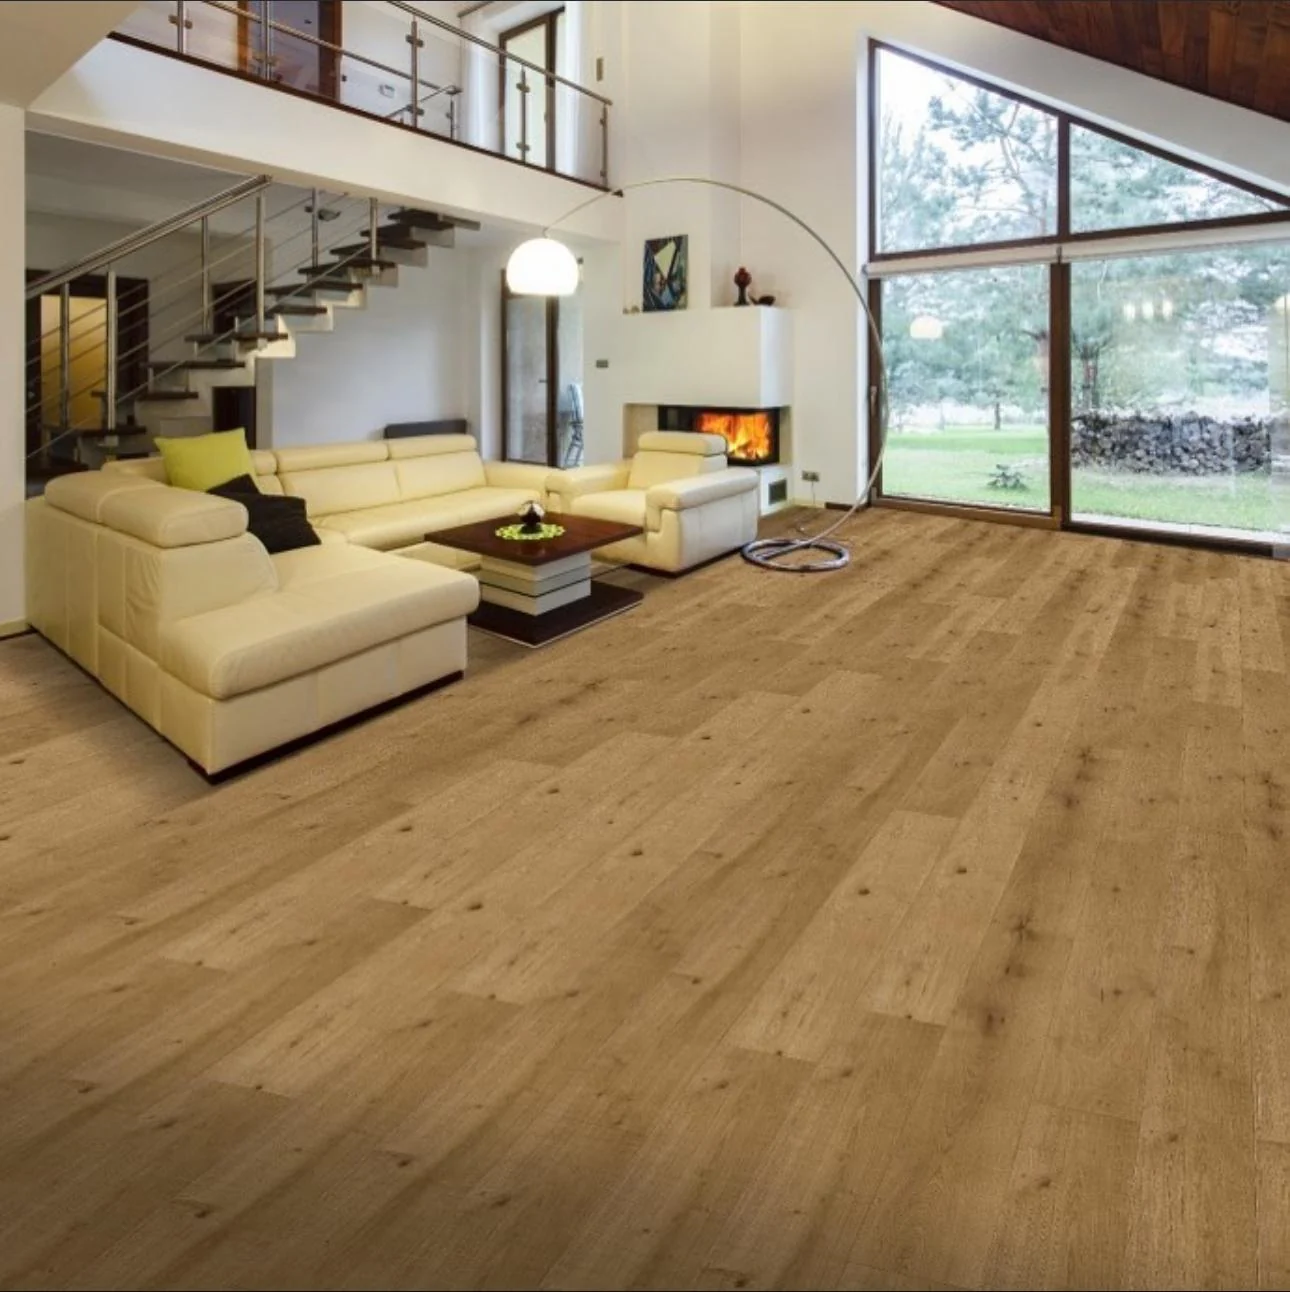
Moisture and slab checks
On a South Florida slab, moisture is measured rather than assumed, and the result decides which adhesives, membranes and underlays are specified.
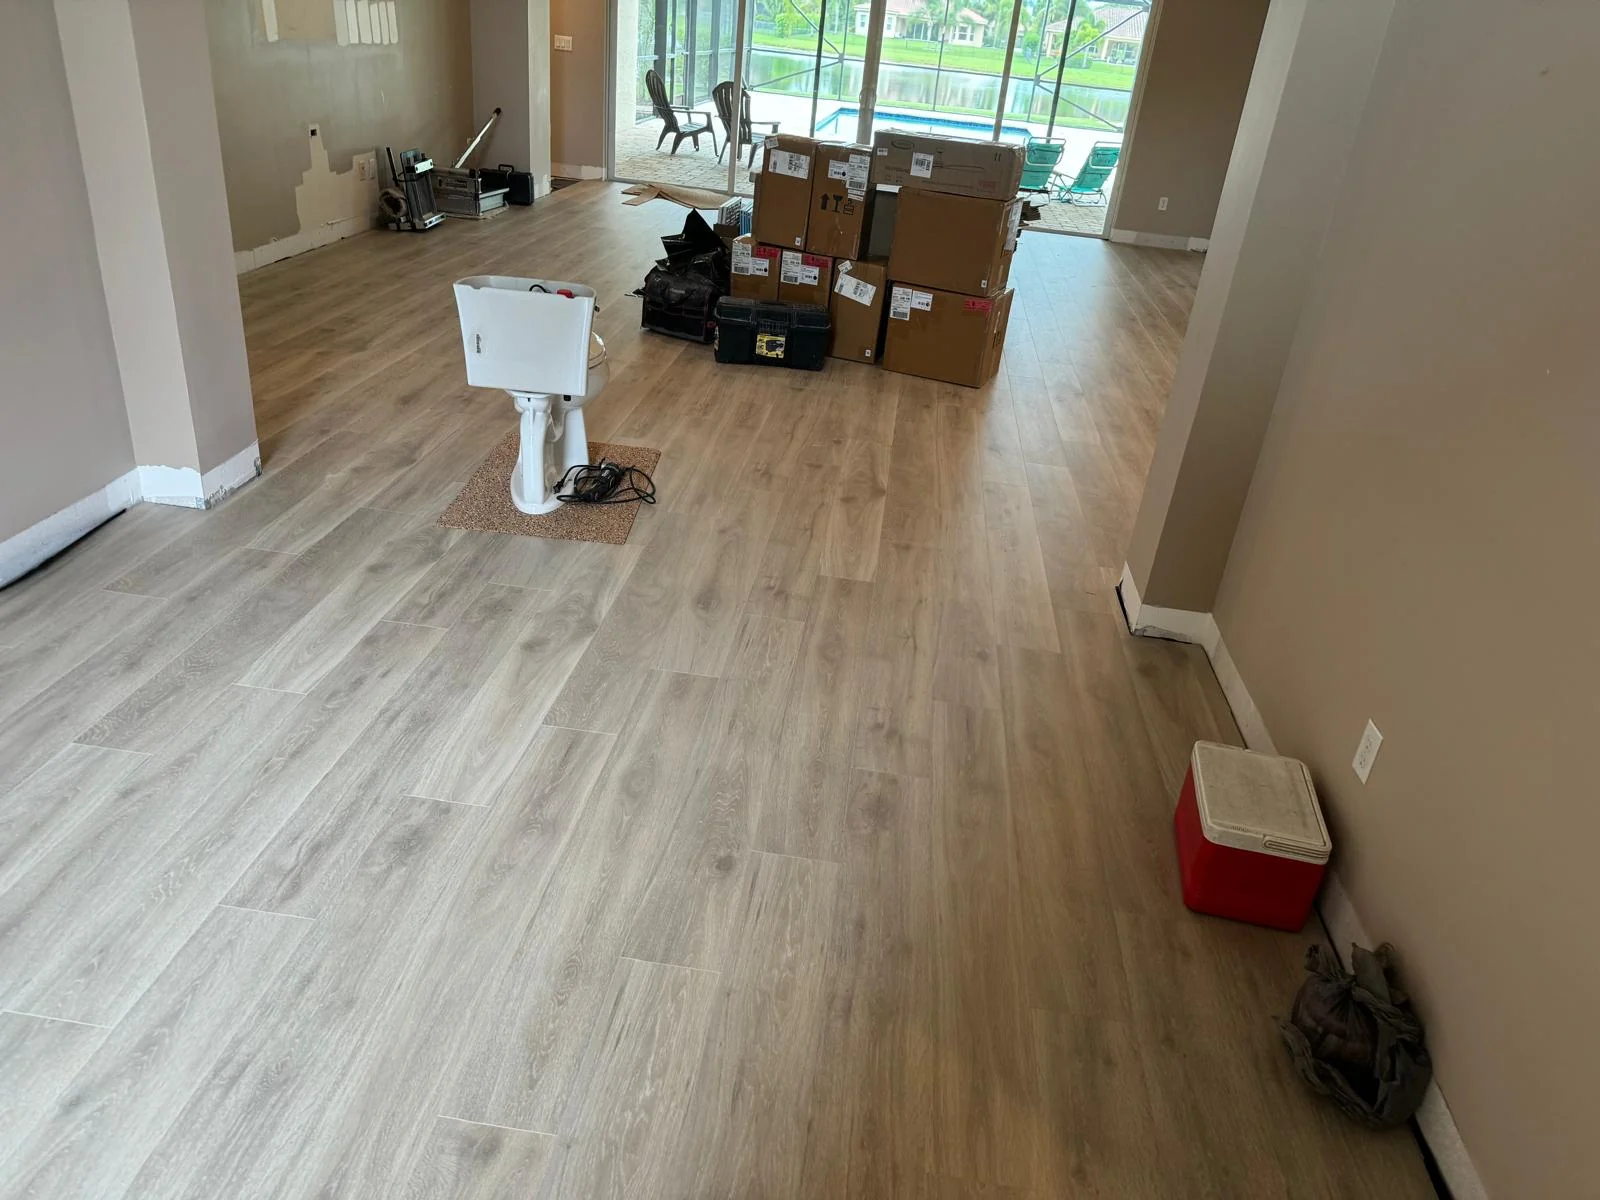
Setting out the run
The direction and starting line are set out against the room, so the first and last boards are a sensible width and the run reads straight from the doorway.
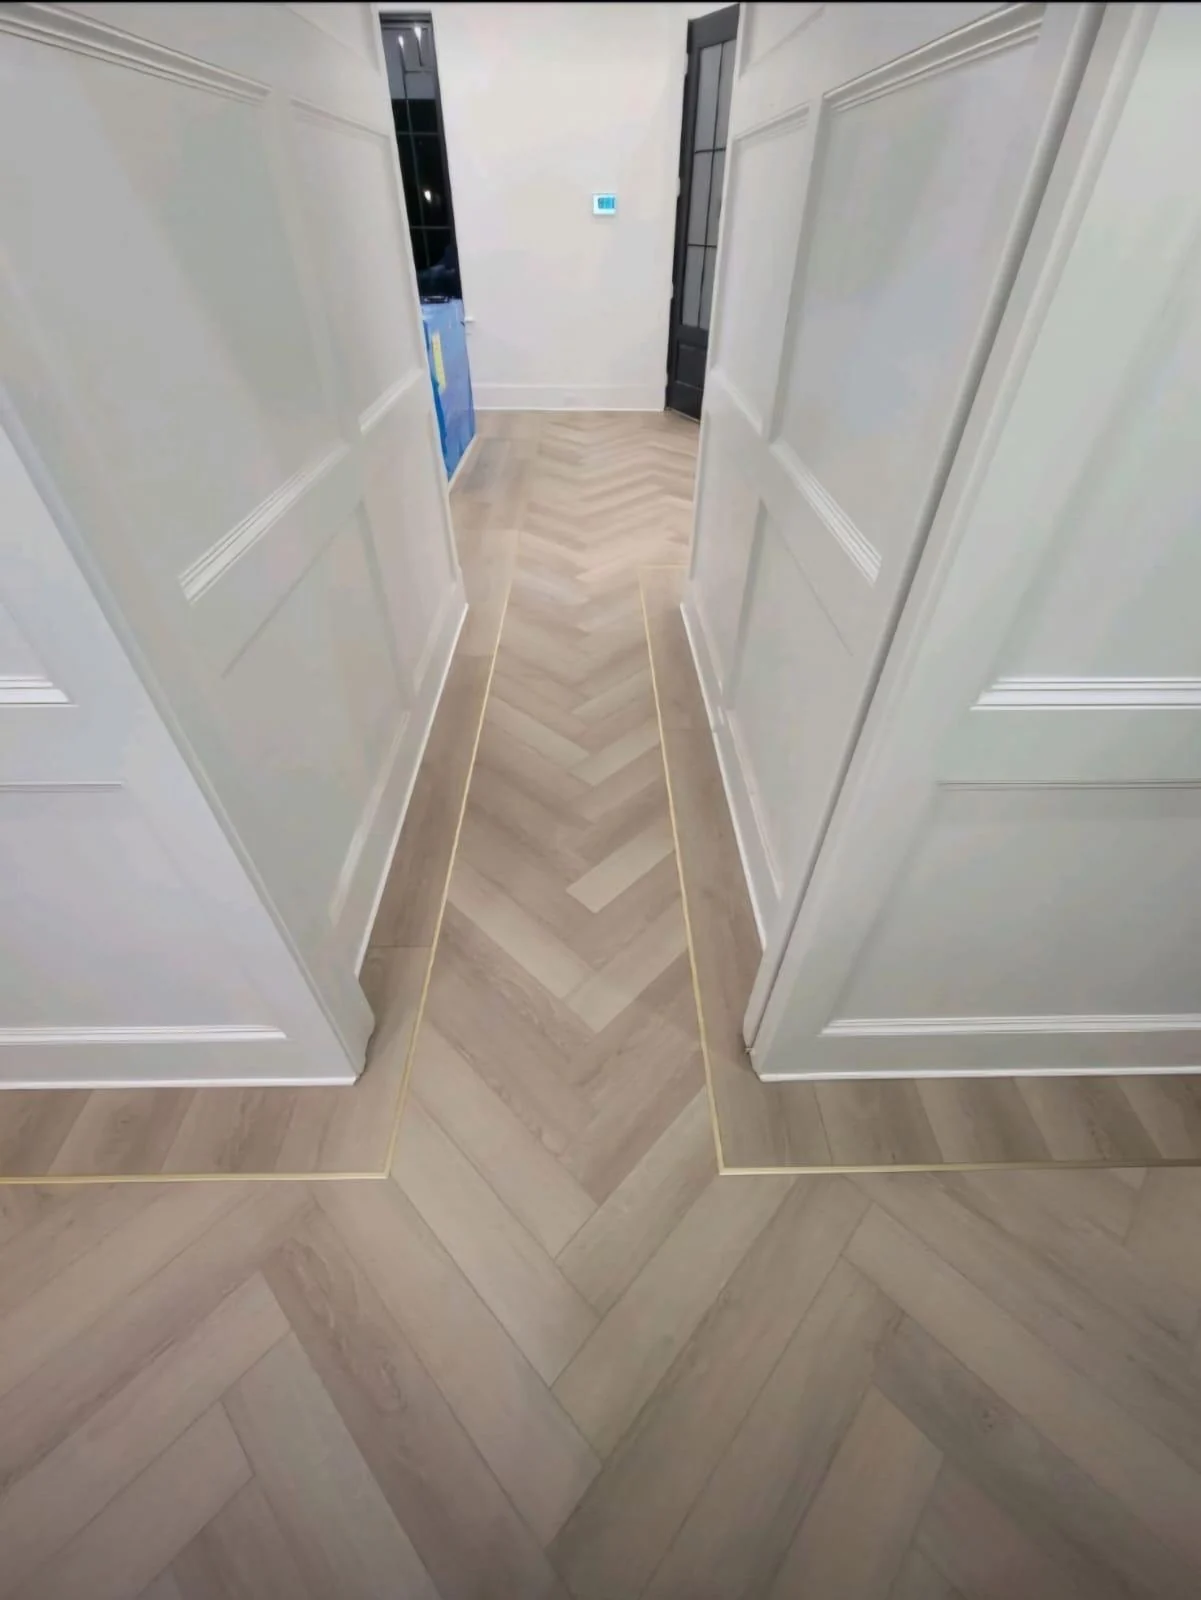
Transitions and thresholds
Where one finish meets another, the junction is planned: flush where it can be, trimmed where it must be, and never left as a lip you can catch a foot on.
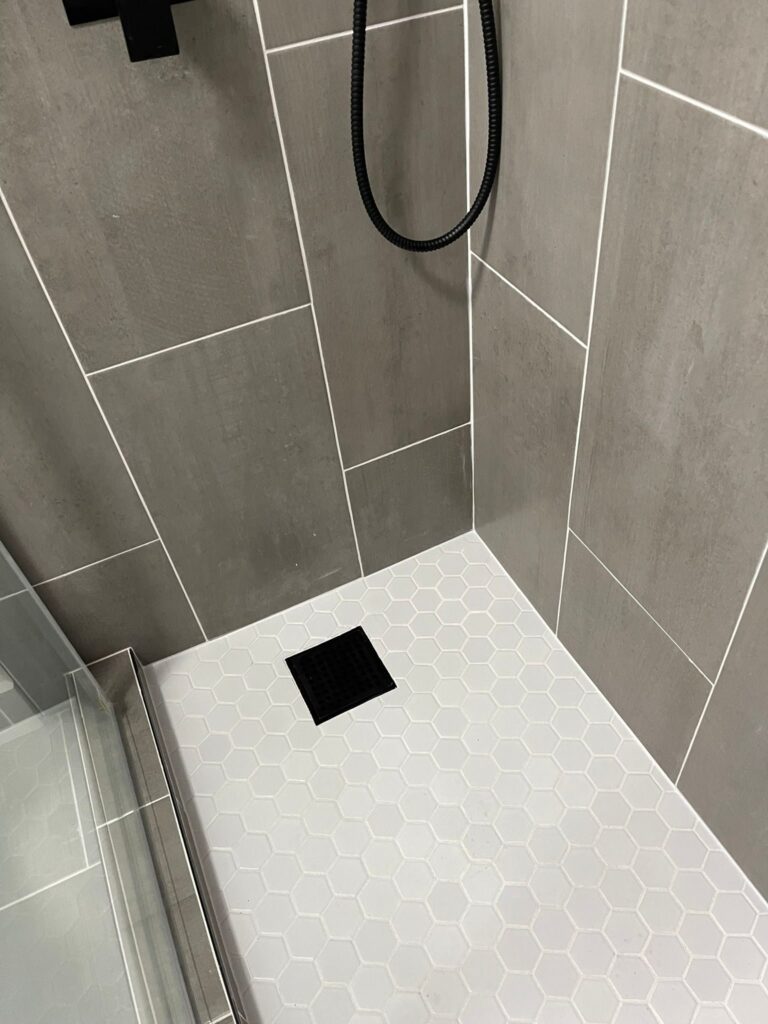
Wet-area floors
Bathroom and laundry floors are laid over a waterproofing system with the falls set to the drain, because that is the part you cannot go back and fix.
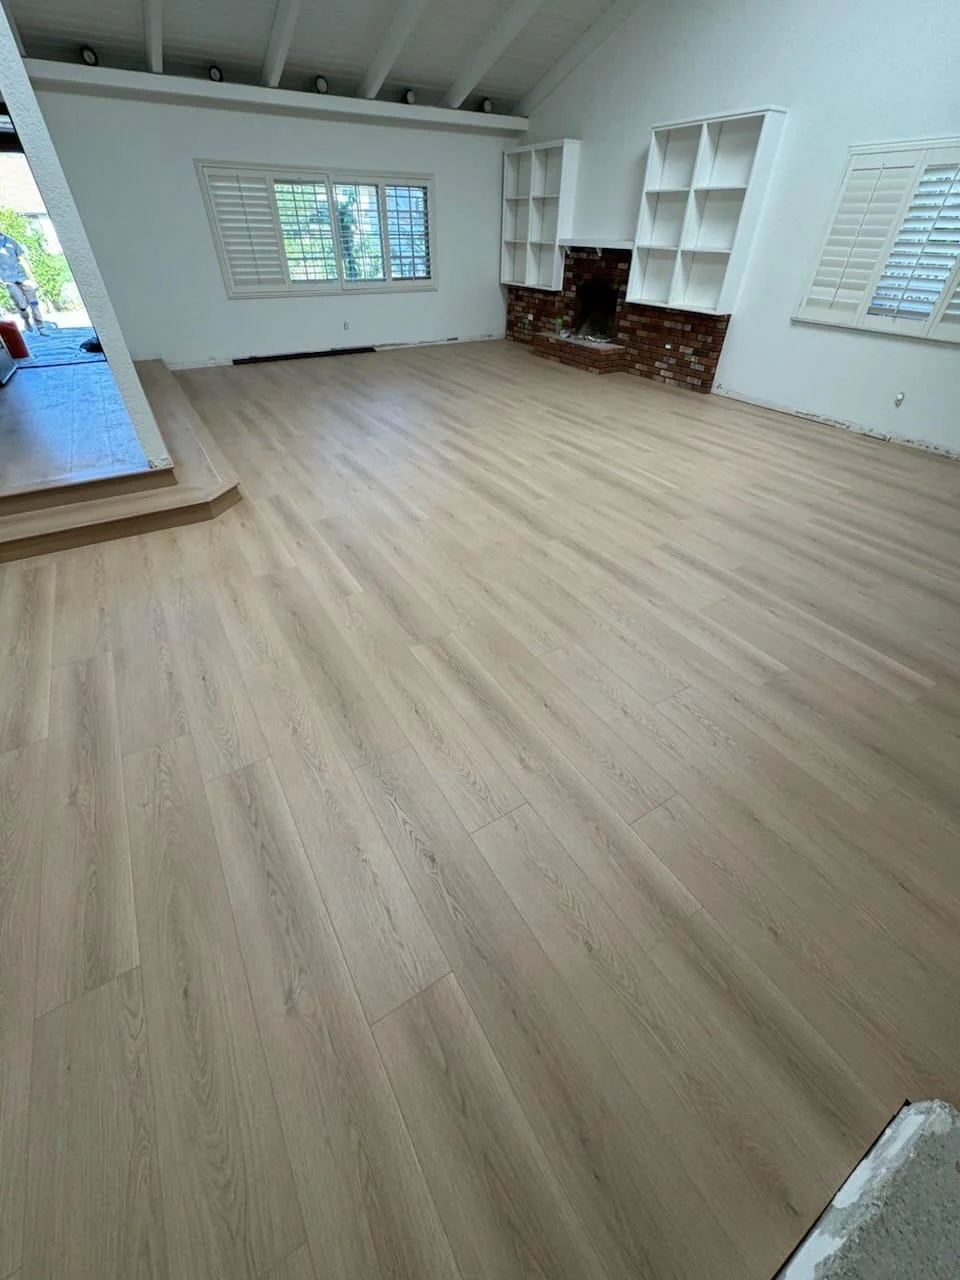
Edges and skirtings
Expansion gaps are left where the material needs them and covered properly at the perimeter, so the floor can move without opening a gap in the middle of the room.
Genuine photographs of completed Elbaz Construction rooms from different projects, shown individually.
Process and client experience
Ten stages, substrate to sealant.
Flooring is one of the shorter trades, but it sits on top of everything and everything sits on top of it.
Initial consultation
We look at the rooms, the existing floor and what is prompting the change.
About forty minutes. Note anything that cracks, lifts, sounds hollow or smells damp.
Whether to proceed to a substrate assessment.
Substrate assessment
Flatness measured, soundness checked, moisture tested where relevant, movement assessed.
QC · Flatness is measured rather than eyeballed, because the finish format depends on it.A clear picture of what is actually under the existing floor.
Nothing yet.
Material selection
Finishes shortlisted against the substrate, the room's use and slip requirements.
A short list that will actually work, not just look good.
Material, format, finish and grout.
Setting-out
Where the pattern centres and where cuts fall, agreed before anything is ordered.
A drawing rather than an improvisation on the day.
Layout preferences and any feature areas.
Proposal
An itemised proposal separating removal, preparation, waterproofing and finish.
A proposal you can compare like for like.
Allowance levels and scope trade-offs.
Ordering
Material ordered with wastage allowance and batch consistency confirmed.
QC · Batch numbers are checked so the whole floor comes from one run.Lead time on specialist and imported materials.
Nothing further.
Protection and removal
Route and adjacent rooms protected; existing floor and adhesive removed.
The dustiest stage. Removal of old adhesive is often the hardest part.
Nothing.
Preparation and waterproofing
Substrate repaired and levelled to tolerance; waterproofing system installed in wet areas.
QC · Waterproofing junctions are photographed before the finish covers them.The stage that decides whether the floor lasts, and the one nobody photographs.
Nothing.
Laying and grouting
Finish laid to the agreed setting-out, then grouted.
QC · Coverage and flatness are checked as laying proceeds, not afterwards.The room transforms in a day or two.
Only late confirmations.
Sealing, transitions and handover
Movement and perimeter joints sealed, thresholds fitted, floor cleaned and handed over.
QC · Movement joints are sealed with sealant rather than grouted solid.Aftercare guidance for the specific material.
Sign-off at completion.
Where flooring forms part of a permitted remodel, the inspections belong to that wider permit.
Planning and risk reduction
Everything that fails was decided before laying.
Wet-area flooring gives very little warning. The decisions that determine its life are all made before the first tile goes down.
The paperwork sequence, in order
- Substrate assessmentFlatness, soundness, moisture and movement established by measurement.
- Build-up height checkWhat the finished level can be, and how it affects doors and transitions.
- Material selectionFinish chosen against substrate condition, room use and slip requirements.
- Tolerance requirementThe flatness the chosen format requires, written down before preparation.
- Waterproofing specificationA single compatible system for membrane, corners, upstands and drain.
- Falls and drainageFalls formed in the substrate where a floor drain is involved.
- Setting-outPattern centres and cut positions agreed on paper.
- Movement joint layoutPerimeter and field joints planned, not improvised.
- Transition detailsHow the floor meets adjoining finishes and level changes.
- Batch verificationMaterial checked to be from a consistent batch before laying.
- DocumentationWaterproofing junctions photographed before they are covered.
- AftercareSealing and cleaning guidance for the specific material at handover.
Why each step exists
Large-format tile fails visually on lipping long before it fails structurally. The tolerance is a number, not an impression.
Mixing membrane, corner tape and sealant from different systems is where wet-area failures start. Compatibility matters.
A grouted movement joint is not a movement joint. It will crack, and the crack will track across the floor.
Tile colour and size vary between production runs. A floor laid from two batches shows it, permanently.
We will not specify a large-format tile onto a substrate nobody has measured. We will not promise a floor over an unassessed subfloor. And we will not tell you a wet-area floor can be laid without a proper waterproofing system just because the previous one was.
Cost and timeline transparency
What drives a flooring number.
We do not publish flooring prices. Preparation, not material, is what most often separates two quotes for the same room.
Substrate condition
Levelling, repair and adhesive removal. Routinely the largest variable, and the one most often omitted from a cheap quote.
Material and format
Ceramic, porcelain, natural stone and LVP differ enormously, and large formats cost more to lay as well as to buy.
Waterproofing scope
How much of the room is a wet area, and whether upstands, benches and a drain are involved.
Removal of the existing floor
Tile bedded in thick mortar is far harder to remove than tile on adhesive, and old adhesive removal is labour-heavy.
Room complexity
Cuts around cabinetry, sanitaryware, thresholds and pipework, and how many of them there are.
Falls and drainage
Forming falls to a drain in the substrate rather than relying on the finish.
Underfloor heating
Adds material, build-up height, an electrical connection and commissioning.
Grout specification
Epoxy-based grouts cost more in material and considerably more in labour to install well.
Level changes and transitions
Bespoke thresholds and removing level changes to create a flush floor.
Access and disposal
Getting material in and heavy waste out, particularly above ground floor.
Typical influence on a South Florida kitchen or bathroom flooring budget. General guidance for planning — not a quote.
What actually moves the schedule
- Removal of the existing floor and adhesive, which is routinely underestimated.
- Levelling compound and waterproofing cure times, which cannot be compressed.
- Material lead times, particularly for imported stone and specialist formats.
- Whether the room is being used, which caps how much can happen at once.
- Sequencing around plumbing and cabinetry when the floor is part of a wider remodel.
Questions worth asking any contractor
- Has the substrate flatness been measured, and to what tolerance?
- What waterproofing system is being used, and is it one manufacturer's system throughout?
- How are falls to the drain being formed?
- Where will the cuts fall — will I see a setting-out?
- Are movement and perimeter joints being sealed or grouted?
- Is removal of the old adhesive included?
- What aftercare does this material need?
How to prepare for an accurate estimate
- Note anything that cracks, lifts, sounds hollow or smells damp.
- Find out what the existing floor is laid on, if you know.
- Decide whether the finished level must match adjoining rooms.
- Think about slip resistance if anyone in the house is unsteady.
- Decide whether underfloor heating is wanted, since it changes the build-up.
- Shortlist materials by maintenance appetite as well as appearance.
Estimates follow scope, not the other way round.
We price against a drawn scope, with allowances stated as allowances. That is what makes a proposal comparable to anyone else’s.
How a wet-area floor is built
The build-up, drawn.
Only the top band is visible when the floor is finished, and every failure people report starts in one of the bands beneath it.
Diagram drawn by Elbaz Construction for this page. Illustrative of a typical wet-area build-up; specific systems vary by substrate and finish.
Every band does a job
- Structural substrate. What everything sits on. Its flatness, movement and moisture decide which finishes are sensible.
- Preparation and levelling. Brings the substrate to the tolerance the chosen format needs. Skipping it is why floors lip.
- Waterproofing system. In wet areas, one compatible system taken continuously into corners, up upstands and into the drain.
- Adhesive bed. The right adhesive at full coverage. Voids under tile are where cracks and hollow spots begin.
- Finish, grout and joints. The visible layer — plus the movement and perimeter joints that must be sealed rather than grouted.
At the junctions in band three and the coverage in band four. Neither is visible once the floor is down, which is why both are checked and photographed before the finish covers them.
Comparison, mistakes and buyer guide
Choosing a wet-area floor.
The four common kitchen and bathroom floor finishes in South Florida
| Factor | Porcelain | Ceramic | Natural stone | LVP |
|---|---|---|---|---|
| Water resistance | Very low porosity; excellent. | Good, but more porous than porcelain. | Varies by stone; needs sealing. | Waterproof as a material. |
| Hardness and wear | Very hard, excellent in kitchens. | Softer; can chip under point loads. | Varies; some stones mark easily. | Softer surface; can dent. |
| Underfoot | Cool and hard. | Cool and hard. | Cool and hard. | Warmer and quieter. |
| Maintenance | Minimal beyond grout cleaning. | Minimal beyond grout cleaning. | Periodic sealing required. | Simple, but seams matter. |
| Substrate demand | High for large formats — needs a flat base. | Moderate. | High; also heavy. | Very high — telegraphs every deviation. |
| Typical cost | Middle. | Lowest. | Highest. | Low to middle. |
| Best suited to | Kitchens and bathrooms generally. | Budget-conscious bathrooms. | Statement rooms where maintenance is accepted. | Where warmth, quiet and cost matter most. |
Grout choices, on what you will notice
| Factor | Cement-based | Epoxy-based |
|---|---|---|
| Stain resistance | Absorbs; needs sealing and shows in wet areas. | Highly resistant; the usual choice around sinks and showers. |
| Installation | Straightforward. | Demanding and time-critical; costs more in labour. |
| Colour stability | Can lighten or discolour over time. | Holds colour well. |
| Repair | Easy to rake out and replace. | Harder to remove. |
| Cost | Lower. | Higher, in both material and labour. |
The mistakes that cost the most
- Choosing large-format tile for an unmeasured floorThe bigger the tile, the flatter the substrate must be. Lipping cannot be fixed after laying — only relaid.
- Mixing waterproofing productsMembrane from one system, corner tape from another and sealant from a third is where wet-area failures start.
- Grouting the movement jointsA grouted movement joint will crack, and the crack will travel.
- Laying over failed adhesiveNew floors laid over old adhesive that is already letting go inherit the failure.
- Ignoring slip resistanceA finish chosen dry can be dangerous wet, particularly in a bathroom.
- Not checking batch numbersColour and size vary between production runs, and a two-batch floor shows it permanently.
- Forgetting build-up heightA thicker build-up can mean doors that no longer clear and thresholds that no longer work.
- Skipping the setting-outWhere the cuts land is a design decision. Left to the day, it lands wherever the first tile started.
Buyer checklist
Prepare before you call
Ask at the first meeting
Expect from a qualified contractor
Tick these off as you go — nothing is stored or sent, the list is here purely so you can use it while you compare contractors.
What the work is like
Dust first, then transformation.
Removal is the worst part
Taking up an old floor and its adhesive is the dustiest, noisiest stage, and usually the one that takes longest. Everything after it is comparatively calm.
Cure times are not padding
Levelling compounds and waterproofing systems have cure times that cannot be compressed. A programme that ignores them produces a floor that fails.
Preparation you can do
Clear the rooms completely, take up anything loose, and give us a route in and out for materials and heavy waste.
Quality control, not just inspection
Substrate flatness is measured before laying, adhesive coverage is checked as work proceeds, and waterproofing junctions are photographed before they are covered.
What completion means
Movement joints sealed properly, thresholds fitted, the floor cleaned, and aftercare guidance for the material you chose.
Questions, answered
Kitchen and bathroom flooring in South Florida.
Sometimes. It depends on whether the existing floor is sound and well bonded, and on whether the extra build-up height causes problems with doors, thresholds and adjoining rooms.
In wet areas it is more often better to remove, because a new waterproofing system needs to start from the substrate.
Porcelain is the usual answer for wet areas — very low porosity, hard-wearing and available in slip-rated finishes. Natural stone is beautiful but needs sealing, and LVP is warmer underfoot but demands a very flat substrate.
The comparison table above sets out the real differences.
A wet area does, yes, as a continuous system taken into corners, up upstands and correctly detailed at any drain. Tile and grout are not a waterproof layer — water passes through grout.
Because tile is rigid. Any deviation in the substrate shows as lipping between adjacent tiles, and the larger the format the worse it looks. The only remedy after laying is relaying.
Usually movement — either in the substrate or at a junction where a movement joint should have been left and sealed rather than grouted solid. Occasionally it is adhesive coverage, leaving voids under the tile.
Yes, within the floor build-up. It affects the build-up height, needs an electrical connection and has to be commissioned, so it is decided before preparation rather than added later.
It depends on removal difficulty and cure times more than on laying. Levelling and waterproofing systems have cure periods that cannot be shortened, and grouting and sealing follow laying.
Flooring alone generally does not require a permit. Where it forms part of a wider bathroom or kitchen remodel involving plumbing or electrical work, it falls under that permit.
Worth specifying deliberately in bathrooms and around sinks, especially with children or anyone unsteady. Tiles are tested for slip performance and the rating is available — it is not something you can judge by looking.
In wet areas and around sinks it resists staining considerably better and holds its colour. It costs more in material and noticeably more in labour, because it is demanding to install well.
We can advise on how close a match is achievable, but exact matches across production runs and ranges are rarely possible. Often a deliberate transition detail looks better than a near-miss.
It depends on the material. Porcelain is close to maintenance-free beyond grout cleaning; natural stone needs periodic sealing; LVP needs care at seams. We hand over aftercare guidance for what you chose.
Why Elbaz Construction
Verified, and nothing more than that.
- Licensed general contractorFlorida-licensed general contractor, License No. CBC1265280. Bonded and insured.
- Substrate measured, not eyeballedFlatness is a number, and the chosen format decides what that number has to be.
- One waterproofing systemMembrane, corners, upstands and drain from one compatible system rather than assembled from parts.
- Setting-out agreed firstWhere the cuts fall is a design decision made on paper, not on the day.
- Local knowledgeWorking across 104 municipalities in Miami-Dade, Broward and Palm Beach counties.
- CommunicationOne point of contact from first conversation through closeout.
- Documented before coveringWaterproofing junctions photographed before the finish hides them.
- Reviews you can readA 4.8 average across 343 Google reviews, published in full on Google.
What homeowners say
Reviews, unedited.
Published on Google, quoted here word for word. We do not shorten, merge or rewrite a review.
Read all 343 reviews on Google
Highly recommended for any bathroom or kitchen projects! Raz is very knowledgeable at this field and gave us wonderful ideas for the design. It was done in a timely manner. Thank you !!
Sean has experience and he gave me the best ideas for my kitchen and bathroom project. He did high quality Job . We are very satisfied
Very satisfied with my bathroom and the way it looks now they crew was very professional, The service was quick, and the staff was friendly , The customer service staff went above and beyond , The customer support was fantastic! They quickly resolved my bathroom issues and were very friendly , highly recommended!!
Asher was knowledgeable and gave us cool ideas that we didn't even know before. Nice beautiful color and design. We appreciate the price !
Related reading and services
- Related serviceTile Flooring Installation
- Related servicePorcelain Flooring Installation
- Related serviceLuxury Vinyl Plank Flooring
- Related serviceFlooring Removal & Subfloor Repair
- Related serviceFull Kitchen Remodel
- Related serviceFull Bathroom Remodel
- CategoryFlooring
- Related serviceWhole-Home Renovation
- Related serviceCustom Flooring Design
Service Areas
Proudly serving homeowners across Miami-Dade, Broward and Palm Beach
- Aventura
- Bal Harbour
- Bay Harbor Islands
- Biscayne Park
- Coral Gables
- Cutler Bay
- Doral
- El Portal
- Florida City
- Golden Beach
- Hialeah
- Hialeah Gardens
- Homestead
- Indian Creek
- Key Biscayne
- Medley
- Miami
- Miami Beach
- Miami Gardens
- Miami Lakes
- Miami Shores
- Miami Springs
- North Bay Village
- North Miami
- North Miami Beach
- Opa-locka
- Palmetto Bay
- Pinecrest
- South Miami
- Sunny Isles Beach
- Surfside
- Sweetwater
- Virginia Gardens
- West Miami
- Coconut Creek
- Cooper City
- Coral Springs
- Dania Beach
- Davie
- Deerfield Beach
- Fort Lauderdale
- Hallandale Beach
- Hillsboro Beach
- Hollywood
- Lauderdale-by-the-Sea
- Lauderdale Lakes
- Lauderhill
- Lazy Lake
- Lighthouse Point
- Margate
- Miramar
- North Lauderdale
- Oakland Park
- Parkland
- Pembroke Park
- Pembroke Pines
- Plantation
- Pompano Beach
- Sea Ranch Lakes
- Southwest Ranches
- Sunrise
- Tamarac
- Weston
- West Park
- Wilton Manors
- Atlantis
- Belle Glade
- Boca Raton
- Boynton Beach
- Briny Breezes
- Cloud Lake
- Delray Beach
- Glen Ridge
- Golf
- Greenacres
- Gulf Stream
- Haverhill
- Highland Beach
- Hypoluxo
- Juno Beach
- Jupiter
- Jupiter Inlet Colony
- Lake Clarke Shores
- Lake Park
- Lake Worth Beach
- Lantana
- Loxahatchee Groves
- Manalapan
- Mangonia Park
- North Palm Beach
- Ocean Ridge
- Pahokee
- Palm Beach
- Palm Beach Gardens
- Palm Beach Shores
- Palm Springs
- Riviera Beach
- Royal Palm Beach
- South Bay
- South Palm Beach
- Tequesta
- Wellington
- Westlake
- West Palm Beach
104 municipalities across three counties — and we hold the licence to build in all of them. Not sure about your address? Ask us.
Start here
Start under the floor.
A substrate assessment tells you which materials are sensible. After that, choosing is the easy part.
What happens after you send this
- We call you back to understand the rooms and what is prompting the change.
- We assess the substrate — flatness, soundness, moisture and movement.
- You get a shortlist of finishes that will actually work, and a setting-out.
- An itemised proposal separates removal, preparation, waterproofing and finish.
Worth having to hand
- Anything that cracks, lifts or sounds hollow
- What the existing floor is laid on, if known
- Whether levels must match adjoining rooms
- Whether underfloor heating is wanted
- Your maintenance appetite
Licensed, bonded and insured · License No. CBC1265280
Design, permitting and construction under one contract
Serving Miami-Dade, Broward and Palm Beach counties
Sun–Fri 7am–7pm · Saturday closed
Thanks — that came through.
Your details are with the Elbaz Construction team. We will call you back to arrange the site visit. If it is urgent, call (754) 236-0675.

