


10 service categories · 100 service pages · Miami-Dade, Broward & Palm Beach
View all servicesStep one
Tell us what is down now.
What you have, what is going over it, and how many rooms. The existing floor decides most of the work.
- Licensed, bonded and insured · CBC1265280
- Substrate preparation included, not extra
- 104 municipalities across three counties
What to have ready
Rough square footage, what is currently down, and whether it is on a slab or a suspended floor.
What happens next
We arrange a site visit and check the substrate. Levelness and moisture cannot be assessed from a photograph.
What the consultation covers
Whether the existing floor can stay, what levelling is needed, moisture, plank format and layout, and where transitions will fall.
Thanks — that came through.
Your details are with us. A licensed general contractor will come back to you to arrange a site walk. If it is urgent, call (754) 236-0675.
What we install
Ninety per cent of a plank floor is the floor underneath.
Luxury vinyl plank is thin and it is flexible, which is exactly why it telegraphs whatever it is laid on. A hollow, a ridge or a high spot that you cannot see today becomes a click underfoot and then an open joint within a year. So the part of this job that matters is the part nobody photographs: checking the slab for moisture, grinding the high spots, filling the low ones, and only then setting out the first row. Get that right and the plank is the easy bit.
- 01
Substrate first
Levelness checked across the room, high spots ground, hollows filled, and the result re-checked before a single board goes down.
- 02
Moisture taken seriously
On a slab in this climate, moisture is the failure mode. It is tested for, not assumed away.
- 03
Set out from the sightline
The first row is placed so the run reads square from the doorway you actually walk in through — not from whichever wall is nearest.
- 04
Transitions planned
Where the floor meets tile, stone or another level is decided on the drawing, not improvised with a strip on the day.
- 05
One contractor
Removal, preparation, installation, trims and disposal under one licence.
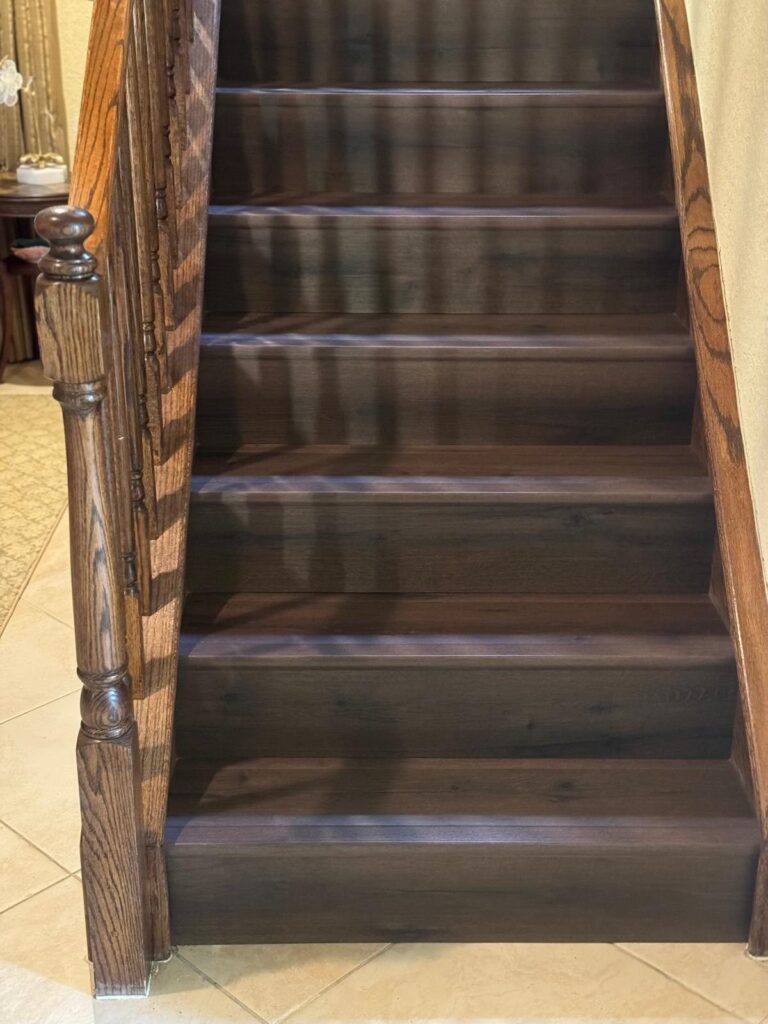
Elbaz project photograph
Project 01
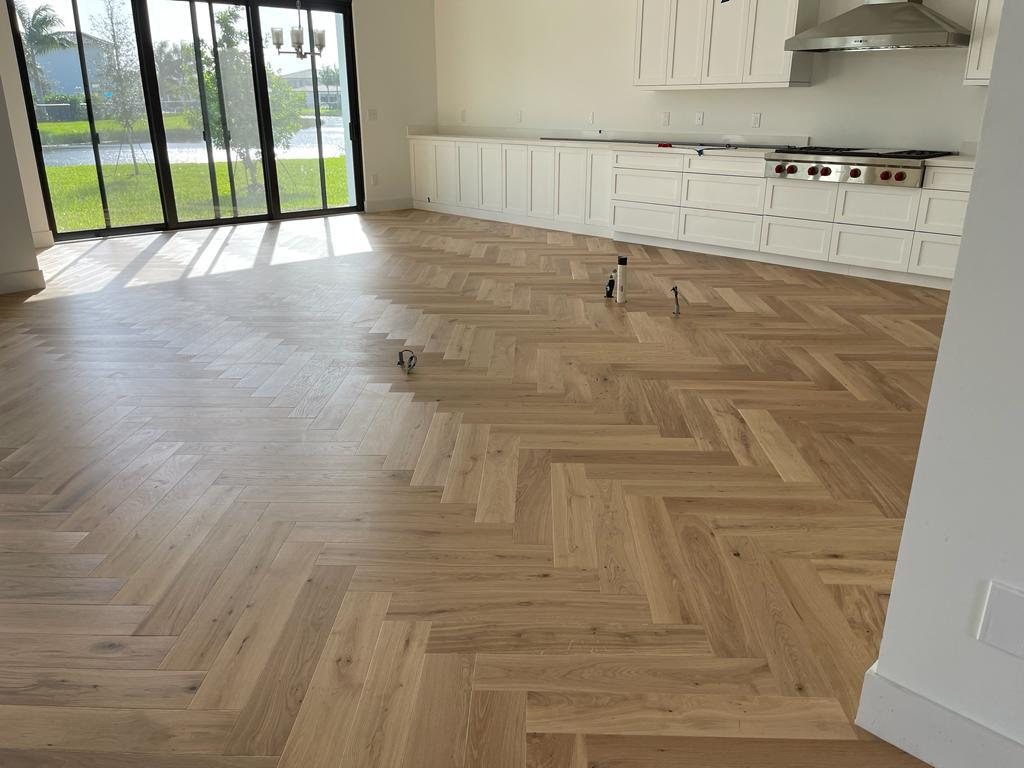
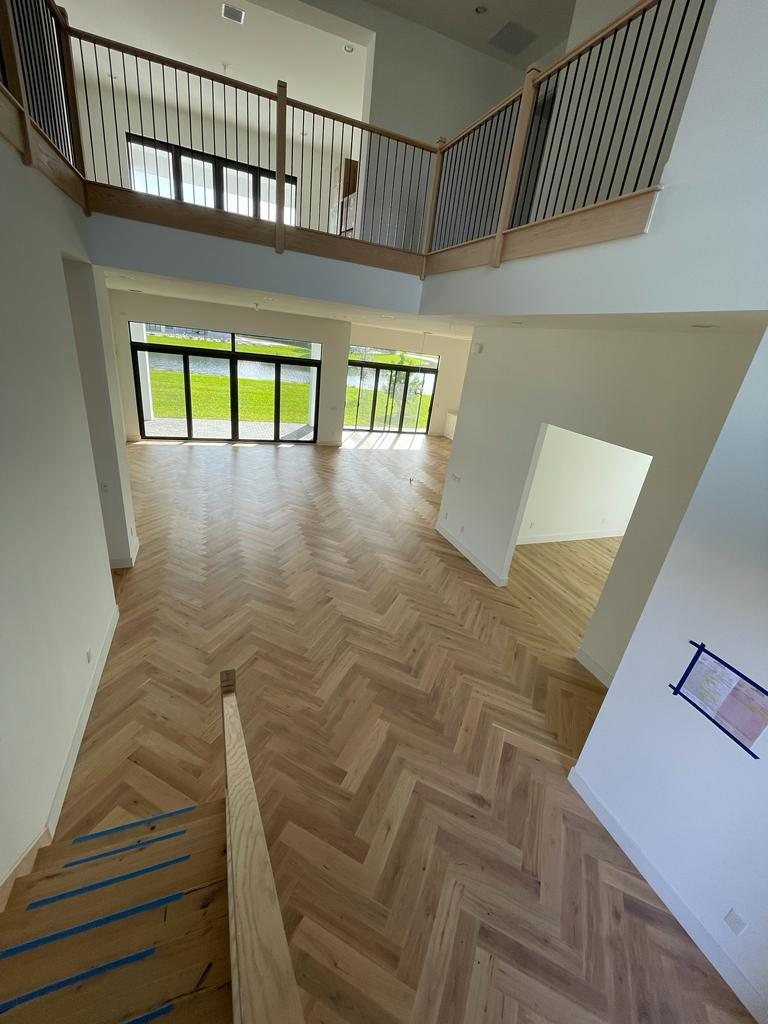
Herringbone plank through a two-storey house
Completed installation
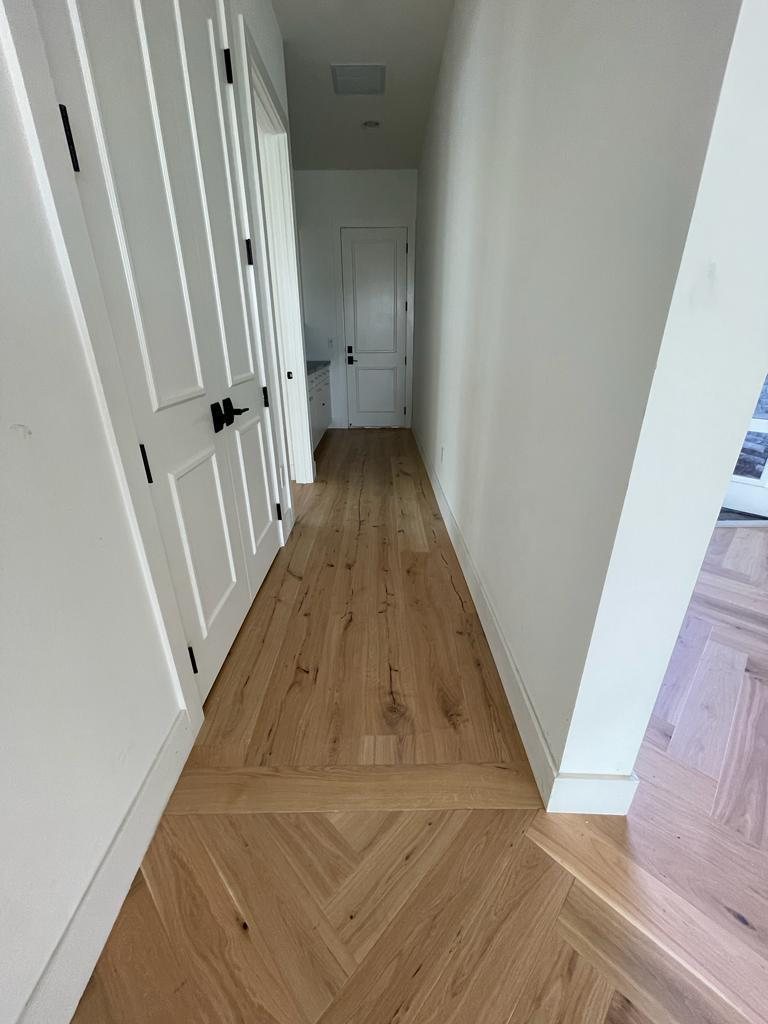
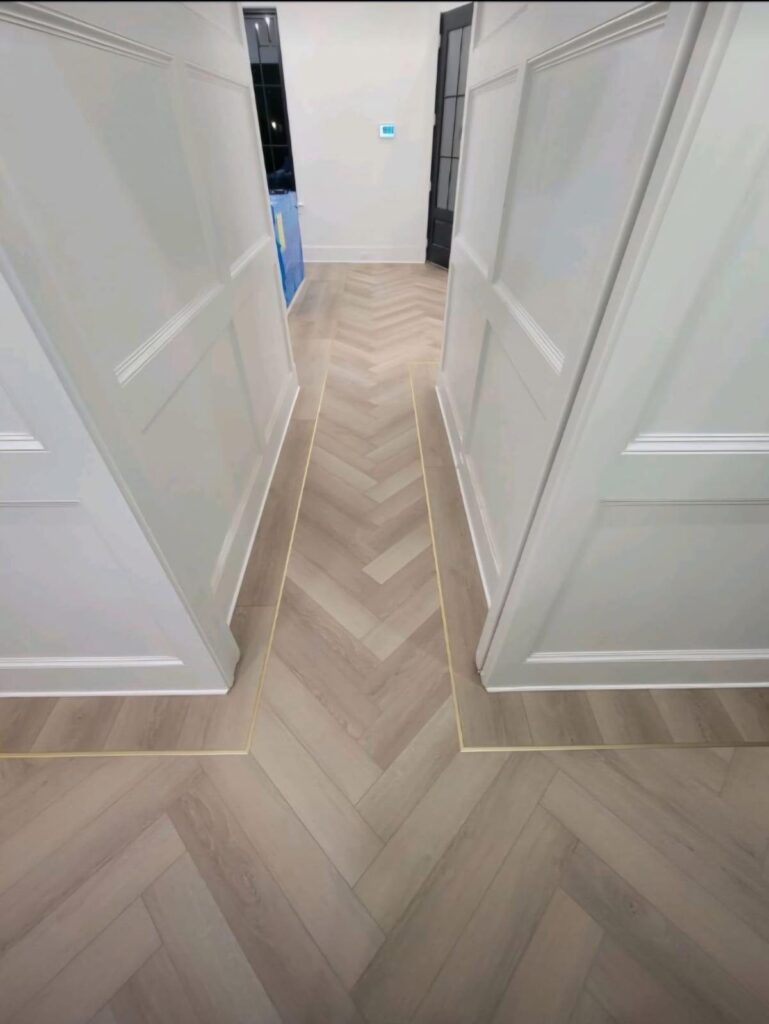
Every frame is an Elbaz Construction photograph of one completed installation. Captions describe the layout and what is visible in the frame — no product brand, no wear-layer claim.
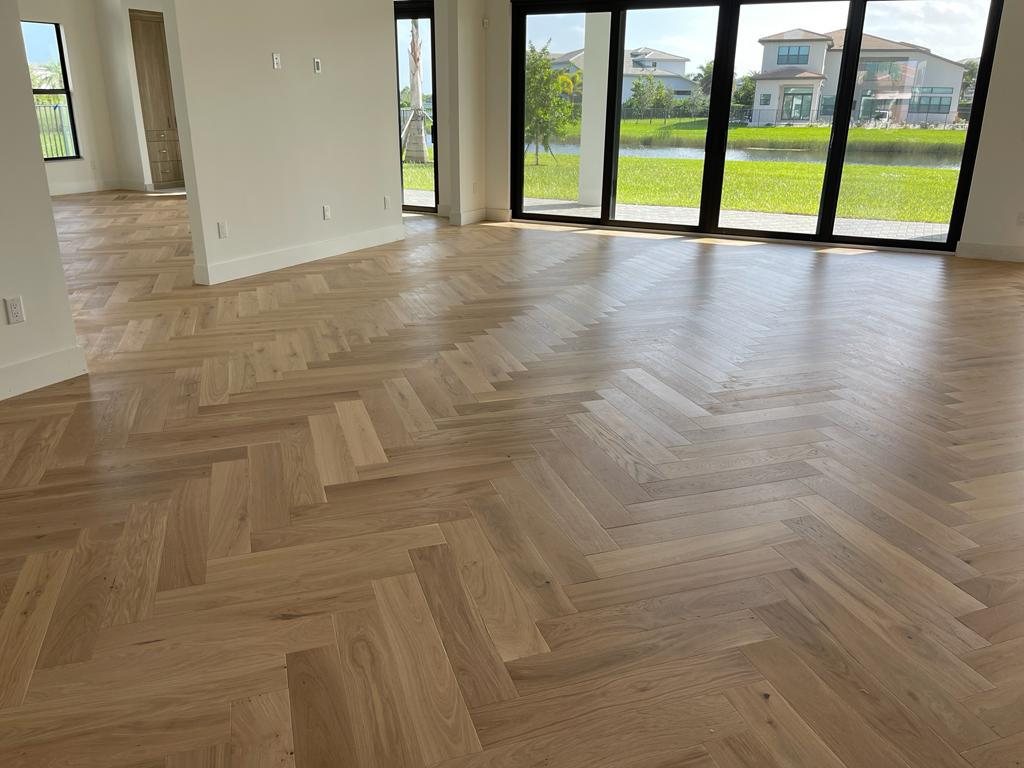
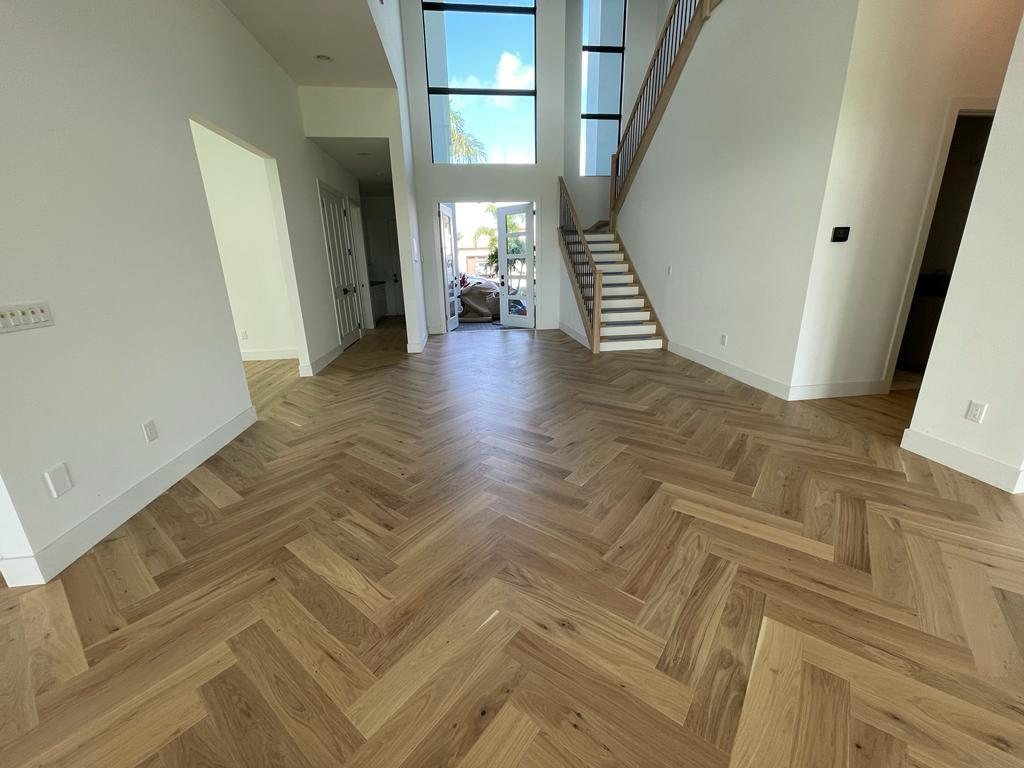
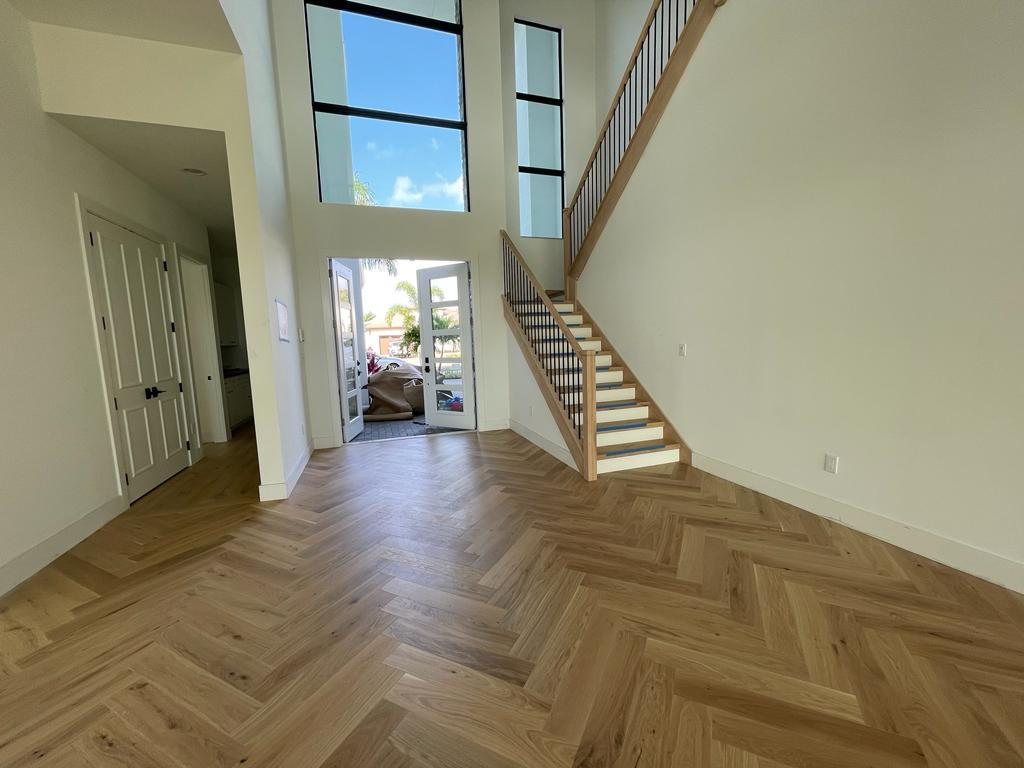
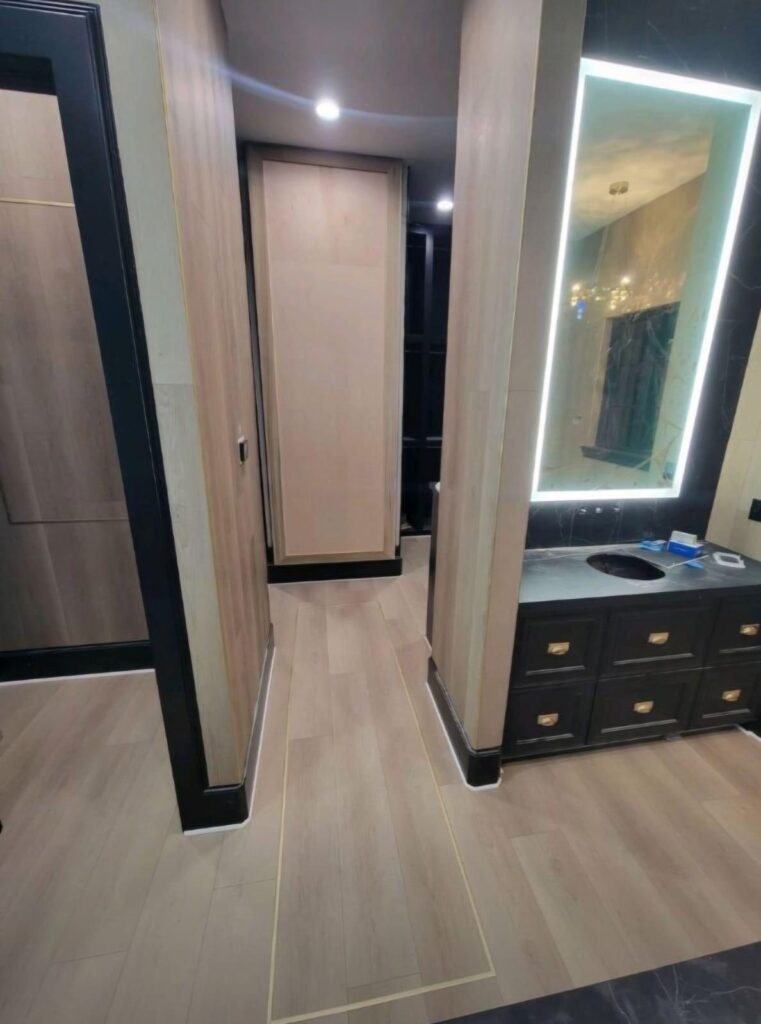
Layout
Herringbone, which doubles the number of cuts and quadruples the consequences of a set-out error.
Continuity
One floor carried through living, dining, kitchen and hallway with no thresholds between them.
Set-out
Run on the axis of the main sightline so the pattern reads square from the entry rather than from a wall.
Junctions
Panelled walls, door linings and a dark tiled threshold all met without a cover strip.
How it runs
Eleven stages, most of them before the first plank.
The installation itself is quick. What decides whether the floor is still tight in five years happens before it.
Site review
What is down now, what is under it, and whether the room is on a slab or a suspended floor.
Measure
Room by room, including closets and thresholds, with a waste allowance that reflects the layout — herringbone needs far more than a straight lay.
Material selection
Plank format, texture, tone and layout chosen against the room size and the light it gets.
Acclimation
Material brought into the space and left to reach room conditions where the manufacturer requires it.
Removal & disposal
Existing floor lifted where it has to go, and taken away rather than left in your driveway.
Moisture assessment
On a slab this is the stage that decides whether the floor survives. It is tested, not assumed.
Levelling
High spots ground down, hollows filled, and the result re-checked with a straightedge across the room.
Set-out
The first row placed from the main sightline, with the pattern centred so the cuts land where nobody looks.
Installation
Boards laid with the joints staggered properly and the expansion gap held at every perimeter.
Transitions & trims
Thresholds, reducers, stair nosings and skirting or scotia fitted.
Clean & hand-over
Floor cleaned, offcuts left with you for repairs, and the care notes for the finish you now own.
Acclimation periods, moisture limits and expansion-gap requirements are set by the manufacturer of the product you choose and vary between products. We follow the data sheet for what is actually being laid.
Wide plank is the opposite decision to herringbone. The pattern gets out of the way, the board length does the work, and the floor reads as one continuous surface rather than as a texture. It is more forgiving to lay and far less forgiving of a substrate that is not flat — a long board bridges a hollow and telegraphs it, where a short herringbone piece simply sits in it.
Project 02
Wide plank in a second property
A different layout, a different room
A separate completed Elbaz installation — a different house from Project 01, and a straight wide-plank lay rather than herringbone.
Elbaz project photograph
Specification
Six choices that decide how the floor lives.
Every one of these is settled before the material is ordered. Switch between the three questions to see the same decision from a different angle.
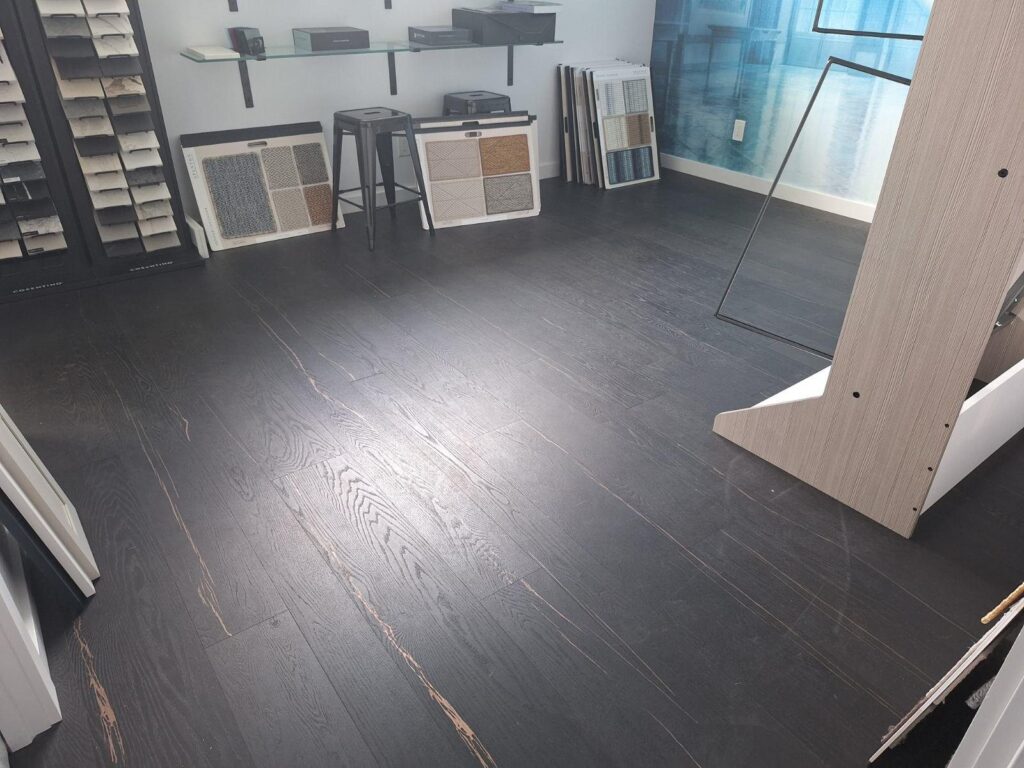
Wear layer
The clear top layer over the printed film — the part that actually takes the traffic.
Elbaz project photograph
Layout: herringbone or straight
Whether the boards run in a straight lay, or are cut and set into a herringbone or chevron pattern.
Elbaz project photograph
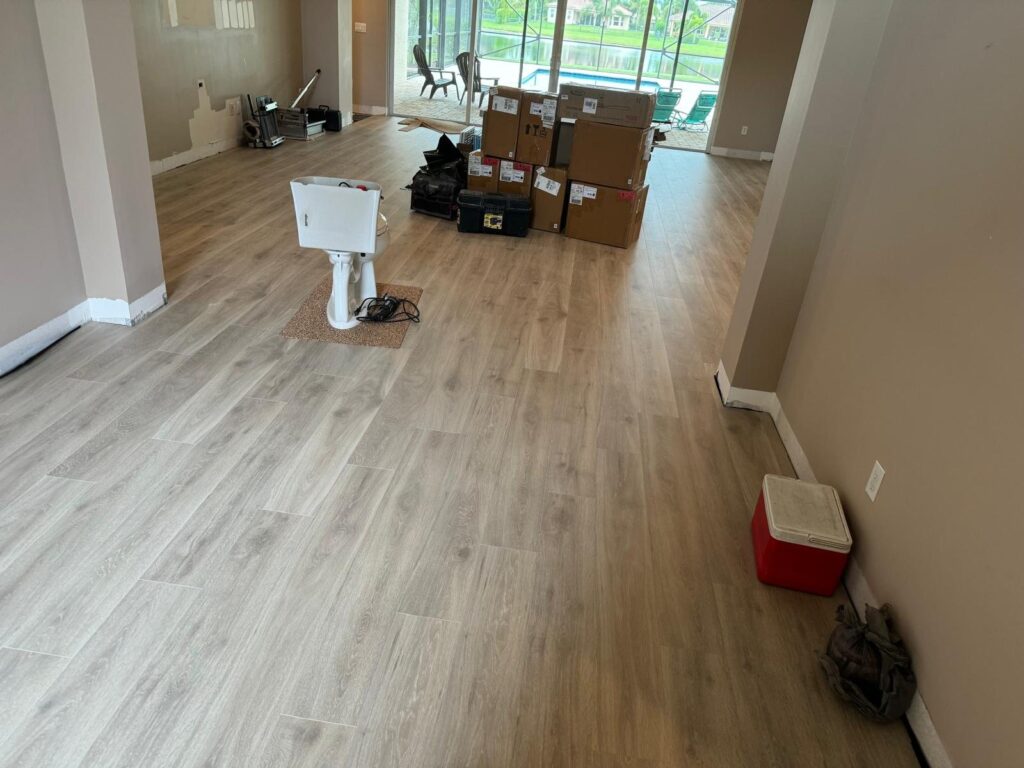
Plank format
Board width and length, and whether the edges are bevelled or square.
Elbaz project photograph
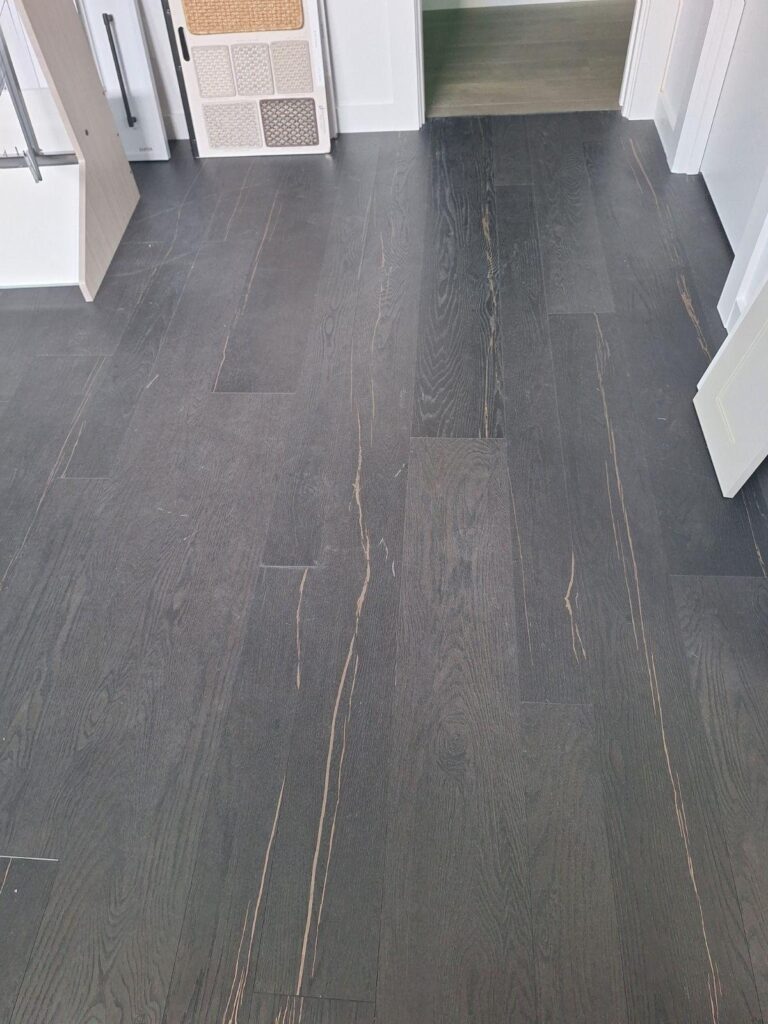
Texture and tone
The embossed grain and the colour of the printed film.
Elbaz project photograph
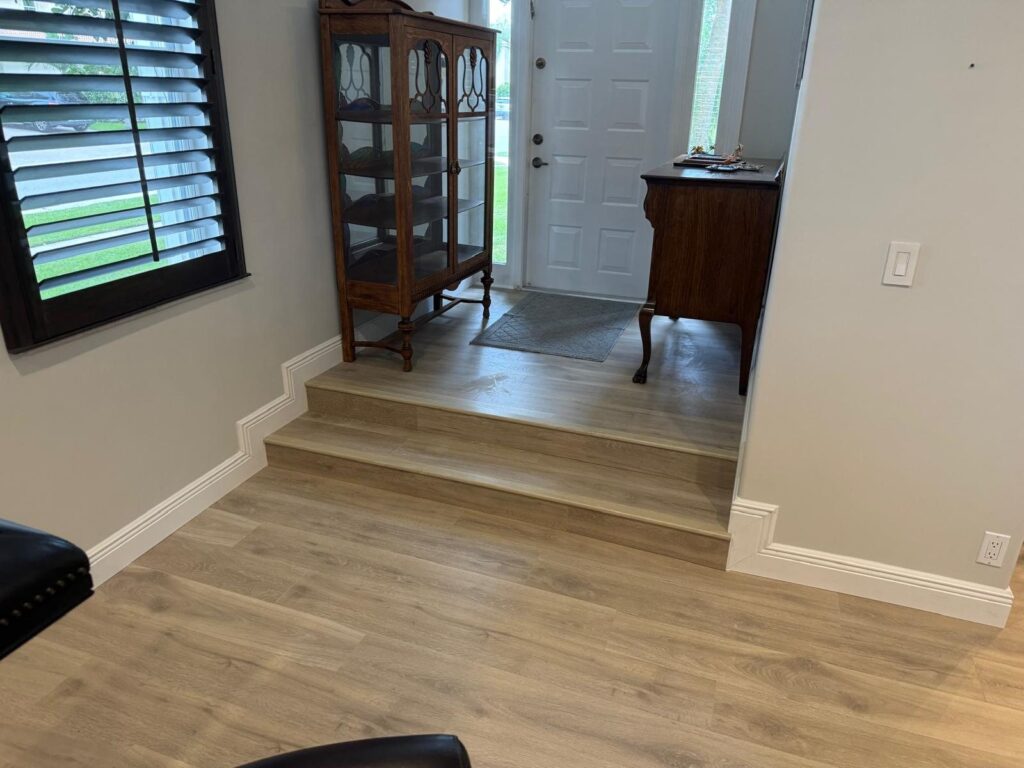
Transitions and levels
Where the floor meets tile, stone, a step or another room, and what holds that junction.
Elbaz project photograph
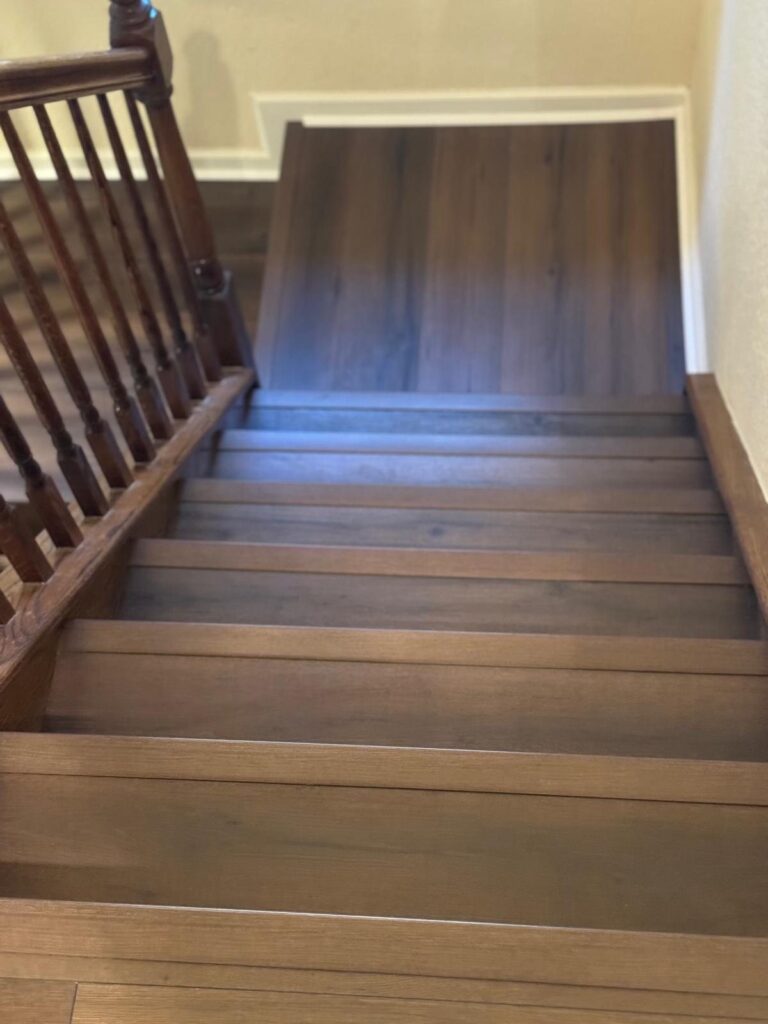
Stairs
Treads, risers and the nosing that turns the front edge of each step.
Elbaz project photograph
Living with it
Day to day
Sweep or vacuum on a hard-floor setting. Grit is what wears a wear layer, not feet.
Washing
Damp mop with a cleaner intended for resilient flooring. Never steam, and never flood a floating floor.
Furniture
Felt pads under everything that moves, and wide load spreaders under anything heavy on castors.
Sun and heat
Long-term direct sun can shift the tone of any printed floor. Blinds on a west-facing glazed wall protect the floor as much as the furniture.
Showcase 03
What happens before the first plank.
Both projects above are shown finished. This section is the work under them — the sequence that decides whether a plank floor is still tight in five years, illustrated with frames from Elbaz installations.
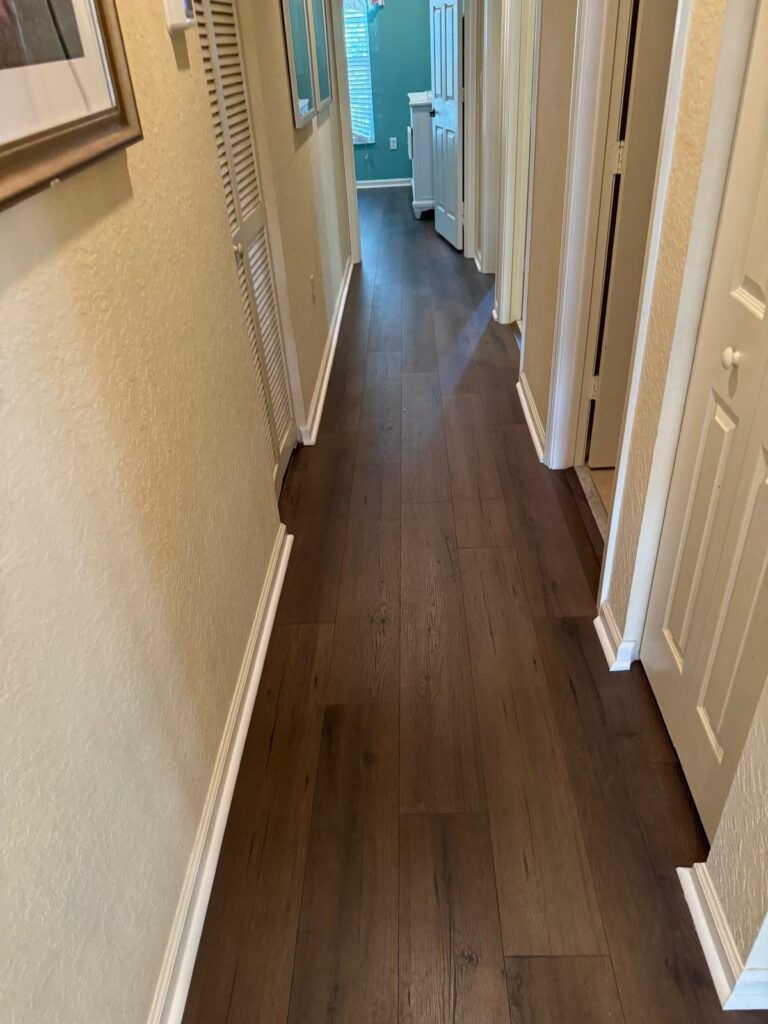
01
The room, stripped
Existing floor lifted and removed. This is the first time the substrate is visible, and the first honest look at what it will need.
Elbaz project photograph
02
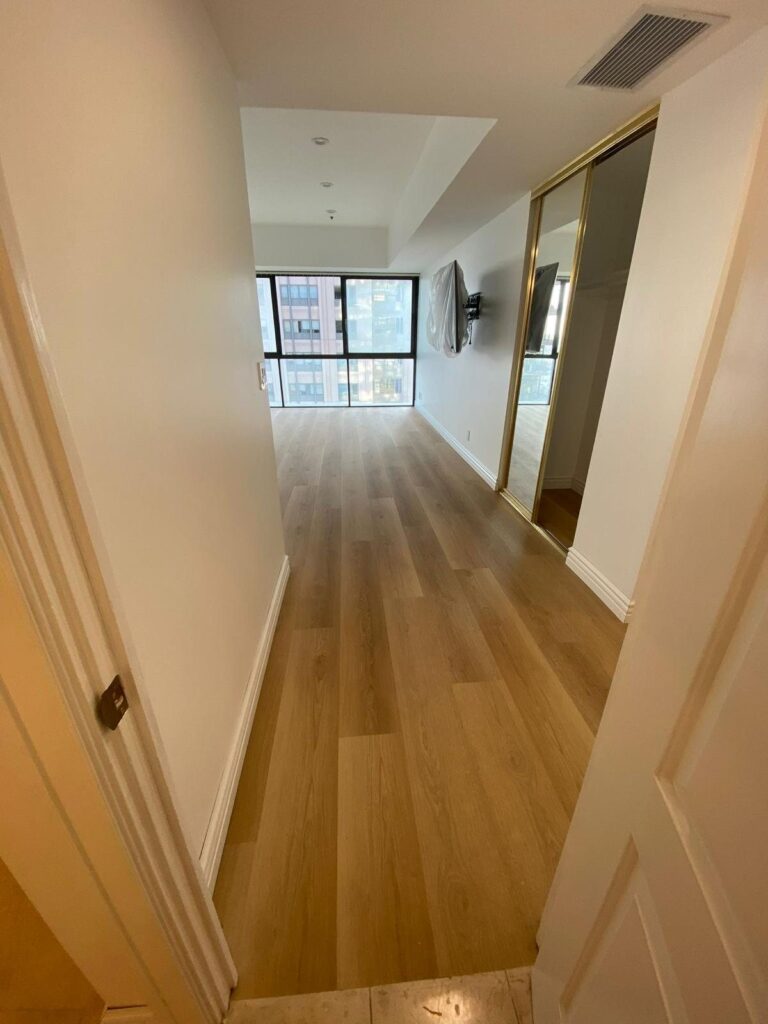
Moisture
On a slab, moisture is the failure mode in this climate. It is tested before anything is laid, because no plank system survives it being wrong.
Elbaz project photograph
03
Levelling
High spots ground, hollows filled, and the result checked with a straightedge across the room rather than by eye.
Elbaz project photograph
04
Set-out
The first row placed from the main sightline. On a herringbone floor this single decision governs every cut in the house.
Elbaz project photograph
05
Laying and expansion
Joints staggered properly and the perimeter expansion gap held everywhere, including behind the skirting and around every column.
Elbaz project photograph
06
Transitions and stairs
Thresholds, reducers and stair nosings fitted last, in matched profiles rather than generic trims.
Elbaz project photograph
Plank floor build-up
What sits between the slab and the surface you walk on
Schematic. Underlayment, moisture barrier and expansion requirements vary by product — the manufacturer's data sheet governs.
Answers
LVP flooring questions.
Often, yes — over tile, over an existing vinyl or over a sound timber subfloor, provided it is flat, dry and firmly fixed. It saves the removal cost and the mess. What it does not do is hide a problem: laying over a hollow or a loose tile guarantees the same fault appears in the new floor within a year.
Almost always to some degree. LVP is thin and flexible, so it follows whatever it is laid on rather than bridging it. Small dips become clicks underfoot and then open joints. Levelling is part of the job we quote, not an extra we discover.
Generally yes, and it is one of the main reasons people choose it. How a specific product behaves in a genuinely wet area depends on that product and on how the perimeter is detailed — we will tell you what the data sheet for your chosen floor actually says rather than repeating a marketing word.
Many products are described that way, and the claim is about the plank itself. Water that gets past the perimeter and sits on the substrate is still a problem, whatever the plank is made of. We treat perimeter detailing in wet rooms as part of the installation rather than as a product feature.
Sweep or vacuum regularly, damp mop with a cleaner made for resilient flooring, felt pads under furniture. No steam cleaners and no flooding. That is genuinely the whole routine.
Substrate condition first — levelling and moisture remediation are the variables that move a quote most. Then layout: herringbone roughly doubles the labour of a straight lay. Then the number of transitions, doorways and stairs, which are priced per item rather than by area.
The laying is quick; the preparation is not. A straightforward straight-lay floor over a sound slab moves fast, while a floor needing removal, grinding and levelling takes considerably longer. We will give you a real sequence after the site visit.
Yes, with matched treads, risers and a proper nosing profile. It is slow, careful work priced per step, and it is the part of a plank installation where a shortcut is most visible.
Any printed floor can shift in tone under years of direct sun. Where a room has a large west-facing glazed wall we will say so and suggest blinds — the same advice protects your furniture.
Individual boards can usually be lifted and replaced, which is a real advantage over a sheet floor. It works best if you keep the offcuts — we leave them with you at hand-over for exactly this reason, because dye lots change.
Tile is harder, cooler underfoot and completely indifferent to water; plank is warmer, quieter, faster to install and far more forgiving to walk on. Many of the houses we work in use both — plank through the living space and tile in the wet rooms — and that is usually the right answer rather than a compromise.
Verified
What clients wrote on Google.
Reproduced exactly as published on the company's Google Business Profile. Read them on Google
After I've been Looking for a good company to renovate my house , I found those guys! These people are super professional super honest super Fast !! Don't hesitate to Rent their service! They are number one!!
carmit cohen
Google review
Their work was absolutely superb, they did a fantastic job with my house renovation!! Definitely recommend
Sophie Brito
Google review
They are amazing! Very professional. Met my exact requests with so much patience and knowledge. They renovated my whole house and the whole process was such a breeze. I highly recommend them!
Lee Morali
Google review
Amazing job Did a total renovation of my house with them
Elie Elancry
Google review
Amazing experience with the entire company! They did a great job in my house for some work that needed to be completed, and I am extremely happy with the result. Super professional & great service. I highly recommend Elbaz Construction.
Mia Zafrani
Google review
Redid my whole bathroom and kitchen. Great service - Great quality - very quick - very professional !! Highly recommended!
Adir Davidov
Google review
Needed remodeling of my master bathroom in my house. After calling around and dealing with a bunch of unexperienced companies I found Elbaz construction and gave them a call. Just from the ease of communication and friendly talk I've had with the owner I knew this was going to be the company I was going to hire. They came 2 days later and started remodeling my bathroom and knocked it out in a timely manner. Great service, great communication, and amazing work. Will definelty refer and reuse this company for any future remodeling I might need.
Itzick Manasherov
Google review
We hired them to renovate our investment property and they provided exceptional quality service for an affordable price!
Shir Partush
Google review
I highly recommend them for home improvement. They renovated my master bathroom and a few upgrades for other guest bathrooms. They are very professional, courteous and transparent. They are great at communicating and finding ways to streamline the work. Sean has impeccable project management and customer relationship management skills. Very pleased with the work!
Omri B
Google review
Very professional! From start to end- personal kind treatment, always respectful every espect of the work was clear, and fair. Value for money 10/10. Thank you guys, see you at our next project, hope others will be smart and do the same!
roni yonani
Google review
Keep reading
Before the floor goes down.
PricingFlooring Cost Guide — South Florida
What actually moves a flooring quote here, line by line.
Read the guide Resilience
Hurricane-Resistant Construction in South Florida
Wind speeds, impact-rated openings and the roof-to-foundation load path.
Read the guide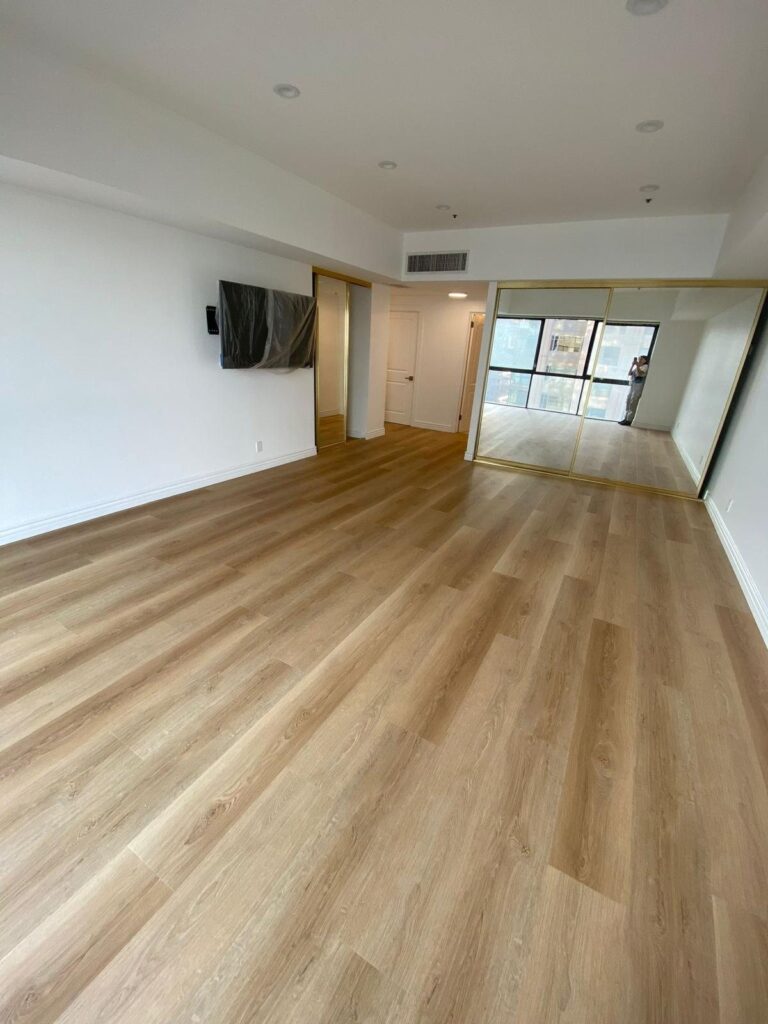 Planning
Renovation vs Remodel
Which one your project actually is, and why the answer changes the budget.
Read the guidePricingHow Much Does It Cost to Remodel a House?
Where a whole-house budget goes, and where flooring sits in it.
Read the guideAlso from us
Related services.
Flooring Removal & Subfloor Repair
The stage that decides the rest.
Tile Flooring Installation
Where water and heat rule it out.
Hardwood Flooring Installation
When you want the real thing.
Kitchen & Bathroom Flooring
Wet rooms, detailed properly.
Porcelain Flooring Installation
Large format, flat substrate.
Custom Flooring Design
Patterns, borders and inlays.
Service Areas
Proudly serving homeowners across Miami-Dade, Broward and Palm Beach
- Aventura
- Bal Harbour
- Bay Harbor Islands
- Biscayne Park
- Coral Gables
- Cutler Bay
- Doral
- El Portal
- Florida City
- Golden Beach
- Hialeah
- Hialeah Gardens
- Homestead
- Indian Creek
- Key Biscayne
- Medley
- Miami
- Miami Beach
- Miami Gardens
- Miami Lakes
- Miami Shores
- Miami Springs
- North Bay Village
- North Miami
- North Miami Beach
- Opa-locka
- Palmetto Bay
- Pinecrest
- South Miami
- Sunny Isles Beach
- Surfside
- Sweetwater
- Virginia Gardens
- West Miami
- Coconut Creek
- Cooper City
- Coral Springs
- Dania Beach
- Davie
- Deerfield Beach
- Fort Lauderdale
- Hallandale Beach
- Hillsboro Beach
- Hollywood
- Lauderdale-by-the-Sea
- Lauderdale Lakes
- Lauderhill
- Lazy Lake
- Lighthouse Point
- Margate
- Miramar
- North Lauderdale
- Oakland Park
- Parkland
- Pembroke Park
- Pembroke Pines
- Plantation
- Pompano Beach
- Sea Ranch Lakes
- Southwest Ranches
- Sunrise
- Tamarac
- Weston
- West Park
- Wilton Manors
- Atlantis
- Belle Glade
- Boca Raton
- Boynton Beach
- Briny Breezes
- Cloud Lake
- Delray Beach
- Glen Ridge
- Golf
- Greenacres
- Gulf Stream
- Haverhill
- Highland Beach
- Hypoluxo
- Juno Beach
- Jupiter
- Jupiter Inlet Colony
- Lake Clarke Shores
- Lake Park
- Lake Worth Beach
- Lantana
- Loxahatchee Groves
- Manalapan
- Mangonia Park
- North Palm Beach
- Ocean Ridge
- Pahokee
- Palm Beach
- Palm Beach Gardens
- Palm Beach Shores
- Palm Springs
- Riviera Beach
- Royal Palm Beach
- South Bay
- South Palm Beach
- Tequesta
- Wellington
- Westlake
- West Palm Beach
104 municipalities across three counties — and we hold the licence to build in all of them. Not sure about your address? Ask us.
Start here
Send us the rooms.
We will look at what is under the floor before we quote what goes on top of it. If the substrate needs work, you will hear it now rather than as a variation later.
What happens after you send this
We read it and come back to arrange a site visit — usually within one working day.
What to have ready
Rough square footage, what is down now, and whether you are on a slab or a suspended floor.
What we will cover
Substrate condition and moisture, levelling, plank format and layout, transitions, and stairs if they are in scope.
Prefer to talk it through first?
(754) 236-0675- Licensed, bonded and insured · CBC1265280
- Removal, preparation and installation in-house
- Sun–Fri 7am–7pm · Sat closed
Elbaz project photograph
Thanks — that came through.
Your details are with us. A licensed general contractor will come back to you to arrange a site walk. If it is urgent, call (754) 236-0675.

