Frame 01OpeningCustom flooring design

Chapter 01 — When the floor is the design

A pattern is a decision.

Made on paper, weeks before anything is cut.

Some flooring projects are about picking a material and installing it efficiently. This page is about the other kind: a pattern that reads as intentional from across the room, a medallion at an entry, a transition between two materials that looks planned rather than patched.

The difference is almost entirely front-loaded. Herringbone and chevron use meaningfully more material than a straight run because of the angled cuts, and they take real additional installation time to align correctly. Waterjet inlay and custom-bent terrazzo divider strip are fabricated off site to exact measurements. None of that can be improvised on installation day.

So the work happens in the order it has to: set out the field, decide where the pattern starts and where it dies into a border, resolve every threshold and material change, and only then order and cut. Done that way a floor reads as one deliberate line drawn through a house. Done the other way it reads as two floors that happened to meet in a doorway.
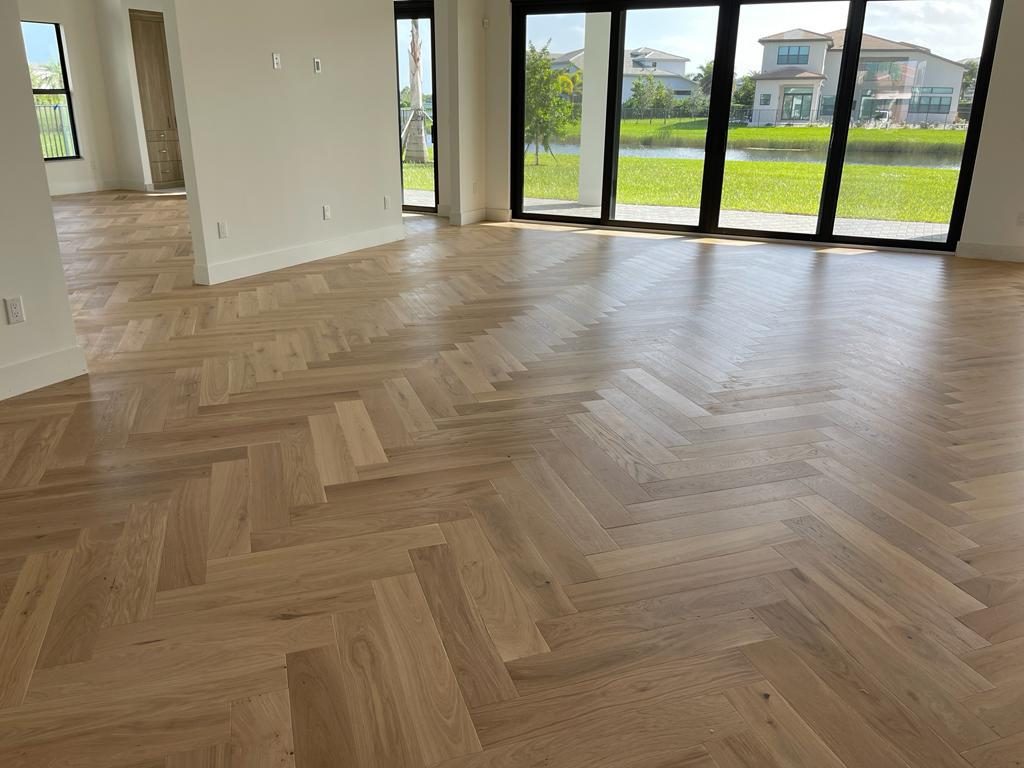
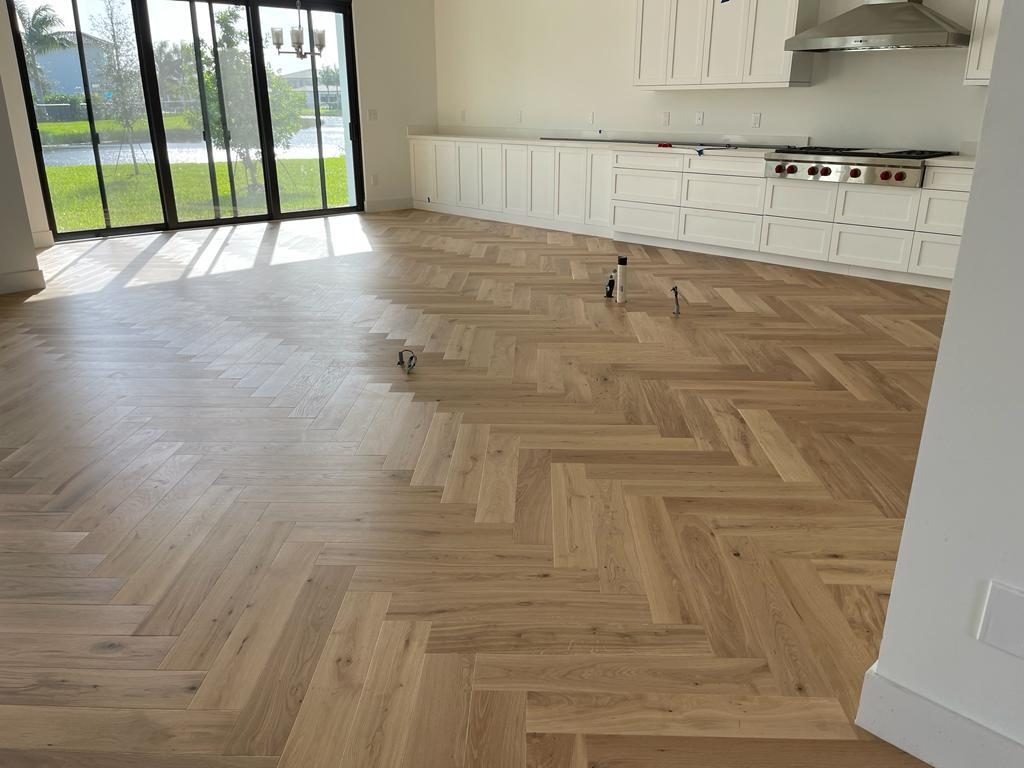
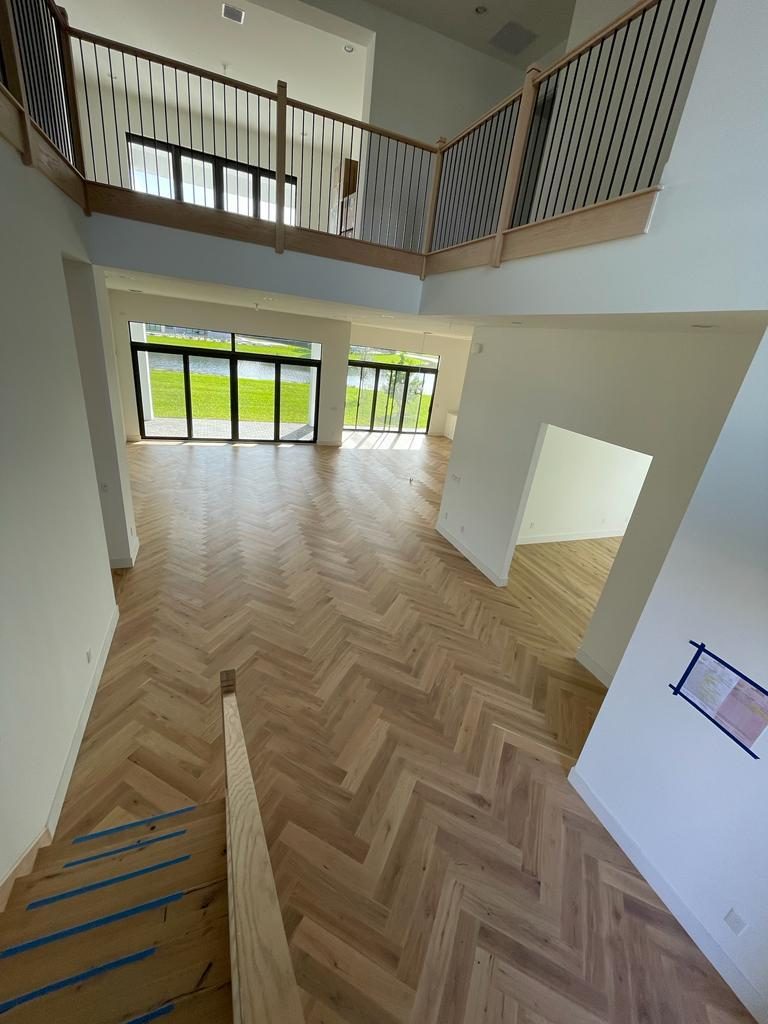
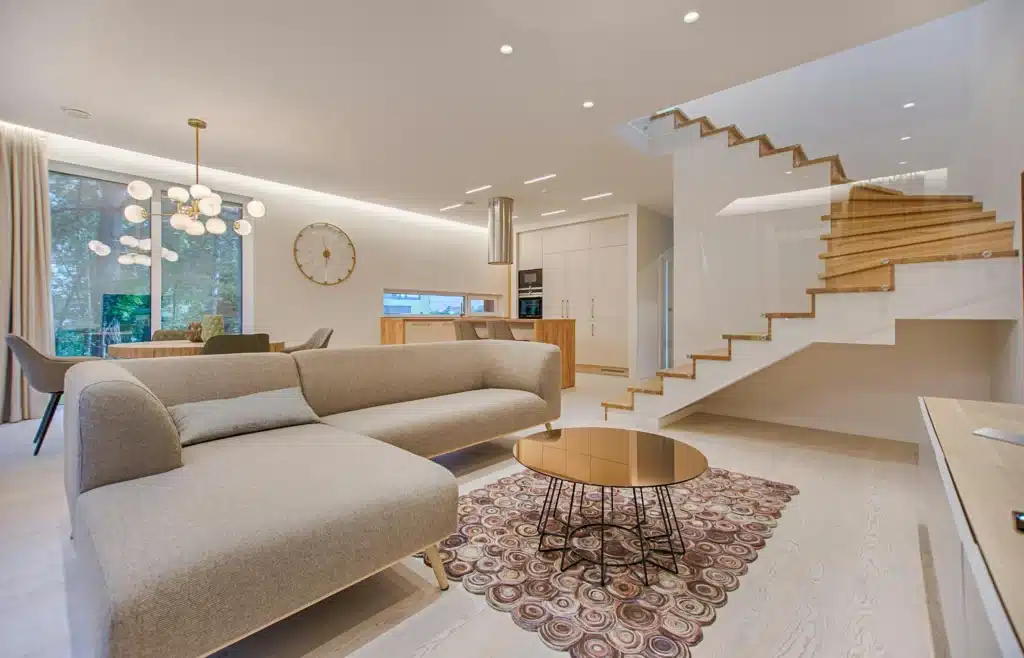
Pale oak herringbone floor running the length of a great room with a full-height black-framed glazed wall
Herringbone fieldRun direction set to the glazingStraight-laid perimeter borderSkirting scribed to the patternThreshold detail
Frame 01 · herringbone fieldAnnotations mark what is visible in this frame. No city, client, cost or date is claimed for any floor shown on this page.
  • Herringbone fieldvisible in this frame
  • Run direction set to the glazingvisible in this frame
  • Straight-laid perimeter bordervisible in this frame
  • Skirting scribed to the patternvisible in this frame
  • Threshold detailvisible in this frame
Shown
Pale oak herringbone, project 01
Pattern
Herringbone with straight-laid border
Note
A second project appears later
MORE

Material than a straight run

Angled cuts mean herringbone and chevron consume more material per square foot than a straight layout, and take longer to align.

OFF-SITE

Fabricated before install day

Waterjet inlay and custom-bent terrazzo divider strip are cut to exact measurements before anyone arrives, so layout has to be final first.

CBC1265280

One licence, one contract

Licensed, bonded and insured general contractor. Design, fabrication coordination and installation stay with one company.
Frame 02ScopeWhat is included

Chapter 02 — What a floor package covers

A floor is the substrate plus the finish.

Survey, preparation, setting out, finish

Scene 01Selection
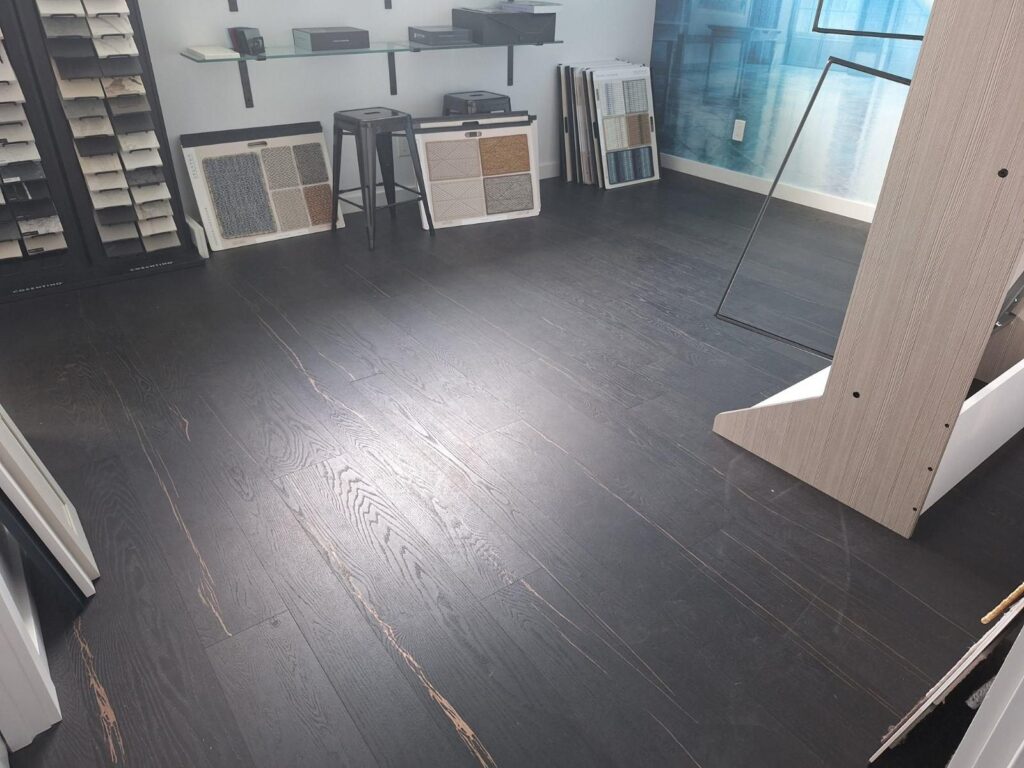
Flooring sample boards and display panels standing on a dark plank floor during material selection

Material and pattern selection

Species, format, finish and pattern chosen together, against real sample boards rather than a screen. Pattern and material are one decision: a chevron in a narrow board is a different floor from a chevron in a wide one.

Choose the pattern and the plank width in the same conversation.

Scene 02Set-out

Layout and shop drawings

Where the pattern starts, which way it runs, where it dies into a border, and how every threshold and material change is detailed. Custom elements are measured and drawn before fabrication, because they cannot be adjusted once cut.

The floor is decided on paper before it exists.

Scene 03Installation
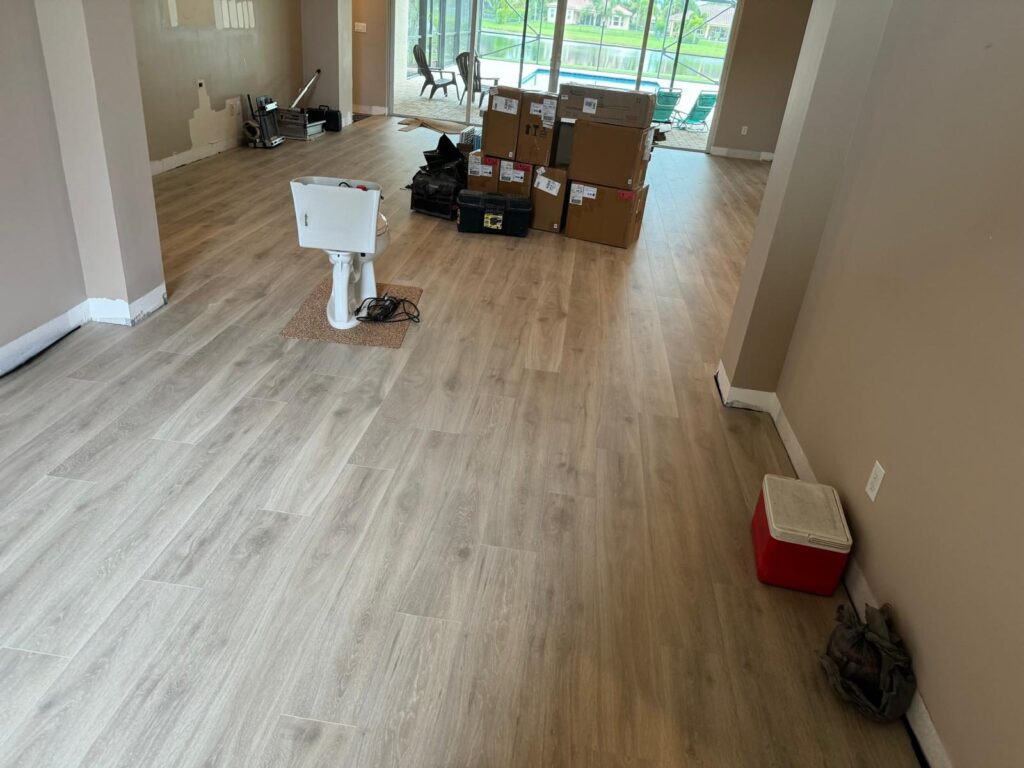
Plank flooring part-laid across a room with material boxes and tools still in place during installation

Subfloor, then field, then detail

The subfloor is prepared and levelled first — a pattern floor is unforgiving of a floor that is not flat. Then the field is run to the set-out, and borders, inlays and transitions are set last against the finished field.

Flatness matters more on a pattern than on a straight run.

Scene 04Detail
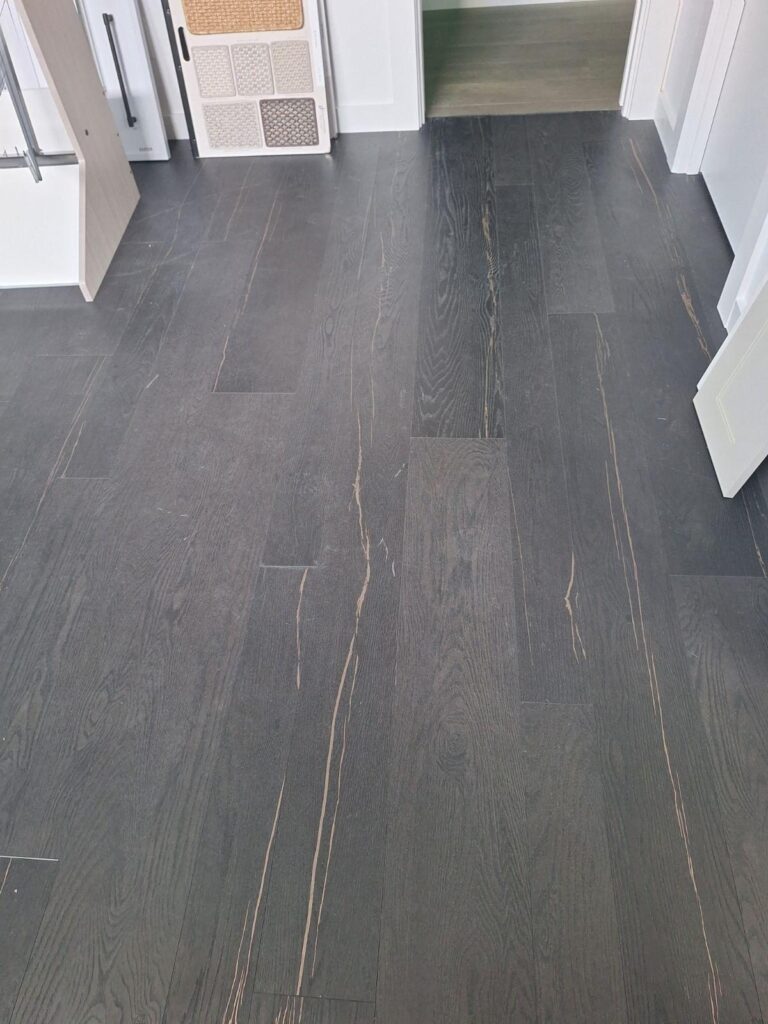
Close view of wide dark-stained plank flooring, showing grain and the long joint lines of a straight-laid run

Transitions, stairs and edges

Thresholds, metal or stone transition strips, stair treads and risers, and the scribe where a pattern meets a skirting. These are the details people actually look at, and they are where a custom floor is won or lost.

Nobody inspects the middle of the room.

Scene 04 is an illustrative diagram. Permitting does not photograph well.

Not sure what is under your existing floor? That is what the survey is for.

Frame 03One house, one patternPale oak herringbone

Chapter 03 — Project 01, a herringbone house

One pattern, one house.

Pale oak herringbone, throughout

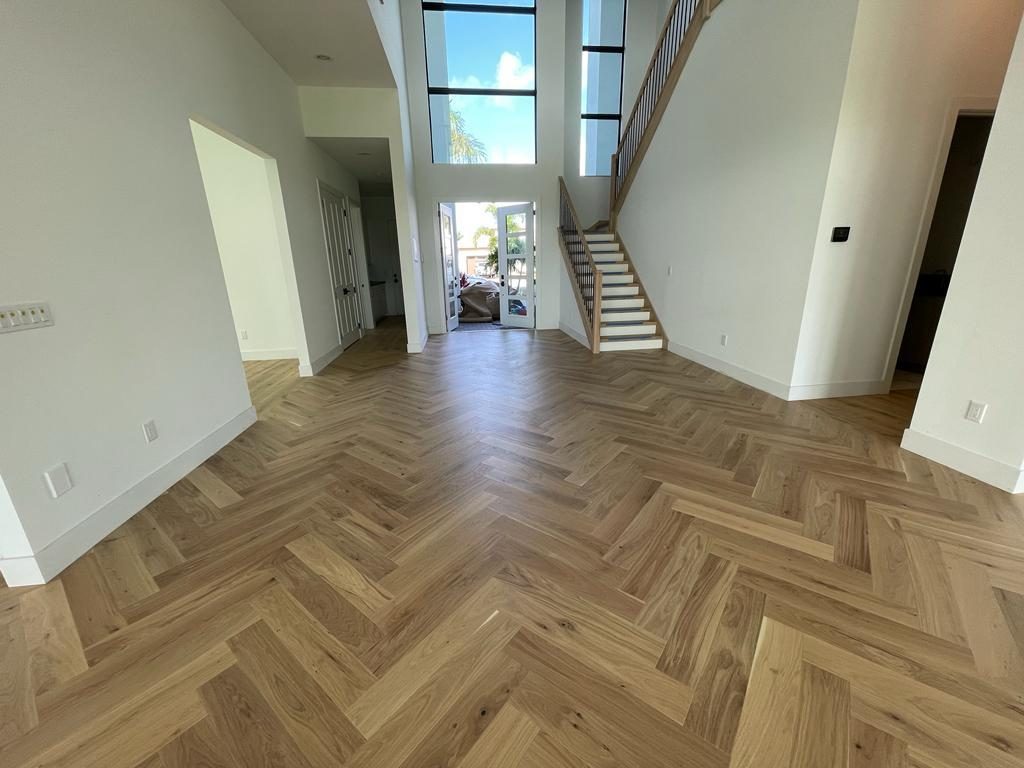
Every frame in this sequence is the same property. The same herringbone field runs from the entrance hall through the living space and down the corridors, which is what makes it read as architecture rather than as a floor finish. Use the arrows, the frame ticks, or the arrow keys.

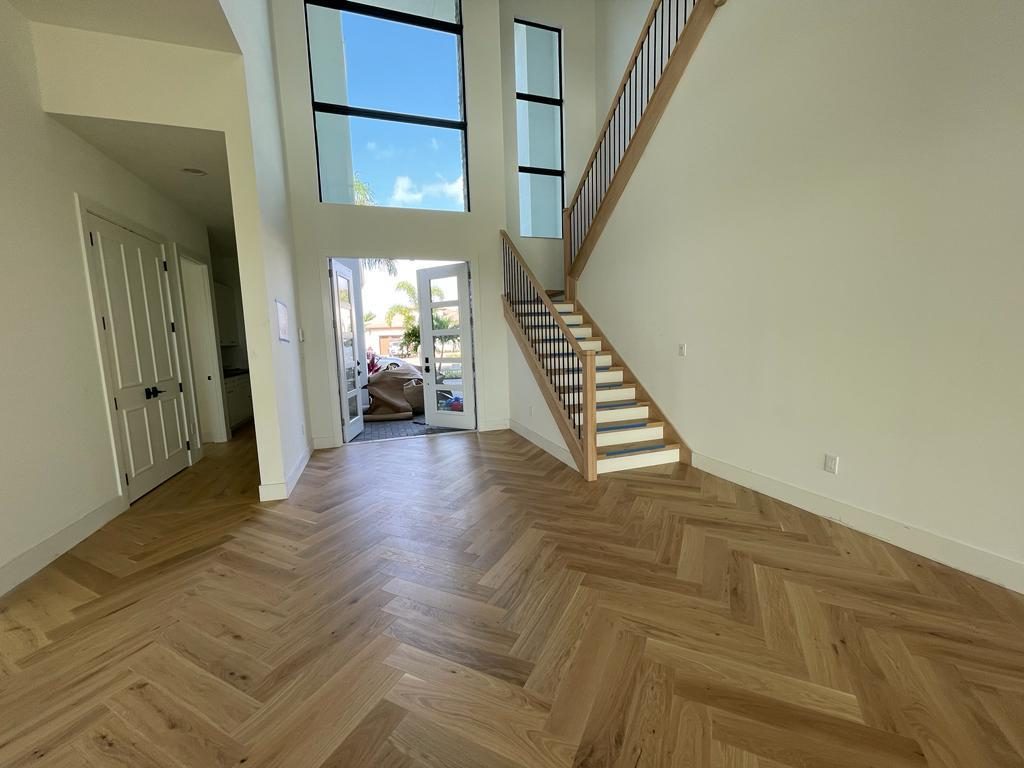
Herringbone flooring in a double-height entrance hall with an open stair rising beyond it
01 · The entrance

01 / 05

01 · The entrance

The pattern starts where you walk in. In a double-height hall the floor is the first and largest surface you see, and setting the herringbone out from this space is what keeps the rest of the house aligned.

02 · The open plan

The field runs on the diagonal to the glazed wall, so the pattern reads against the light rather than disappearing into it. Direction is a design decision, not a consequence of which way the boards came out of the box.

03 · The living space

The same field continues without a break or a threshold strip. Running one pattern across a whole level takes more set-out and more material, and it is the single biggest reason a floor like this looks intentional.

04 · The corridor

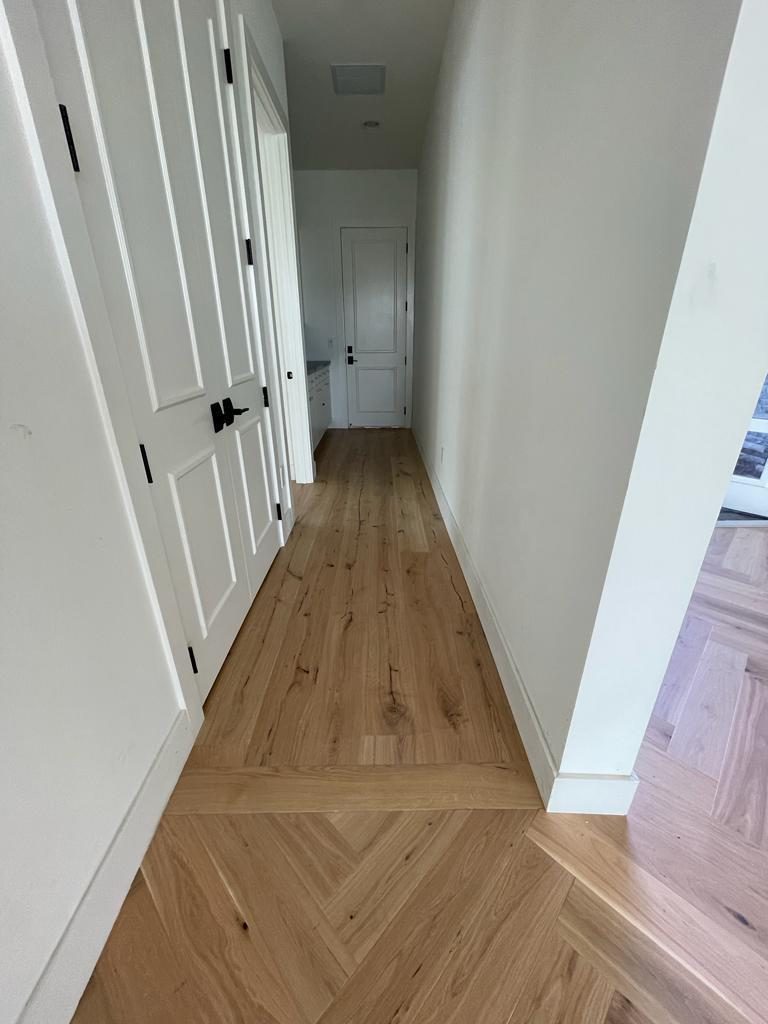
Where the herringbone meets the corridor it is framed by a straight-laid border. That border is what stops the angled cuts dying awkwardly into a skirting, and it has to be planned before the field is set out.

05 · From above

Seen from the landing the whole level reads as one surface. This is the view that tests whether the set-out was right — any drift in the pattern shows from here and nowhere else.

Want to see this pattern at full size? We can show you a laid floor.

Frame 04The herringbone, readObserved detail only

Chapter 04 — Reading the floor

What the floor frames show.

Observed in one house, not reconstructed

One field, one house

The same pale oak herringbone runs through the entrance hall, the open-plan living space and the corridors. There is no change of material or direction between rooms. That continuity is the whole idea — and it is also the hardest part, because a single set-out has to work in every space at once.

The direction is deliberate

The herringbone runs on the diagonal relative to the main glazed wall. Laid square to the glass the pattern would flatten out under raking light; laid on the diagonal it catches it. That is a decision made at set-out, not on site.

The border is doing work

Where the field meets corridors and thresholds there is a straight-laid perimeter board. Without it, every angled cut in a herringbone dies into the skirting at a different length and the edge looks ragged. With it, the floor has a frame.

The material and format

Wide pale oak boards in a herringbone set. Wide-format boards in a pattern are more demanding than narrow ones: fewer joints to hide behind, and any cupping or unevenness in the subfloor shows immediately.

What the second project adds

The stair and dark-plank frames are a different property. They are shown because stairs are where flooring work is most visible and least forgiving — treads, risers, nosings and the junction with a balustrade all have to be cut to the stair as built, not to a drawing of it.

What is not claimed

No city, client, cost, timeline or product brand is attached to any floor on this page. The pool these frames came from contains several different properties; only frames that are visibly the same floor are grouped together here.

Every floor starts with a moisture reading, not a sample book.

Frame 05MaterialsIllustrative · not project photography

Chapter 05 — Species, formats and finishes

What you walk on, and what sits under it.

And how each behaves in Florida humidity

Illustrative diagrams

Pattern

Herringbone, chevron and basket weave

Herringbone and its mitred cousin chevron turn a straight run into a directional statement, at the cost of more material and more installation time because of the angled cuts. Basket weave and pinwheel layouts are common in tile entryways and often pair with a contrasting accent set into the joints.

UpkeepKeep grit off a pattern floor; angled joints trap it more than straight ones.

System

Custom terrazzo medallions and logos

Poured terrazzo is set using metal divider strips that can be bent to almost any shape before the terrazzo is poured around them. It is one of the only systems that renders a genuinely custom medallion, monogram or logo into the material itself rather than applying it on top.

UpkeepTerrazzo wants sealing and gentle cleaning, not aggressive chemicals.

System

Waterjet and precision-cut stone inlay

Waterjet cutting makes curved and intricate stone or porcelain inlay possible — a radius border, a compass medallion, a rug-style inset — that a wet saw cannot achieve. Pieces are fabricated off site to exact measurements before being set into the field.

UpkeepInspect grout and strip joints around inlay work annually.

System

Mixed-material transitions

A wood-look field meeting a tile inlay, or a stone border framing a terrazzo field, needs the transition detail decided before either material is set — usually a metal or stone strip. Done well it reads as an intentional line; improvised, it reads as two floors meeting by accident.

UpkeepCheck transition strips for movement after the first year.

Material

Contrasting borders and accent species

A contrasting accent tile or a second wood species used as a border or medallion adds a design layer without changing the base material — and gives the field somewhere to terminate cleanly.

UpkeepMatch any future repair stock at the time of install, not years later.

Substrate

Subfloor preparation and levelling

Custom pattern work is unforgiving of an uneven subfloor. Levelling and moisture control are part of the flooring scope rather than an afterthought, and on a slab in South Florida moisture testing matters.

UpkeepAddress any slab moisture before, not after, the floor is down.

These panels are illustrative diagrams explaining custom flooring systems in general. They are not photographs of Elbaz Construction work, and listing an option here does not mean it was used on the floors shown above.

Engineered or solid, oak or porcelain — easier to choose with someone who has laid both.

Frame 06A second propertyDifferent material · different setting

Chapter 06 — Project 02, where flooring gets difficult

Stairs and corridors.

A different property, a different material

These three frames are a separate project from the herringbone house — dark stained timber rather than pale oak. They are here because stairs are the most exposed flooring work in a house and the least forgiving of an approximate measurement.

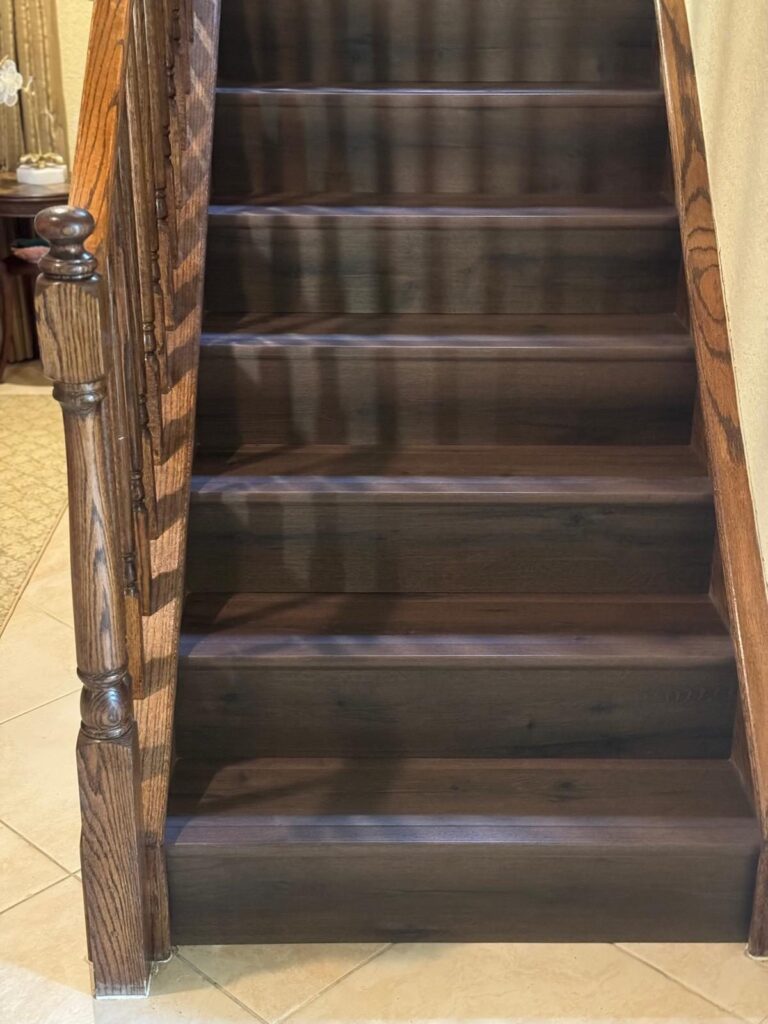
Stained timber stair treads and risers with turned balusters and a matching handrail

01Treads

Cut to the stair as built

Treads, risers and nosings are cut to the staircase that exists, not to the drawing of it — no two treads in an older house are reliably identical. The junction with the turned balusters has to be scribed rather than trimmed, which is slow work and immediately visible if it is rushed.

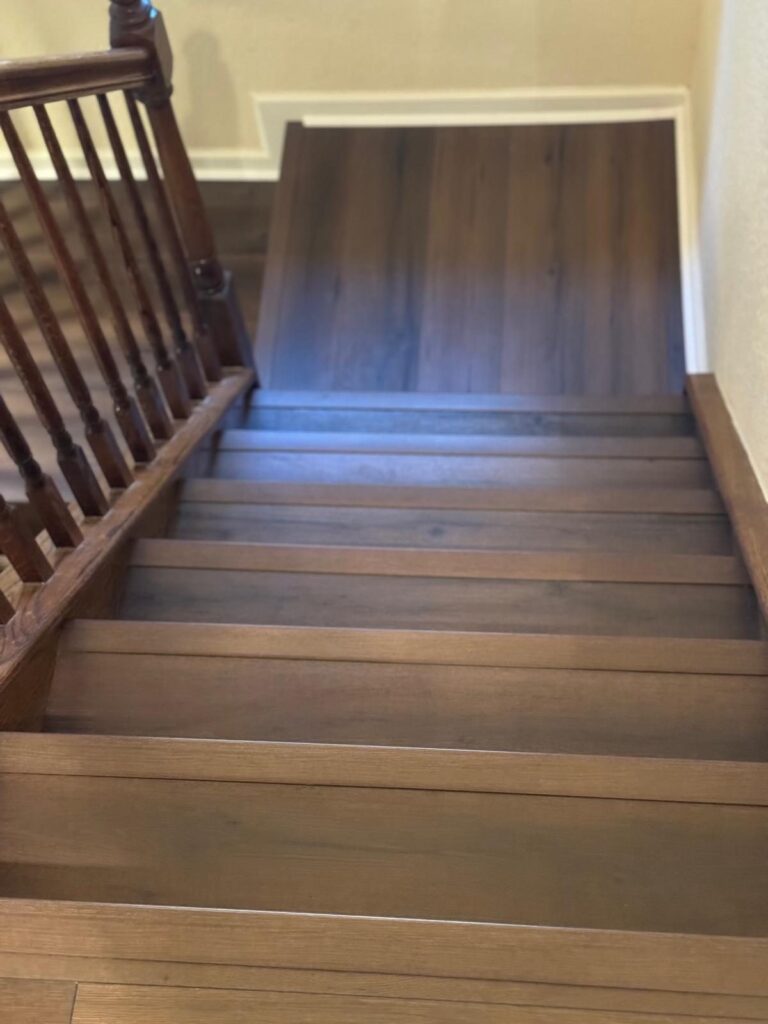
Stair landing finished in the same stained timber as the treads, seen from above

02Landing

Where the run changes direction

A landing is where the material has to turn a corner and stay flat, level and aligned with both flights. It is the detail that decides whether a stair reads as one continuous piece of joinery or as two runs that meet in the middle.

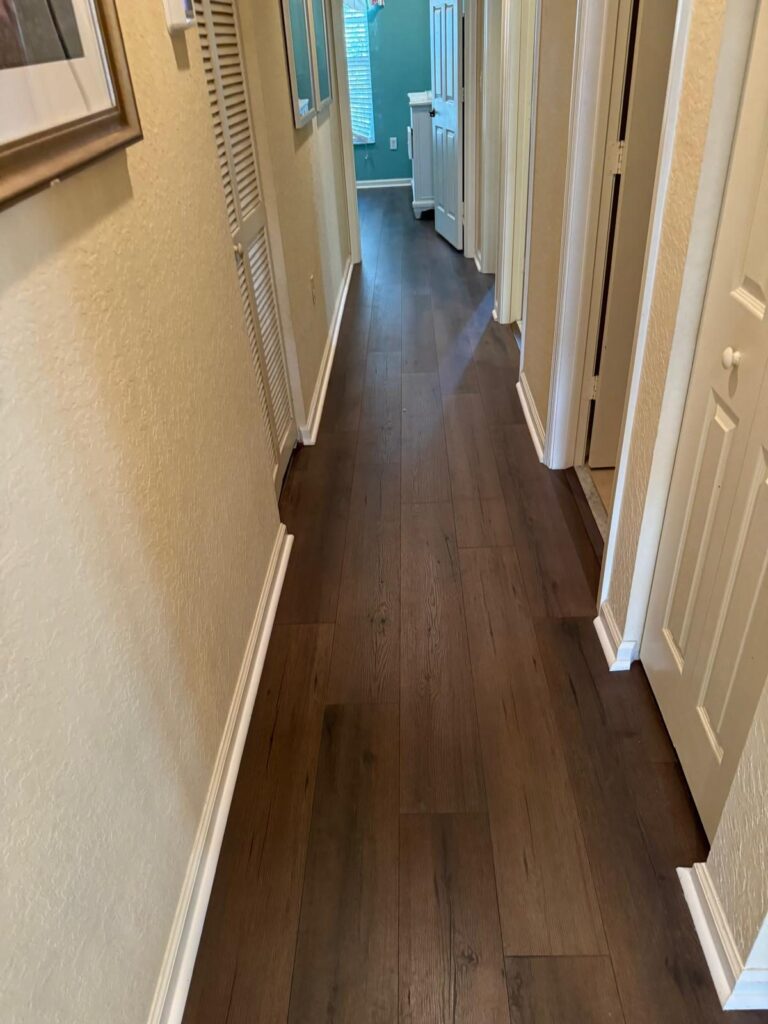
Dark plank flooring running down a hallway to a doorway, with the boards laid along the length of the corridor

03Corridor

Direction down the length

In a corridor the boards run along the length rather than across it, so the space reads longer and the joints are not fighting the direction of travel. It is a small decision that is very hard to undo once the floor is down.

Send us your room dimensions and we will tell you how the pattern will land.

Frame 07ProcessNine stages

Chapter 07 — Nine stages, in order

How a floor is actually laid.

Consultation to final walk-through

Design consultation

What the floor has to do and what it has to look like, room by room. Custom flooring starts as a design conversation rather than a material order.

You getA licensed contractor, not a call centre.

CheckNothing is ordered before the design is agreed.

Concept and pattern development

Pattern, direction, borders, medallions and where custom elements sit. This is where the floor is actually designed, against real samples.

You getOptions you can see and stand on, not just swatches.

CheckPattern and plank format decided together.

Material selection

Species, format, finish and any contrasting accent, chosen for the pattern rather than in isolation, and checked for availability before the layout depends on them.

You getAvailability and lead time confirmed before commitment.

CheckRepair stock allowance agreed at selection.

Layout and shop drawings

The set-out drawing: start point, run direction, border widths, threshold positions and exact dimensions for anything being fabricated off site.

You getA drawing of your actual floor before it exists.

CheckEvery custom element dimensioned before fabrication.

Fabrication

Waterjet cutting, custom-bent divider strip and any inlay pieces produced off site to the measurements in the drawings, with lead time built into the programme.

You getFabrication lead time in the schedule, not a surprise.

CheckPieces checked against the drawing on arrival.

Subfloor preparation

Levelling, moisture testing and any remedial work. A pattern floor magnifies an uneven substrate, so this stage is not optional on custom work.

You getA substrate that is measured, not assumed.

CheckFlatness and moisture recorded before laying starts.

Field installation

The field is run to the set-out from the agreed start point, keeping the pattern true across the whole area rather than room by room.

You getOne field across the space, not a floor per room.

CheckPattern alignment checked against the set-out as work proceeds.

Borders, inlay and transitions

Borders, medallions, inlays, thresholds and stair work set against the finished field, scribed where they meet skirtings and balustrades.

You getThe details that people actually look at, done last and done properly.

CheckEvery transition detailed rather than covered with a strip.

Protection and handover

Finishing, protection while other trades complete, a final clean and guidance on how to look after the specific material that was installed.

You getA floor protected until the house is finished.

CheckFinal walk with you, in raking light.

We handle the setting out, so the pattern lands where it should.

Frame 08ApprovalsPlanning, permits, inspections

Chapter 08 — Coordination, not permitting

What actually needs approving.

And what genuinely does not

Flooring is one of the few construction trades that often needs no building permit at all. We would rather say that plainly than invent a process. What it does need is coordination, and on some projects an approval that is not the building department’s.

When a permit is not required

A like-for-like floor covering replacement inside an existing home generally does not require a building permit in the tri-county area. If nobody is moving walls, plumbing or structure, there is usually nothing to permit.

When one is

If the flooring work is part of a wider remodel that touches walls, plumbing, electrical or structure, the permit is for that scope, and the flooring simply sits inside it. Levelling that adds significant dead load, or work in a multi-storey building, can also change the answer.

Condominium and HOA approval

This is the one that catches people. Most condominium associations require approval before hard flooring is installed above ground level, and many specify a minimum acoustic rating for the underlayment. That is an association process, not a municipal one, and it has its own calendar.

Sound transmission requirements

Where an association specifies an impact-insulation rating, the underlayment has to be documented rather than assumed. This is worth resolving before material is ordered, because it can rule out an assembly you have already chosen.

Moisture and slab testing

On a South Florida slab, moisture is the single most common cause of a floor failing after installation. Testing is part of preparation, and the result can change the specification of the underlayment or the adhesive.

Access and building rules

In condominiums and gated communities, delivery windows, lift bookings and work hours are set by the building. They affect the programme more than most people expect, and they are confirmed before a start date is agreed.

Fabrication lead time

Waterjet inlay and custom-bent terrazzo strip are made to order. That lead time is a scheduling constraint in the same way an approval is, and it is planned for at the same point.

Trade sequencing

Flooring usually wants to go in after the dust-generating trades and before final fit-out. Where that is not possible, protection becomes part of the scope rather than an afterthought.

Existing floor removal

What is already down affects the programme: removing tile set in thinset over a slab is a different job from lifting a floating floor, and it can reveal levelling work that was not visible beforehand.

Handover documentation

Product documentation, warranty paperwork, any acoustic certification the association required, and the maintenance guidance for the specific finish.

Permit requirements vary by municipality and by building. Nothing here is a determination for your property — we confirm what applies before work is scheduled, and we will tell you when the honest answer is that no permit is needed.

Most floors need no permit. We will tell you plainly if yours does.

Frame 09VariablesCost · programme · decisions

Chapter 09 — What moves the number

Cost, programme and the decisions behind both.

Pattern, substrate, and the size of the field

Fewer variables

Pattern only

A herringbone or chevron field in one material, with a straight-laid border, over a sound and level substrate.

  • One material, one pattern
  • Extra material for angled cuts
  • No off-site fabrication
  • Set-out is the main design work
The usual shape of these jobs

Pattern plus detail

A patterned field with a contrasting border or an inlaid element, and one or two considered material transitions.

  • Two or more materials meeting
  • Transition details decided at set-out
  • Some fabrication lead time
  • Stair or threshold work included
More moving parts

Fully custom

A terrazzo medallion, a waterjet compass or a logo built into the floor, integrated into a large field.

  • Custom-bent divider strip or waterjet cutting
  • Shop drawings and exact measurement first
  • Meaningful off-site fabrication lead time
  • Substrate work to match the system

Complexity of the custom element

A full medallion or logo costs significantly more than a simple accent border.

Pattern-driven waste

Herringbone and chevron use more material per square foot than a straight run because of the angled cuts.

Off-site fabrication

Waterjet cutting and custom-bent divider strip add cost and lead time beyond standard installation.

Number of materials mixed

Three or more materials need more planning and more transition detail than a simple two-material change.

Design and drawing time

Custom work needs design and measurement before installation starts, which a standard install does not.

Field size

A medallion in a small foyer is a smaller undertaking than one integrated into a large great-room floor.

Substrate condition

Levelling and moisture remediation are more likely to be needed, and more consequential, under a pattern floor.

Stairs and thresholds

Stair treads, risers and scribed junctions are slow, skilled work and are priced separately from field area.

We do not publish a square-foot rate for custom flooring, because the field area is often the smallest part of the number. What moves it is the pattern, the number of materials meeting each other, whether anything is fabricated off site, and what the substrate turns out to need. A herringbone field and a straight-laid field in the same material and the same room are genuinely different jobs. We price the set-out, the fabrication and the substrate work as separate lines so you can see which part of the floor is costing what.

For a number specific to your house, we need the areas and the substrate.

Frame 10Sequence of workIllustrative diagram

Chapter 10 — The order of work

How a custom floor is set out.

Substrate preparation to final walk-through

Illustrative diagram

Stage 01

Survey and existing floor

Measure the actual space, check what is already down and how it is fixed, and identify anything that will affect levels at thresholds and stairs.

Stage 02

Removal and preparation

Existing covering removed, substrate exposed, levelled and moisture-tested before any new material is ordered against it.

Stage 03

Set-out

Start point, run direction, border widths and threshold positions marked out on the actual substrate, not just on a drawing.

Stage 04

Fabrication

Waterjet inlay, custom divider strip or accent pieces produced off site to the dimensions in the set-out.

Stage 05

Field installation

The main field run to the set-out, keeping the pattern true across the whole area rather than resetting it room by room.

Stage 06

Borders and inlay

Perimeter borders, medallions and inlaid elements set against the completed field and scribed where they meet skirtings.

Stage 07

Stairs and transitions

Treads, risers, nosings, thresholds and transition strips — the slow, visible work that finishes the floor.

Stage 08

Protection and handover

Finishing where applicable, protection while other trades finish, final clean and maintenance guidance.

An illustrative diagram of the general order of work on a custom floor. It is not a photograph of a project, and the sequence varies with the material, the substrate and whether anything is fabricated off site.

If the substrate is already down, we start at the moisture test.

Frame 11On siteWhat to expect while it happens

Chapter 11 — What a floor installation is like to live around

On site.

Assembled from the frames above

Frame 11 · on siteBuilt from the same flooring frames used in the galleries on this page — genuine work, moved rather than invented. Nothing here is stock footage.

Rooms come out of useFlooring takes whole rooms out of use at a time, including the route through them. On a whole-floor job that means planning which half of the house works first.
Furniture and appliancesEverything has to come off the floor, including appliances on a kitchen run. That is agreed in the scope rather than discovered on the morning.
DustRemoving an existing floor is the dusty stage, particularly tile over a slab. Containment goes up before it starts.
AcclimatisationWood and some engineered products need time in the actual building before they are laid. It looks like nothing is happening; it is preventing a floor that moves later.
Decisions we will need earlyPattern, direction, border and any custom element — because fabrication lead time sits between those decisions and installation day.
ProtectionIf other trades are still working, the finished floor is covered and stays covered until the end.
HandoverA final clean, a walk in raking light, and specific care guidance for the material actually installed.

Ready to see this underfoot rather than on a screen?

Frame 12QuestionsFAQ and credentials

Chapter 12 — Questions, and why us

What people ask before choosing a floor.

Grouped so you can find yours

Pattern and design

Yes, on two counts. The angled cuts consume more material per square foot than a straight run, and the alignment takes real additional installation time. The material is the same; the pattern is what costs.

Herringbone lays rectangular boards at a right angle to each other so the ends meet in a staggered zigzag. Chevron mitres the ends so the boards meet point to point in a continuous V. Chevron needs more precise cutting and usually costs more.

Usually against the main light source or along the main axis of the space, decided at set-out. It is a design decision with a real effect on how the floor reads, and it is very expensive to change afterwards.

Custom elements

In poured terrazzo, yes. The metal divider strips can be bent to almost any shape before the terrazzo is poured around them, so the design is built into the material rather than applied on top. Aggregate colour can be blended to a specific palette rather than picked off a standard board.

Waterjet. It makes curves and intricate shapes possible that a wet saw cannot cut. The pieces are fabricated off site to exact measurements, which is why the layout has to be final before fabrication starts.

Materials

Yes, and it is one of the most effective custom moves — but the transition detail has to be decided before either material is set, usually a metal or stone strip. Improvised afterwards, it reads as two floors meeting by accident.

A great deal. A wide-format board in herringbone is a different floor from a narrow one, both visually and in how unforgiving it is of an uneven substrate. Pattern and format are one decision.

Substrate

It is more of a problem under a pattern than under a straight run, because the angled joints telegraph unevenness. Levelling is part of the flooring scope, and we measure it rather than assume it.

On a slab, yes. Moisture is the most common reason a floor fails after installation in South Florida, and the result can change the underlayment or the adhesive specification.

Permits and approvals

Usually not, if it is a like-for-like covering replacement and nothing structural, plumbing or electrical is moving. If flooring is part of a wider remodel, the permit covers that scope and the flooring sits inside it.

Almost certainly. Most associations require approval before hard flooring goes in above ground level, and many specify a minimum acoustic rating for the underlayment. That is an association process with its own calendar, and it is worth starting before you choose a material.

Timing

The installation is often the shortest part. Design, set-out and any off-site fabrication happen first, and fabrication lead time is usually what sets the start date. We give a programme once the design is fixed.

Maintenance

Marginally. There are more joints and they run in more directions, so grit is better swept than pushed around. Otherwise it is the same care the material would need laid straight.

Individual boards can usually be lifted and replaced in a pattern floor, but only if matching stock exists. We agree a repair-stock allowance at selection, because matching a discontinued product years later is the hard version of this problem.

Still have questions? Ask the people who will lay it.

Frame 13ReviewsGoogle

Chapter 13 — What clients said

Reviews, quoted as written.

Rated 4.8 from 343 Google reviews at the time of writing.

Frame R1ReviewGoogle
The team was amazing. Did a fabulous job with the landscaping, roofing and backyard renovation. The best contractors I have worked with! Will definitely use this company in the future.

Derpy DayGoogle review

Frame R2ReviewGoogle
Great experience! The team was professional, efficient, and delivered high-quality work on time. They communicated clearly throughout the project and exceeded our expectations. Highly recommend for any construction needs!

AndrewGoogle review

Frame R3ReviewGoogle
Asher was knowledgeable and gave us cool ideas that we didn’t even know before. Nice beautiful color and design. We appreciate the price !

Sierra BernabeoGoogle review

Read every review on Google, unedited.

Schedule a Consultation (754) 236-0675
Preferred contact method

We use your details only to respond to this enquiry. No lists, no resale.

Thanks — that came through.

Your enquiry is with the Elbaz Construction team. A licensed contractor will call you back to ask about the lot, the drawings and your timing. If it is easier to talk now, call (754) 236-0675, Sunday to Friday 7am to 7pm.

Frame 14StartConsultation, not a sales visit

Chapter 14 — Start here

Bring us the room.

A design conversation, not a sales visit

Custom flooring is easier to talk about with a plan, a photograph or just the dimensions of the space. If you already know you want a pattern, say which one. If you only know the floor should do more than exist, that is a fine place to start too.

What happens after you send it

01
We read what you sendYour description, the rooms involved, and any plan or photographs you already hold.
02
We call you backA licensed contractor, to ask about substrate, thresholds and what is above and below the space.
03
We see the spaceLevels, existing floor, thresholds, stairs, light direction and where a pattern would need to start.
04
You get it in writingA scope separating set-out, fabrication, substrate work and installation.

Useful to have ready

  • Which rooms are involved
  • What is on the floor now, and what is under it
  • Whether you are in a condominium or an HOA community
  • Any pattern or material you already have in mind
  • Whether this is part of a wider remodel